|
You will need:
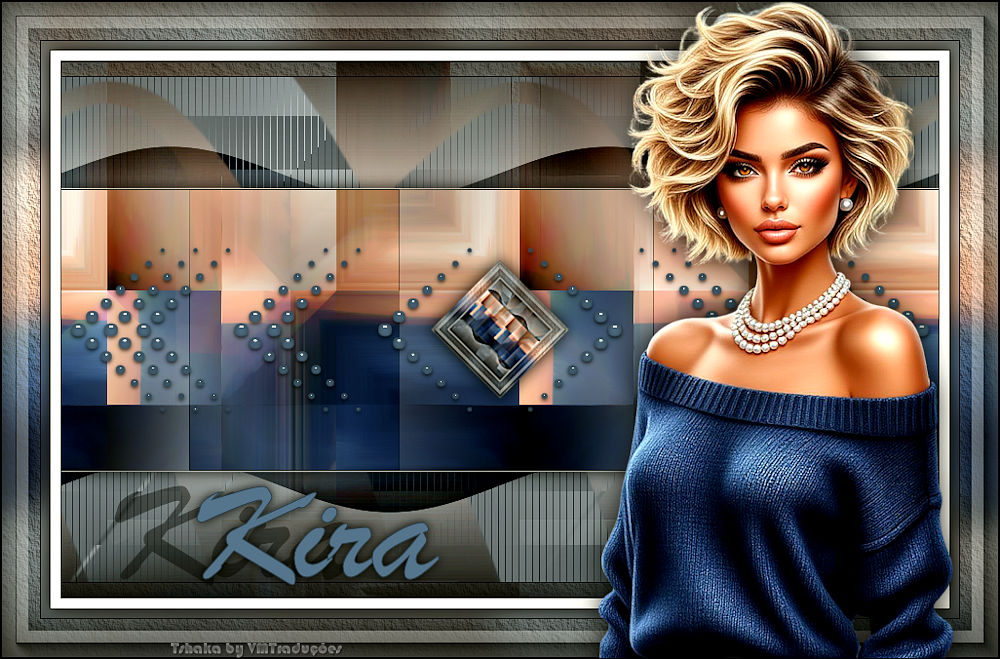
1 main tube
*
Double-click the preset [GL_Kira_Tsha]
to install it in the plugin
Save the selection [Kira1_Tsha] in the selections folder
of PSP
*
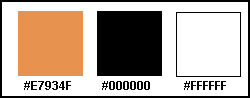
Colors:
1 - colors
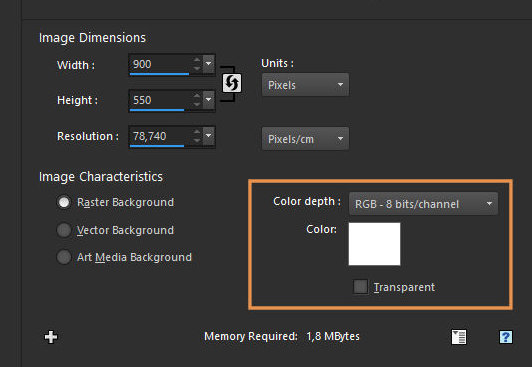
Open a new image with the color white,
900x550px
1a - layer
Selections / Select all
Copy your tube and paste it into the selection
Select none
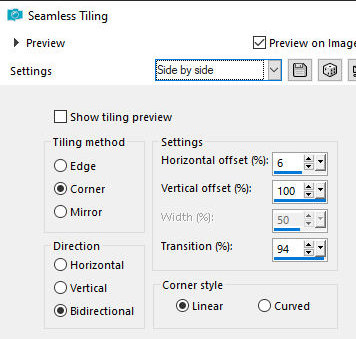
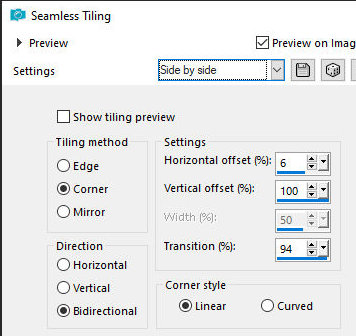
Effects / Image Effects / Seamless Tiering - preset [side
by side]
2 - side by side
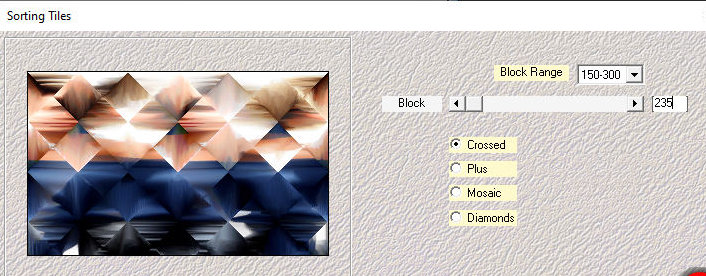
Effects / Plugins / Mehdi / Sorting
Tiles
3 - 150/300 235 crossed
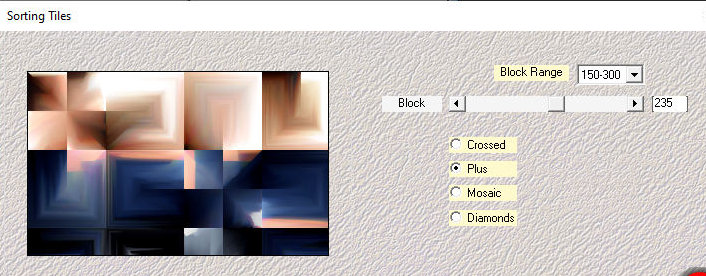
Repeat the Sorting Tiles with PLUS
selected
4 - same plus checked
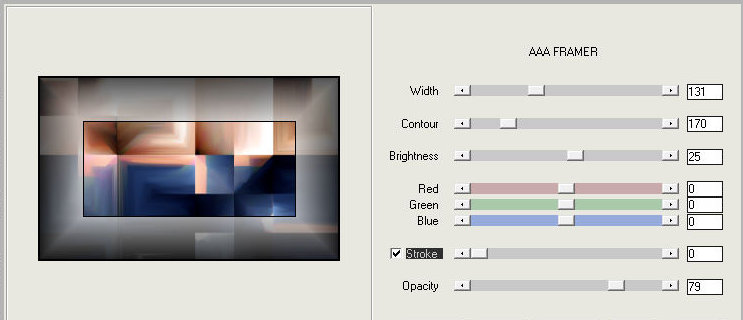
Effects / Plugins / AAA Filters / AAA
Framer
5 - 131 170 25 0 0 0 0 79
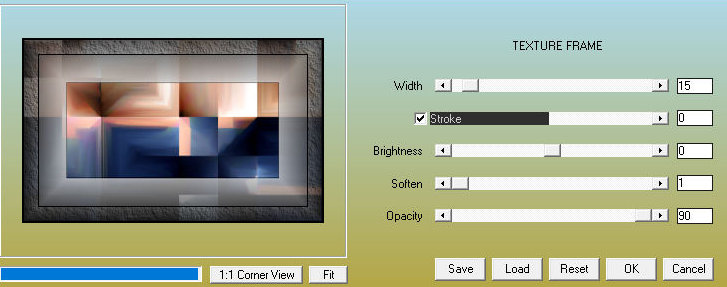
Effects / plugins / AAA Frames Texture
Frame
6 - 15 0 0 1 90
Effects / Image Effects / Seamless
Tiling - preset [side by side] - same as before
7 - side by side
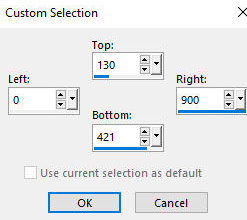
Activate the Selection Tool / Custom
Selection and configure:
8 - 130 0 900 421
Selections / Promote selection to
layer
Select none
Hide this layer by clicking the eye icon
Activate the background layer
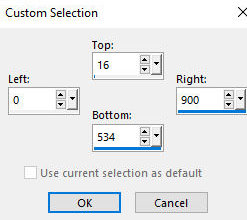
Activate the Selection Tool / Custom Selection and
configure:
9 - 16 0 900 534
Adjust / Sharpness / Sharpen More
Add a new layer
Choose a strong color from your image
Paint the selection with it
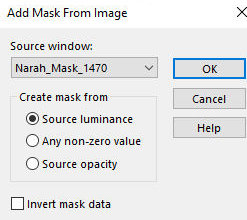
Layers / New Mask layer / From Image / Mask [Narah-Mask_1470]
10 - mask narah 1470
Merge group
Select none
Layers / Duplicate
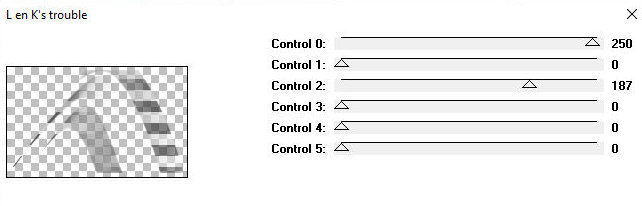
Effects / Plugins / Links / Links K's Trouble - default
11 - default
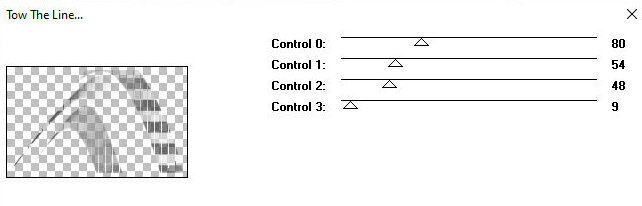
Effects / Plugins / Frames / Tow The
Line - default
12 - default
Effects / image Effects / Seamless
Tiling - preset [side by side] - same as above
13 - equal
Activate the second layer from below -
Group Raster 1
Repeat Seamless Tiling with the same configuration
14 - equal
Activate and open the top layer -
Promoted selection (click on the eye)
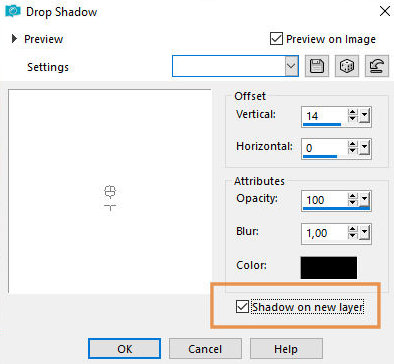
Drop Shadow: 14 0 100 1 black - SHADOW ON NEW LAYER
MARKED
15 - shadow
Layers/Duplicate
Image / Mirror / Mirror Vertical
Merge Down
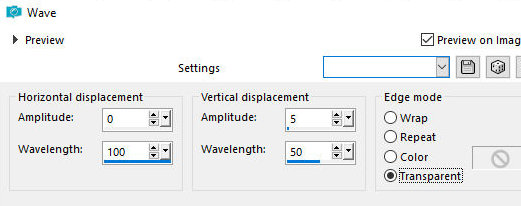
Effects / Distortion Effects / Wave
16 - 0 100 5 50 trans
Layers / Properties / blend Mode:
Overlay
Activate the top layer - Promoted selection
Drop shadow: 0 0 100 25 black
Merge visible
Copy (will be stored in memory)
Open a new transparent image with 300x300px
Selections / Select all
Paste the image stored in memory into the selection
Select none
Border: 1px / white
Selections / Select all
Border: 50px / white
Selections / invert
Paste the image stored in memory into the selection
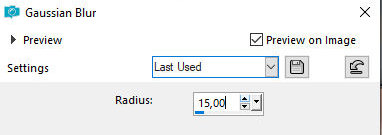
Adjust / Blur / Gaussian Blur: 15
17 - 15
Select none
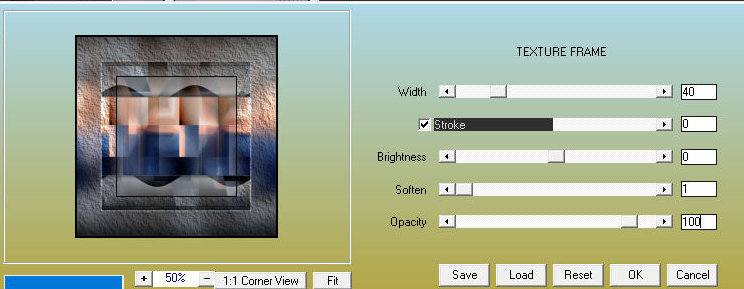
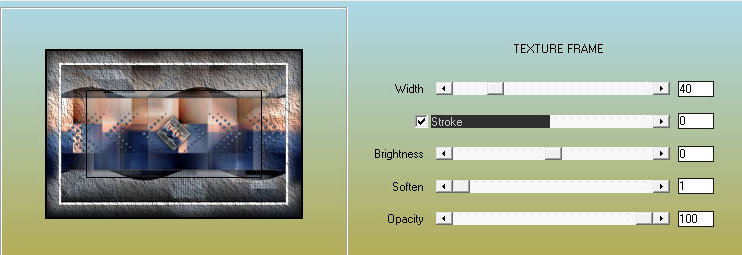
Effects / Plugins / AAA Frames / Texture Frame
18 - 40 0 0 1 100
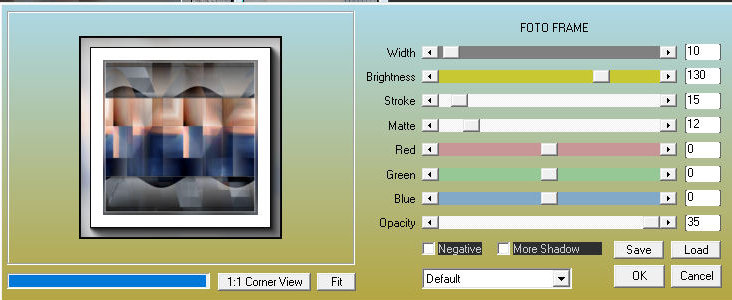
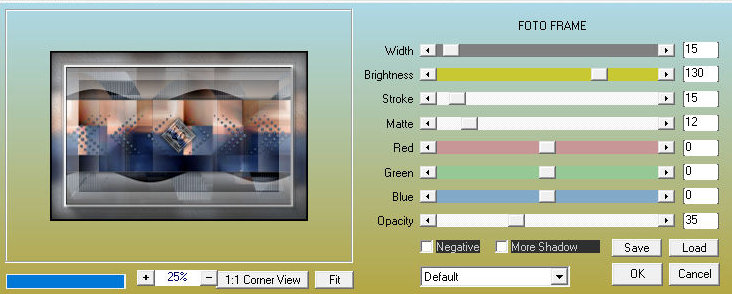
Effects / plugins / AAA Frames / photo
Frame
19 - 10 130 15 12 0 0 0 35
Image / Resize: 25% - all layers
checked
Copy this image
Return to the main image
Paste as a new layer
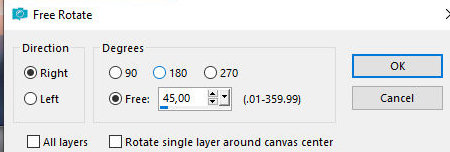
Image / Free rotate - right 45
20 -right 45
Adjust / Sharpness / Sharpen more
Drop Shadow: 0 0 100 25 black
Add new layer
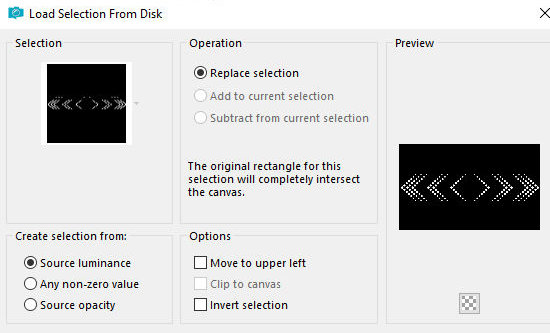
Selections / Load selection from disk / Selection
[Kira1_Tsha]
21 - sel 1
Paint the selection with the color you
chose above
Select none
Effects / Plugins / Eye Candy 5: Impact / Glass - Preset
[GL_Kira-Tsha]
22 - gl kira tsha
Border: 1px / black
Copy (will be stored in memory)
Borders:
10px / white
1px / black
Selections / Select all
Border: 50px / white
Selections / Invert
Paste the image stored in memory onto the selection
Adjust / Blur / Gaussian Blur: 15
23 - 15
Effects / Plugins / AAA Frames /
Texture Frame
24 - 40 0 0 1 100
Effects / Plugins / AAA Frames / Photo
Frame - Width=15
25 - 15 130 15 12 0 0 0 35
Selections / Invert
Drop Shadow same as before
Select none
Copy your main tube
Paste as a new layer
Position according to the model or as you prefer
Apply a Drop shadow of your choice
Choose a font, size, color and type some text: Kira or
another you want
Position as you prefer
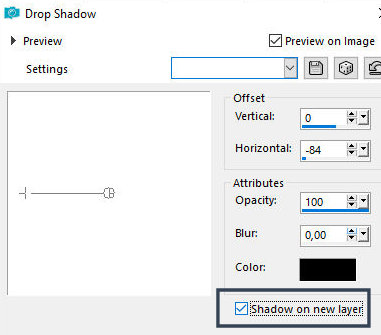
Drop Shadow: 0 -84 100 0 black - SHADOW ON NEW LAYER
CHECKED
26 - shadow
Move this shadow to where you want (in
my version, I couldn't move the shadow, I left it as is)
Layers / Properties / blend mode: Hard Light / Opacity=40%
Activate the top layer - Text
Drop Shadow: 0 0 85 15 black
Border: 1px / black
Add signatures
Merge all
Save as jpeg |