|
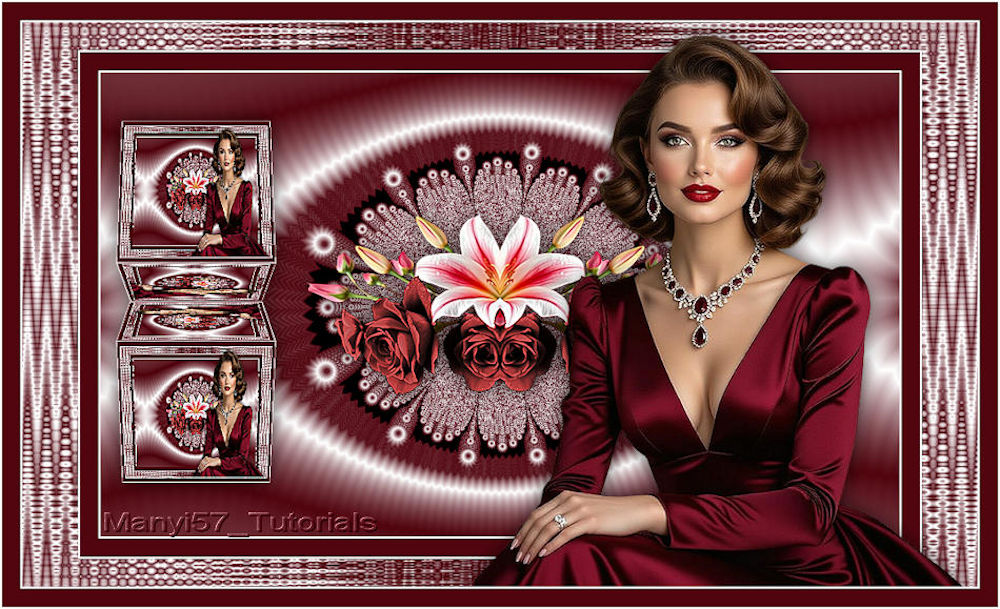
(imagem original de Manyi)
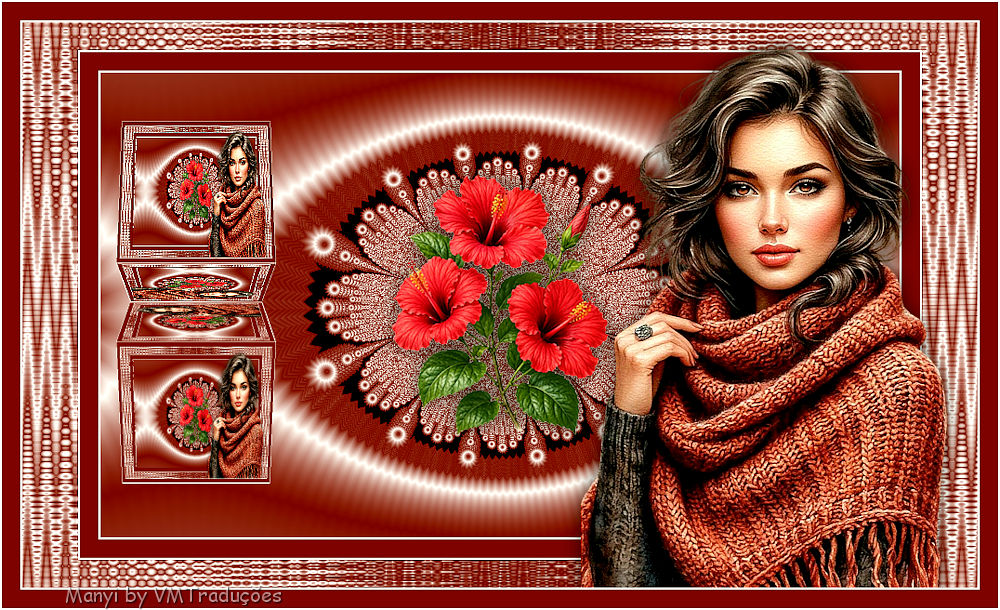
(Minha versão)

This tutorial is from Manyi who I thank for
letting me translate their tutorials.

Original here
Tubes

Material

Plugins
GMIC


You can find these plugins on the websites of:
Renée
Cloclo
You can also find this tutorial translated into these languages:
(Click on the flag)


|
Notes:
> Open the material / Duplicate (shift+d) / Close the originals
> Change the blend mode of the layers to match their colors.
> In older versions of PSP, Mirror Horizontal=Mirror / Mirror Vertical=Flip /
Pick tool=deformation
> Open the masks in psp and
minimize
>Adjust the size of the tubes according to your images
|
SCRIPT
Images:
1 female tube
1 floral tube
***
My images
***
Open a folder and name it "gmic-barbarella"
***
1. Open the alpha channel [Barbarella Image PSP]
Duplicate (Shift+D) – Close the original
2. Set color #51050f as the
foreground and color #ffffff as the background
Prepare a gradient
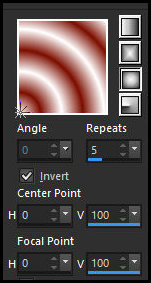
Fill the image with it
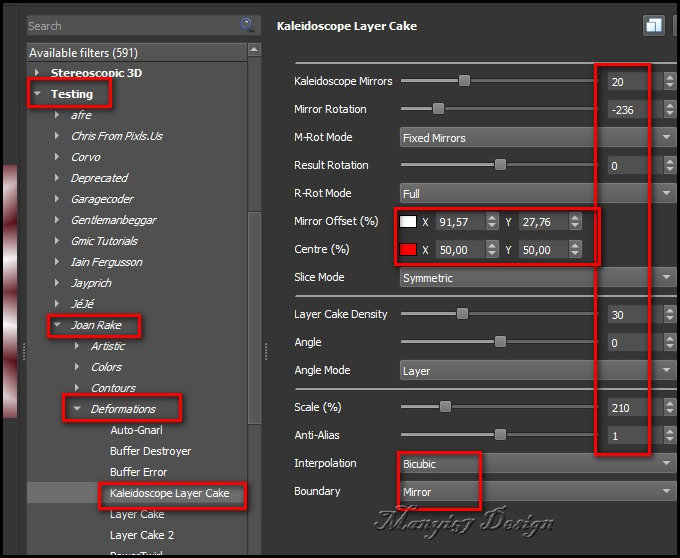
3. Effects - Plugins - GMIC-QT - Testing - Joan Rake - Deformations
- Kaleidoscope Layer Cake
4. Selections - Load selection from
alpha channel - Selection 1
5. Selections - Promote selection
to layer
Select None
6. Activate the background layer
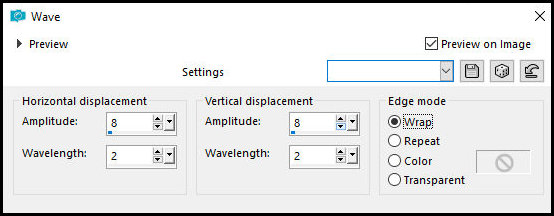
Effects - Distortion Effects - Wave
7. Copy this layer
Paste as new image
8. Minimize. We will use this later
9. Return to your main image
Delete this selected layer
10. The "promoted selection" layer
is selected
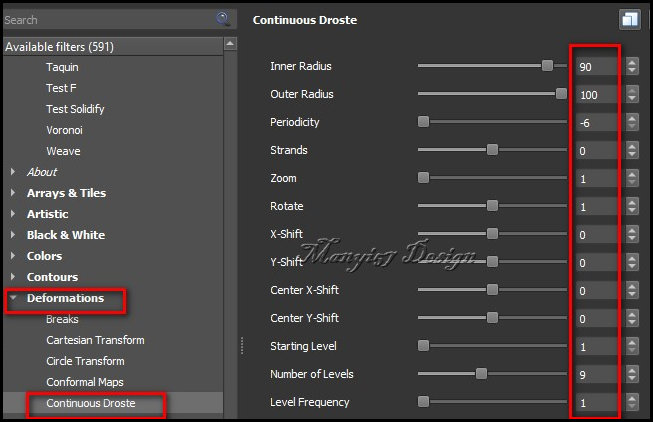
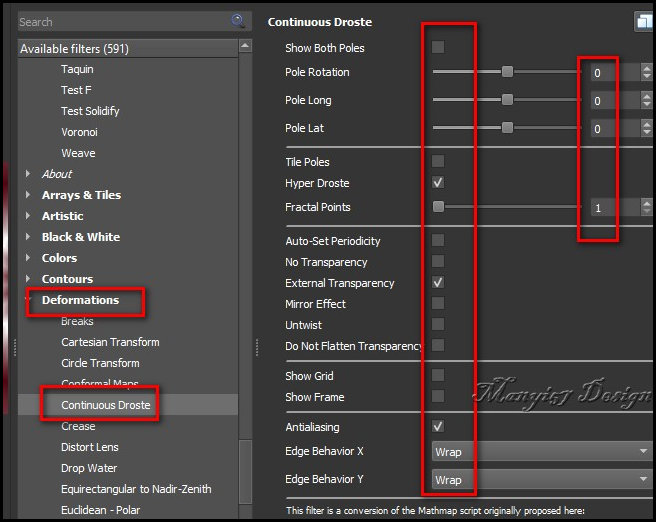
Effects - Plugins - GMIC-QT - Deformations - Continuous Droste
11. Image - Add borders - 2px -
white
Image - Add borders - 20px - #51050f
Image - Add borders - 2px - white
12. Selections - Select all
Image - Add borders - SYMMETRIC UNCHECKED - white
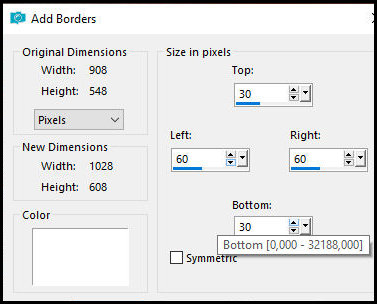
13. Selections - Invert
Maximize the image on hold
Copy
Return to your main image
Paste into selection
14. Effects - Edge Effects -
Enhance
Select none
15. Copy the floral tube
Paste as a new layer
16. Adjust - Sharpness - Sharpen
17. Drop Shadow: 0 0 60 30 black
18. Copy the main tube
Paste as a new layer
Adjust size to 526x595px
Pick tool: X=486 Y=14 Press M
19. Adjust - Sharpness - Sharpen
20. Drop Shadow: 0 0 60 30 black
21. Image - Add borders - 2px - white
Image - Add borders - 20px - #51050f
Image - Add borders - 2px - white
23. Effects - Plugins - GMIC-QT - Rendering - 3D Image Object
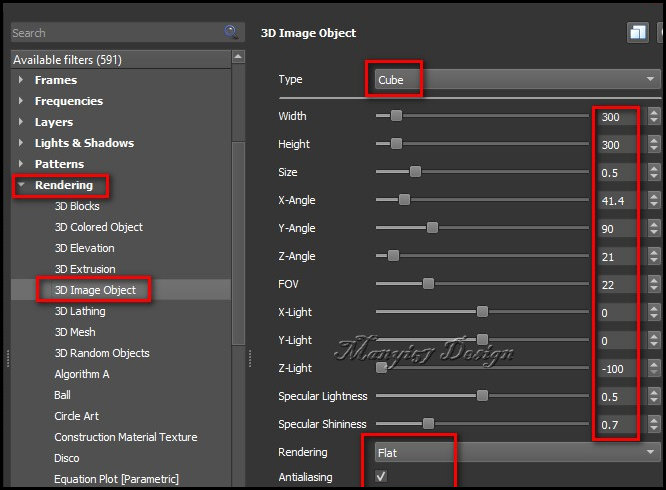
Return to PSP
Save the image in the gmic-barbarella folder; name it "1"
24. Open image "1" in the PSP
workspace
Copy and paste it into the main image as a new layer
Pick Tool: X= 125 Y= 130 Press M
25. Activate the bottom layer
Effects - Plugins - GMIC-QT - Rendering - 3D Image Object
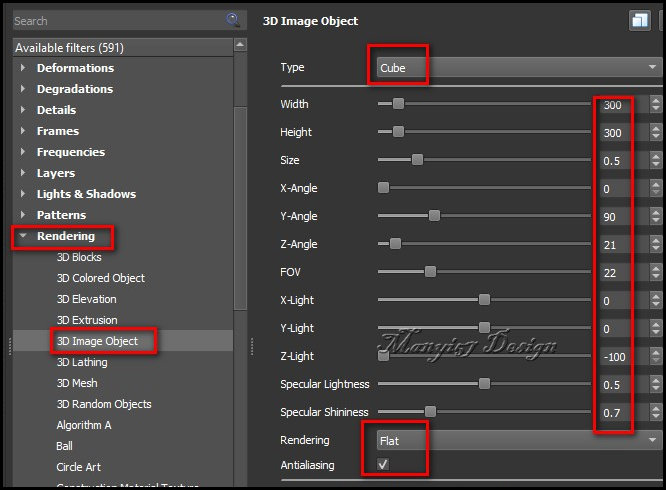
Return to PSP
Save the image in the gmic-barbarella folder as number "2"
26. Open image "2" in the workspace
from PSP
Copy and paste onto your main image as a new layer
Pick tool: X=125, Y=325; press M
27. Activate the top layer
Merge down – twice
28. Adjust – Sharpness – Sharpen
More
31. Image – Resize: 950x579px
Add credits
Merge all
Save as JPEG

|