|
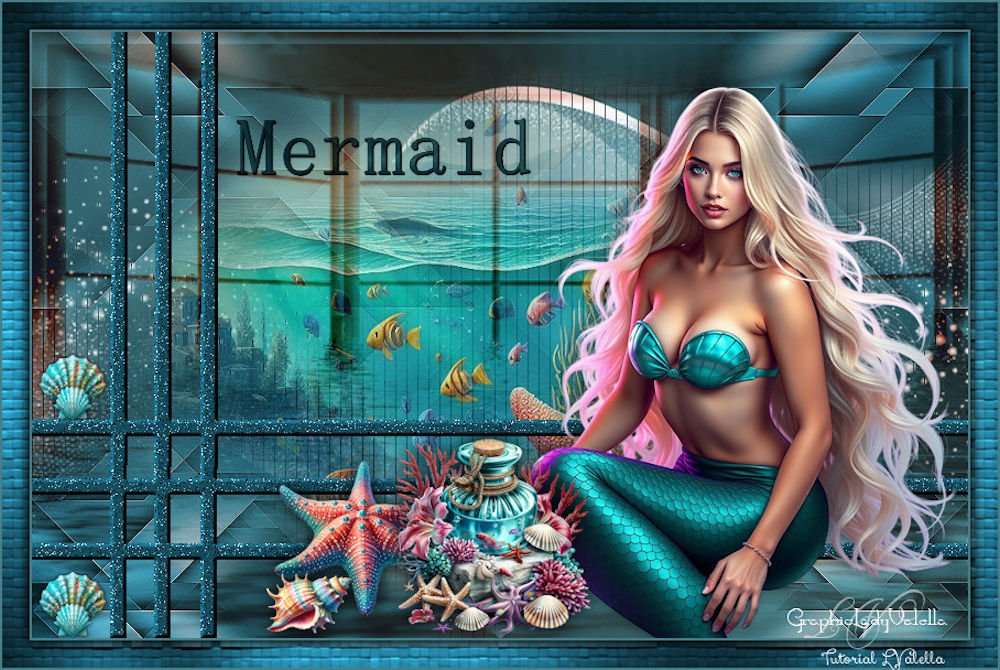
(imagem original de Lady Valella)
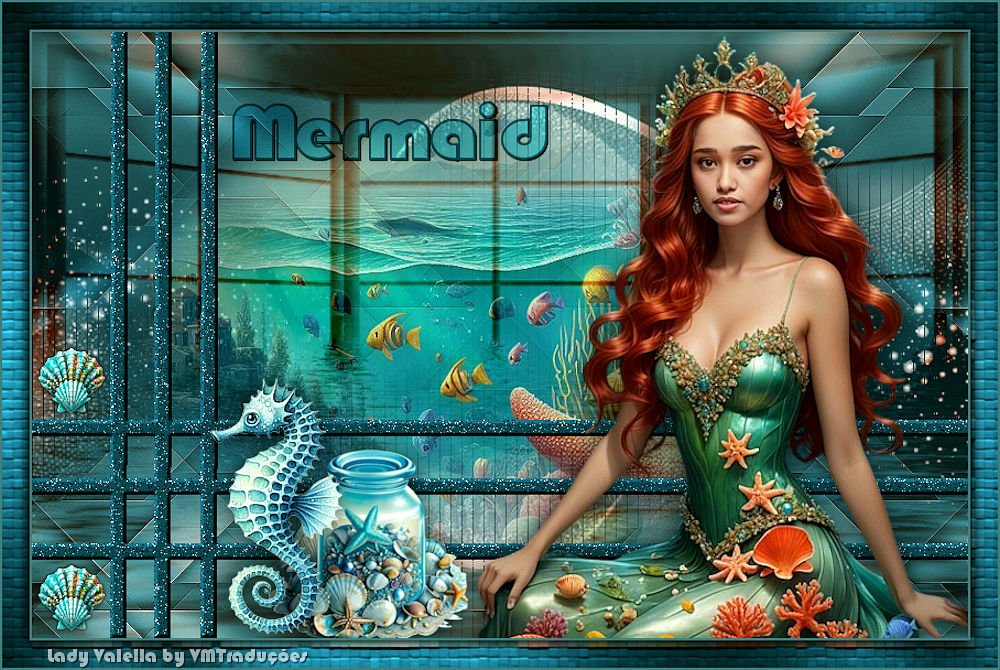
(minha versão)

This tutorial is from Lady Valella who I thank for
letting me translate their tutorials.

Original here

Tubes

Material

Plugins
AP [Lines] - Textures - Graphic
Plus
You can find these plugins on the websites of:
Renée
Cloclo
You can also find this tutorial translated into these languages:
(Click on the flag)


|
Notes:
> Open the material / Duplicate (shift+d) / Close the originals
> Change the blend mode of the layers to match their colors.
> In older versions of PSP, Mirror Horizontal=Mirror / Mirror Vertical=Flip /
Pick tool=deformation
> Open the masks in psp and
minimize
>Adjust the size of the tubes according to your images
|
SCRIPT
Step 1
Open a new transparent image, 850x550
Colors: Foreground: #467f88 - Background: #113d4a

Prepare a Linear gradient
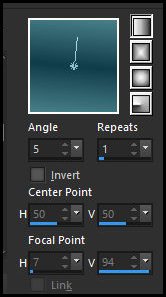
Fill the image with this gradient
Copy [flower1]
Paste as a new layer
Effects - Image Effects - Seamless Tiling - default
Adjust - Blur - Gaussian Blur: 15
Step 2
Effects - Texture Effects - Weave - colors #202f28/#467f88
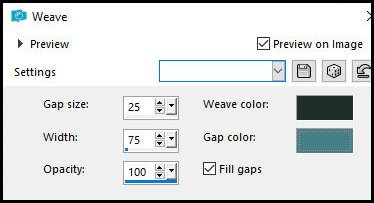
Effects - Geometric Effects - Skew
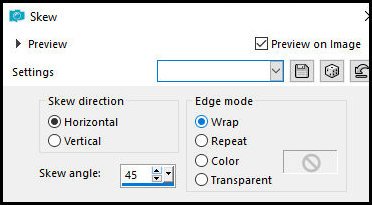
Layers - Duplicate
Image - Mirror Horizontal
Merge down
Effects - Image Effects - Seamless Tiling - default
Effects - Edge Effects - Enhance
Blend Mode: Luminance (or another of your choice)
Step 3
Add a new layer
Fill with white
Layers - New Mask Layer - From Image - Mask [creation.tine-masque329]
Merge group
Layers - Duplicate
Effects - Plugins - AP[Lines] Silverlining
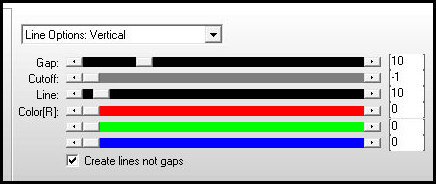
Blend mode: Burn
Step 4
Copy [0606-MP(AILValella25]
Paste as a new layer
Adjust - Sharpness - Sharpen
Opacity: 80%
Layers - Arrange - Move Down
Activate the top layer
Add a new layer
Fill with the background color
Layers - New Mask Layer - From Image - Mask [maske-fenster-5-bd-28-1-10]
Merge group
Blend mode: Difference (or another that matches your colors)
Layers - Duplicate
Step 5
Copy [elemento righe]
Paste as a new layer
You can change the color using your preferred method
Adjust - Add/Remove Noise - Add Noise
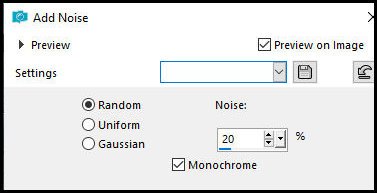
Effects - 3D Effects - Inner Bevel
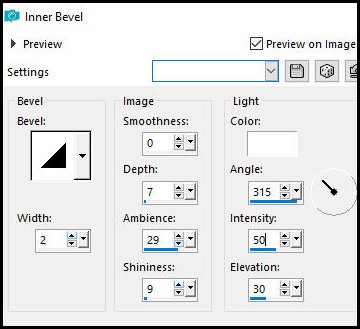
Pick Tool: X=(-3) Y=(-50)
Step 6
Copy [859 Fa-AI-LV26]
Paste as a new layer
Drop shadow of your choice Choice
Position on the right, following the example
Copy and paste decorative elements and position them near the
mermaid
Apply a drop shadow of your choice to each element
Invert the colors in the color palette by clicking the small arrow
Choose a font and size and type the title [Mermaid]
Drop Shadow: 1 1 100 1 black
Blend Mode: Multiply (or another that matches your colors)
Position as desired
Copy [Shell]
Paste as a new layer
Position between the lines, following the example
Change the color if you wish
Step 7
Image - Add borders - 2px - foreground color
Selections - Select all
Image - Add borders - 25px - background color
Selections - Invert
Effects - Plugins - Textures - Patchwork
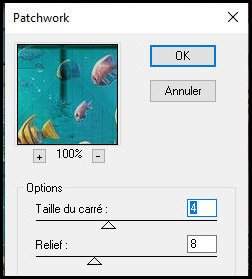
Effects - Plugins - Graphic Plus - Cross Shadow - default
Selections - Invert
Drop Shadow: 0 0 100 18 black
Repeat the Drop Shadow
Select none
Image - Add borders - 2px - foreground color
***
Add credits
Merge all
Save as JPEG

Traduzido por Vera Mendes -
09/08/2026 |