|
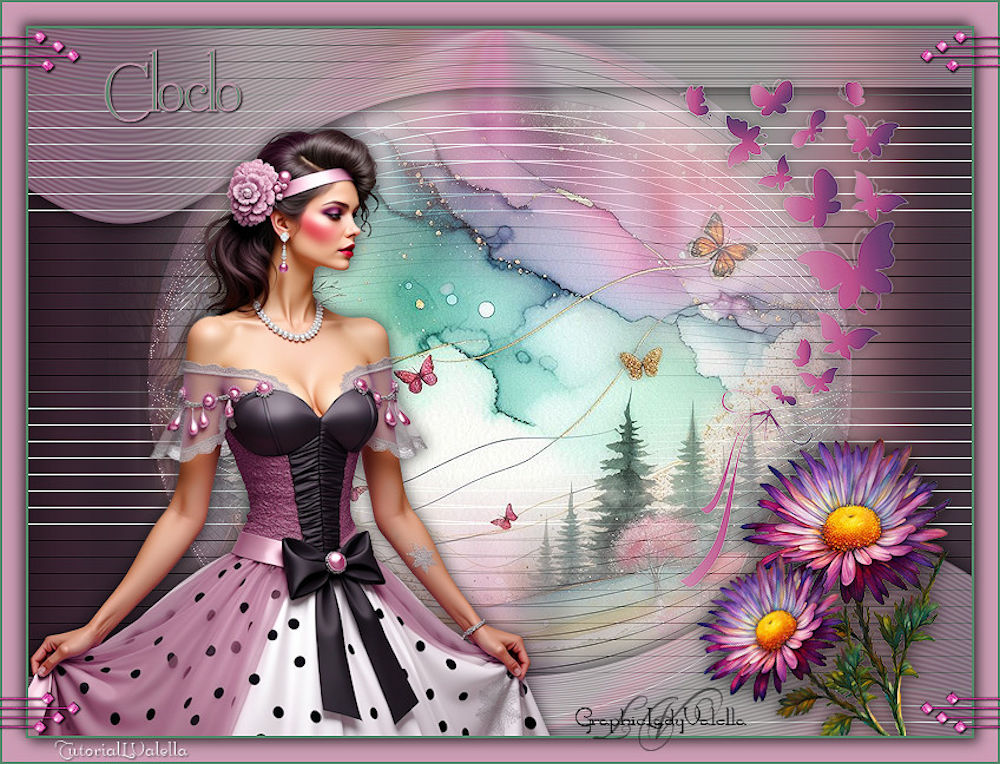
(imagem original de Lady Valella)
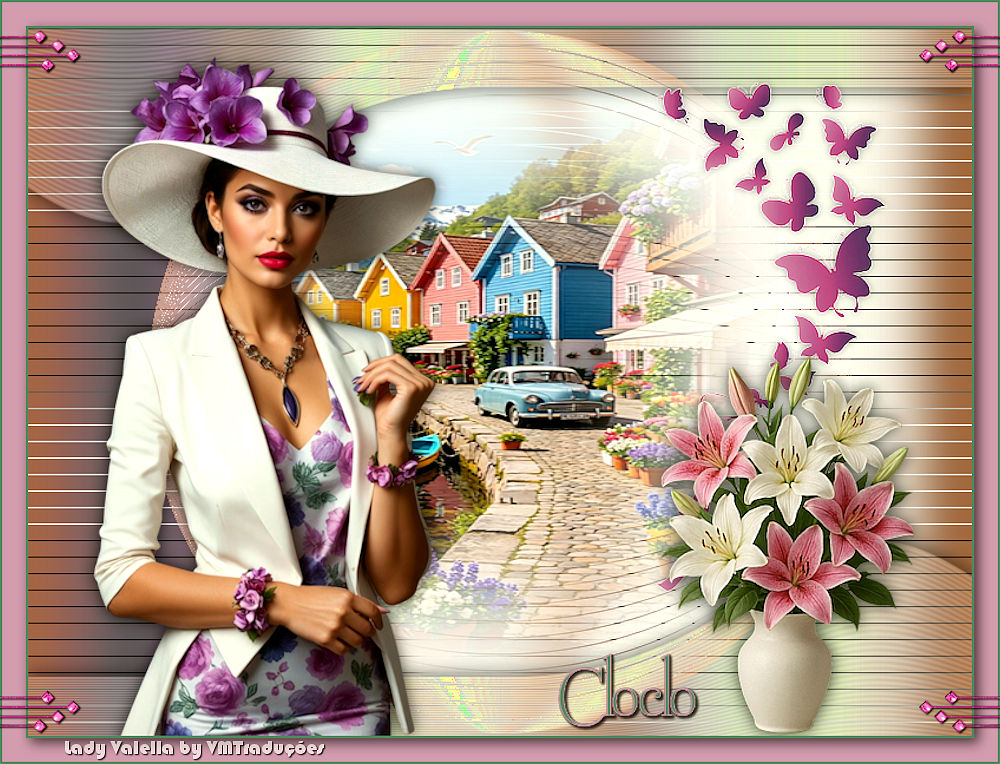
(minha versão)

This tutorial is from Lady Valella who I thank for
letting me translate their tutorials.

Original here

Tubes

Material

Plugins
L & K's Mayra
You can find these plugins on the websites of:
Renée
Cloclo
You can also find this tutorial translated into these languages:
(Click on the flag)


|
Notes:
> Open the material / Duplicate (shift+d) / Close the originals
> Change the blend mode of the layers to match their colors.
> In older versions of PSP, Mirror Horizontal=Mirror / Mirror Vertical=Flip /
Pick tool=deformation
> Open the masks in psp and
minimize
>Adjust the size of the tubes according to your images
|
SCRIPT
Images used:
1 female tube
1 landscape
1 floral tube
***
Materials:

***
My images
***
Step 1
Open a new transparent image, 800x600px
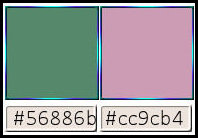
Set foreground color to #56886b and background color to #cc9cb4
Prepare a Radial gradient
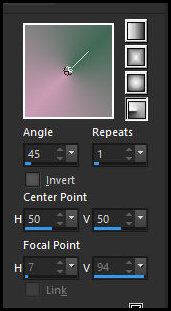
Fill the image with this gradient
Add a new layer
Selections - Select All
Copy tube [0126-TD(AILValella25]
Paste into selection
Select None
Image Effects - Seamless Tiling - default
Adjust - Blur - Radial Blur
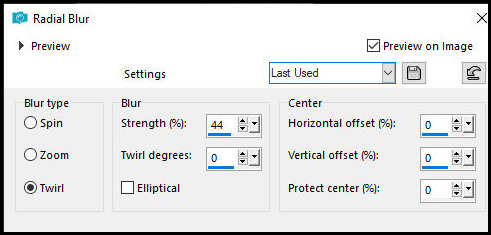
Merge Visible
Adjust - Blur - Gaussian Blur: 15
Step 2
Effects - Plugins - L&K's - L&K's Mayra
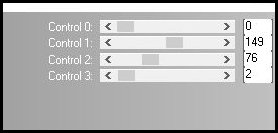
Layers - Duplicate
Effects - Geometric Effects - Circle - default
Drop Shadow: 0 0 100 25 black
Blend Mode: Screen
Step 3
Add a new layer
Activate the Selection Tool / Custom Selection and configure:
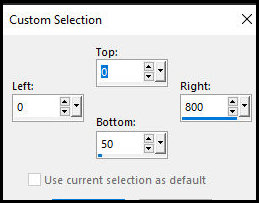
Fill the selection with the background color
Effects - Texture Effects - Blinds - foreground color
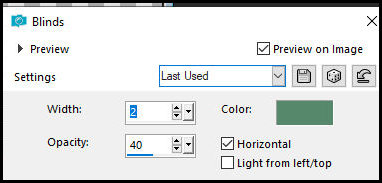
Select None
Step 4
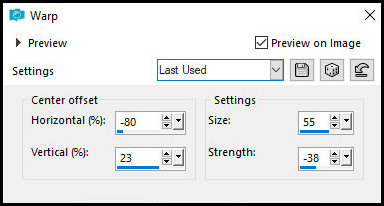
Effects - Distortion Effects - Warp
Layers - Duplicate
Image - Mirror Horizontal
Image - Mirror Vertical
Merge Down
Adjust - Sharpness - Sharpen
Blend Mode: Luminance - Opacity: 50
Drop Shadow: same as previous
Step 5
Copy [PaesaggioPri LV25]
Paste as new layer
Do not move
Adjust - Sharpness - Sharpen
Copy [0126-TD(AILValella25]
Paste as new layer
Image - Resize: 65% - "all layers" unchecked
Position to the left
Drop Shadow: 0 0 70 20 black
Copy [farfalle]
Paste as new layer
Position to the right near the circle as shown in the example (You
may need to change the color to match your image's tones)
Copy [S-604 F-AI-LV26]
Paste as new layer
Position at the bottom right, as shown in the example
Drop Shadow: 0 0 70 20 black
Step 6
Image - Add borders - 2px - foreground color
Image - Add borders - 20px - background color
Image - Add borders - 2px - foreground color
Selections - Select all
Selections - Modify - Contract: 22
Drop shadow: 4 4 60 15 black
Select none
Copy [decoro]
Paste as new layer
Do not move (if necessary, change the color to match your palette)
Drop shadow: 1 1 100 2 black
Step 7
In the color palette, click the small arrow to swap the foreground
and background colors -> foreground #cc9cb4 / background #56886b
Type the text [Cloclo] using a font and size of your choice
Drop Shadow: 1 1 100 2 black
Or use the text provided in the materials
Position as desired
Add credits
Merge all
Save as JPEG

|