|

This tutorial is from Lady Valella who I thank for
letting me translate their tutorials.

Original here

Tubes

Material

My images: Here
Plugins
Flaming Pear
You can find these plugins on the websites of:
Renée
Cloclo
You can also find this tutorial translated into these languages:
(Click on the flag)


|
Notes:
> Open the material / Duplicate (shift+d) / Close the originals
> Change the blend mode of the layers to match their colors.
> In older versions of PSP, Mirror Horizontal=Mirror / Mirror Vertical=Flip /
Pick tool=deformation
> Open the masks in psp and
minimize
>Adjust the size of the tubes according to your images
|
SCRIPT
Images:
1 male tube
1 misted landscape tube
*
Step 1
Open the Alpha file [BaseAlphaCityMan] / Duplicate (shift+d) / Close
the original
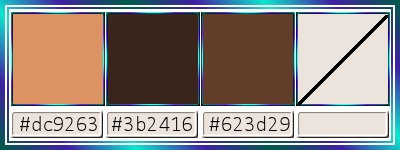
Set the color #dc9263 in the foreground and the color #3b2416.
Another color used: #623d29
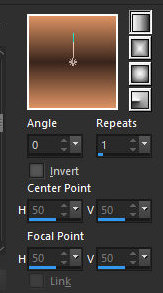
Prepare a Linear gradient
Paint the image with this gradient:
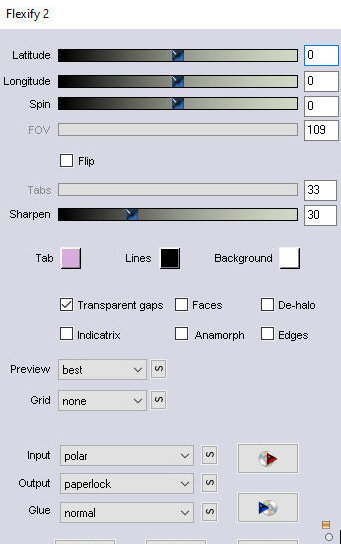
Effects / Plugins / Flaming
Pear / Flexify 2
The image will look like this:
Step 2:
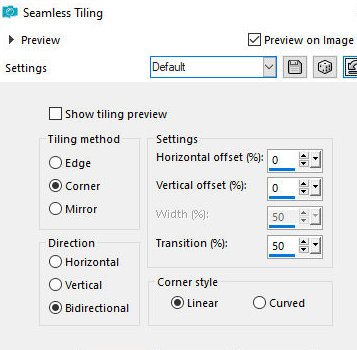
Effects / Image / Effects /
Seamless Tiling - default
Effects / Edge Effects / Enhance
Add a new layer
Paint the layer with the background color
Layers / Arrange / Move Down
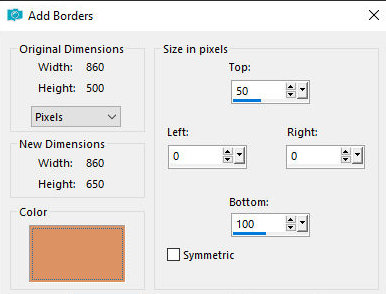
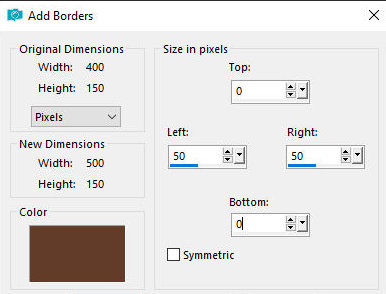
Step 3:
Border: symmetric unchecked - color
1
50 0 0 100
Select the top and bottom border
with the Magic Wand (tolerance/Feather=0)
Selections / Promote selection to
layer
Activate the layer below and press Delete
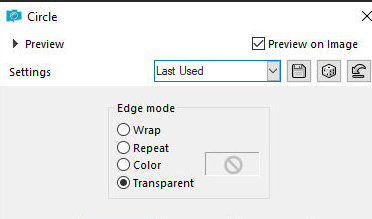
Step 4:
Activate the layer above:
Effects / Geometric Effects /
Circle - Transparent
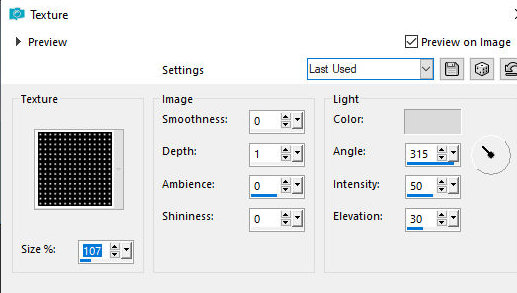
Delete the layer below and remain
on the Circle layer:
Selections / Promote Selection to layer
Effects / Texture Effects / Texture - Corel_15_006 texture (no
material)
Select none
Effects / Image Effects / Seamless Tiling - default
Merge visible
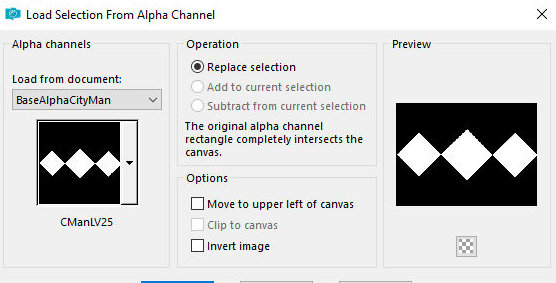
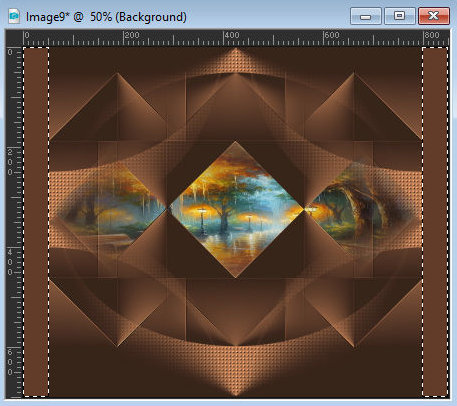
Step 5
Add new layer
Selections / Load selection from alpha channel Selection [CManLV25]
Copy the landscape tube
[images_paysages_1228382476_paysages]
Paste into the selection
Select none
(Note: if the misted color doesn't match well with the colors, use
the Luminance Blend Mode or another that matches your colors)
Select none
Step 6
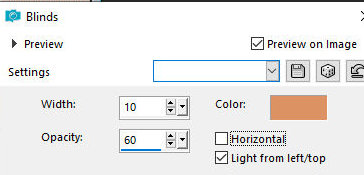
Border: symmetric unchecked - color 3 (#623d29)
Select these borders with the Magic
Wand
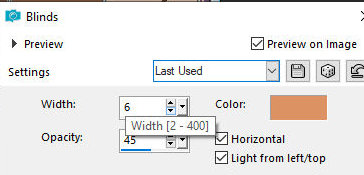
Effects / Texture Effects / Blinds
Drop Shadow: 11 7 71 14.85 black
Drop Shadow: -11 -7 71 14.85 black
Select none
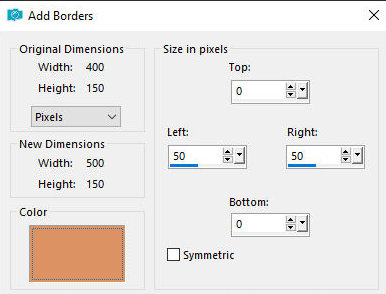
Border: symmetric checked - same as before but with color 1
Select these borders
Effects / Texture Effects / Texture - (corel-15-006) same as before
Drop Shadow same as before (negative
as well)
Select none
Step 7
Copy the tube [2039-TU(LValella24]
Paste as a new layer
Position to the left as per the model
Copy the tube [titolo]
Paste as a new layer
Position as per the model
Step 8
Border:
2px / color 2
2px / color 1
28px / color 2
Select this 28px border with the Magic Wand
Effects / Texture Effects / Blinds - color 1
Select none
Border:
2px / color 1
4px / color 2
Selections / Select all
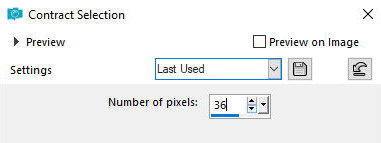
Selections / Modify / Contract: 36
Selections / Invert
Drop shadow as before
Select none
If desired, add a decorative tube
Add signatures
Merge all
Save as jpeg

|