|
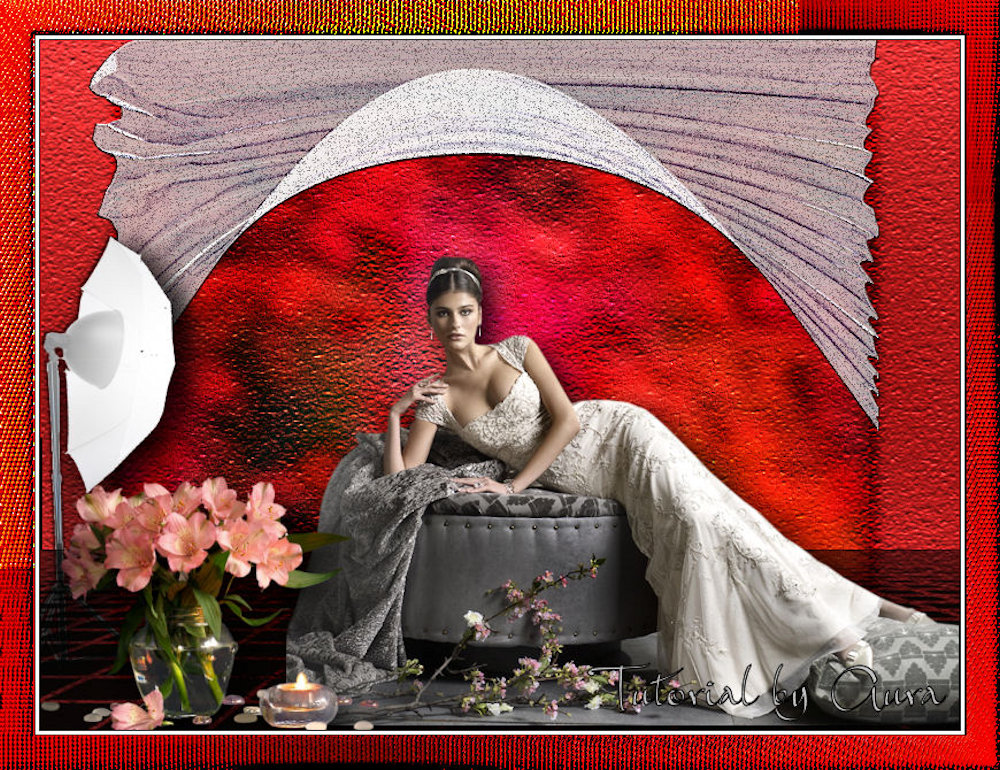
(tag original de Grafica Pergioco)
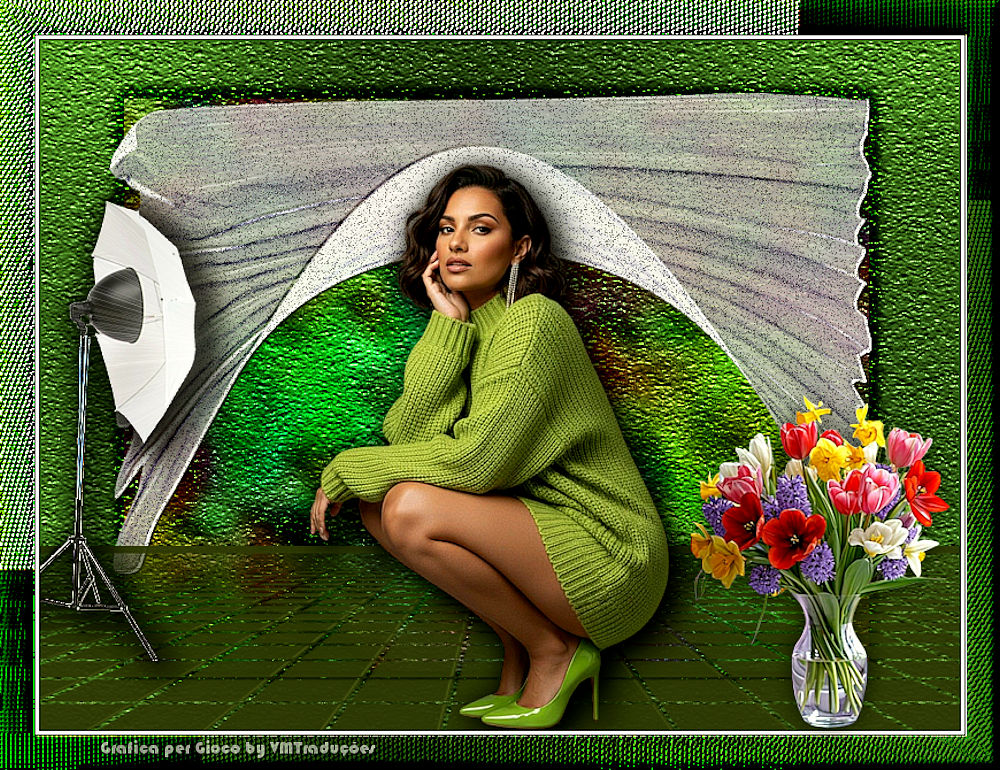
(minha versão)

This tutorial is from Grafica PerGioco who I thank for
letting me translate their tutorials.

Original here

Tubes

Material

Plugins
Flaming Pear - Eye Candy 5: impact
- Tramages
You can find these plugins on the websites of:
Renée
Cloclo
You can also find this tutorial translated into these languages:
(Click on the flag)


|
Notes:
> Open the material / Duplicate (shift+d) / Close the originals
> Change the blend mode of the layers to match their colors.
> In older versions of PSP, Mirror Horizontal=Mirror / Mirror Vertical=Flip /
Pick tool=deformation
> Open the masks in psp and
minimize
>Adjust the size of the tubes according to your images
|
SCRIPT
Images:
1 female tube
Decorative tubes
*
Material
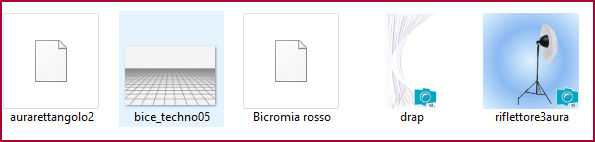
*
My images
*
Save the selection in the PSP Selections folder
*
Step 1
Place the selection in the PSP Selections folder
Open a new transparent image with 800x600px
Set a dark color for the foreground and a light color for the
background
Click on the foreground / select the gradient option / locate the
gradient [bicromia rosso] and set a Sunburst gradient: [0/1 - 50/50]
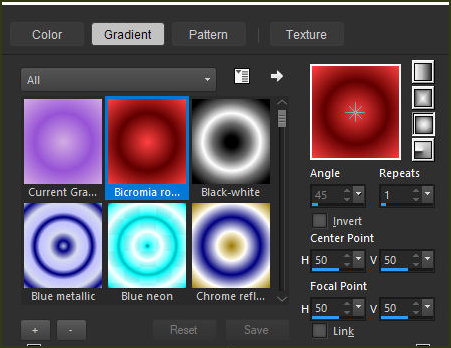
Paint the image
(Note: if using other colors, colorize using your preferred method)
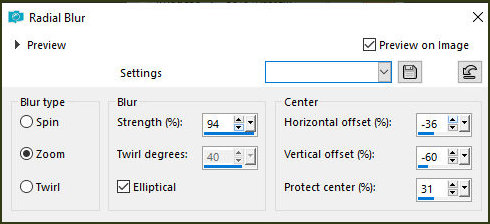
Adjust / Blur / Radial Blur [zoom / 94 / ellipse checked / -36 -60
31]
Effects / Edge Effects / Enhance
User Defined Filter / Emboss 3
Step 2
Add a new layer
Selections / Load selection from disk / Selection [aurarectangle2]
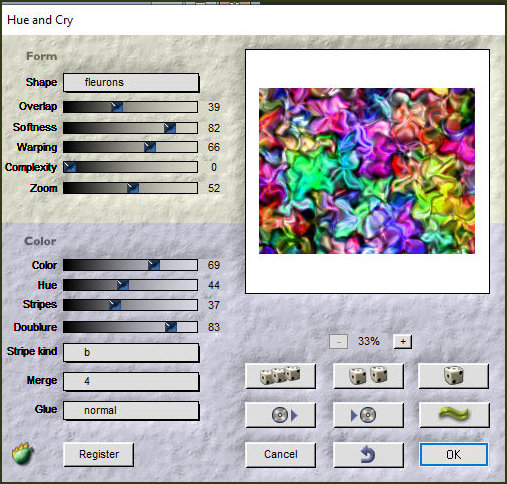
Effects / Plugins / Flaming Pear / Hue and Cry
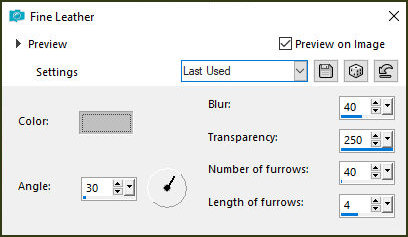
Effects / Texture Effects / Fine Leather
Select none
Drop shadow: -6 4 40 9 black
Drop shadow: 6 -4 40 9 black
Blend Mode: Overlay
Step 3
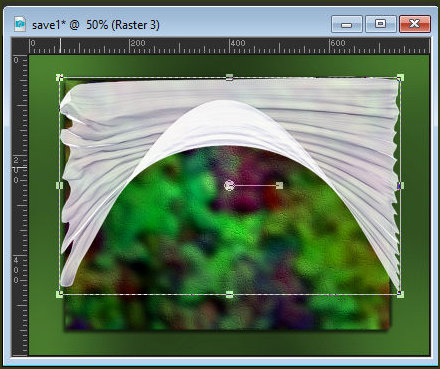
Copy the texture [drap]
Paste as a new layer
Image / Free Rotate - Right/90
With the Pick Tool activated, stretch the image until it looks like
the model
Effects / User Defined Filter / emboss 3
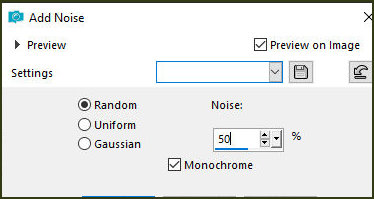
Adjust / Add Remove Noise / Add Noise [random 50 monochrome checked]
Drop shadow: 1 1 100 0 black
Step 4
Add a new layer
Paint with a dark color
Layers / New Mask Layer / Mask [bice_techno05]
Merge Group
Effects / User Defined Filter / Emboss 3
Using the Pick Tool, click on the top center node and drag to 350px
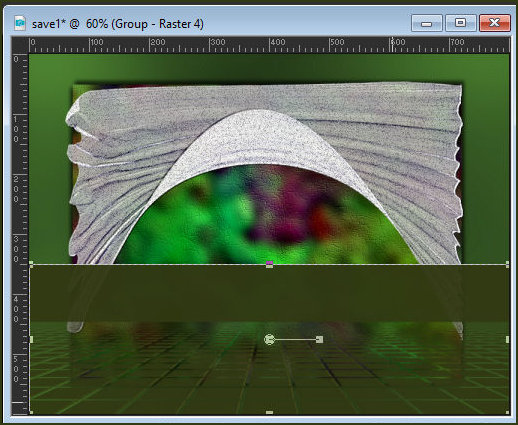
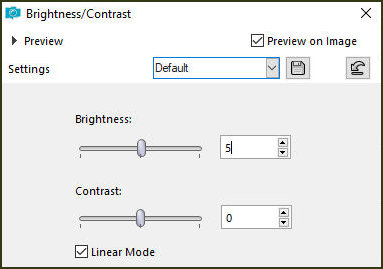
Adjust / Brightness and Contrast / Brightness/Contrast - [brightness:5]
Activate the selection tool and select the rectangle above the
ground
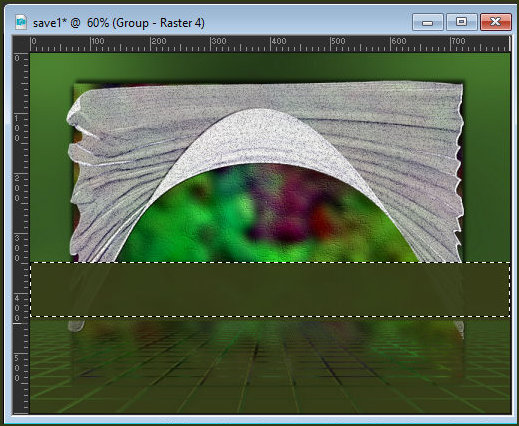
Press Delete
Select none
Step 5
Activate the Raster 1 layer
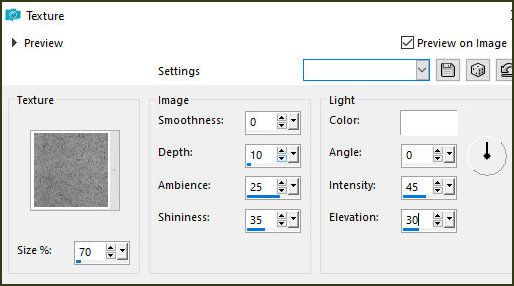
Effects / Texture Effects / Texture - [concrete]
70 – 0/10/25/35 – 0/45/30
Activate the Raster 2 layer (square)
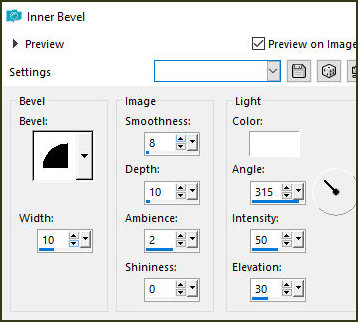
Effects / 3D Effects / Inner Bevel
Drop shadow: 4 4 100 10 black
Drop shadow: -4 -4 100 10 black
Activate the top layer
Copy the main tube
Paste as a new layer
Adjust the size
Center
Effects / Plugins / Eye Candy 5: Impact / Perspective Shadow -
Preset [Drop shadow, Blurry]
Copy the tube [riflettore3aura]
Paste as a new layer
(Note: it consists of two parts, so you can position it according to
your tube)
Merge Down
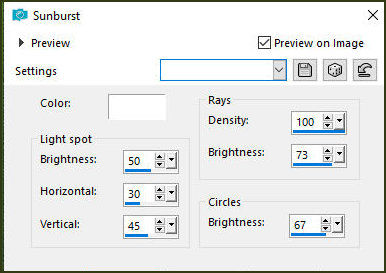
Effects / Illumination Effects / Sunburst
Step 6. Image / Resize: 50%
Move to the left (see model)
Effects / Plugins / Eye Candy 5: Impact / Perspective Shadow - same
as before
Adjust / Brightness and Contrast / Brightness/Contrast - same as
before
Drop shadow: 2 2 70 2 black
Drop shadow: -2 -2 70 2 black
Add the decorative tubes
Image / Add borders / 1px / black
Image / Add borders / 3px / white
Image / Add borders / 1px / black
Image / Add borders / 30px / White
Select this 30px border with the Magic Wand
Step 7
Add new layer
Paint with gradient
Effects / Plugins / Frames / Wire Mesh [86 144 144 144]
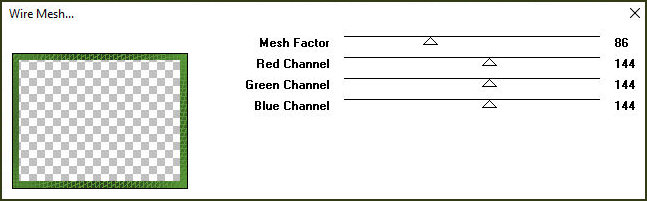
Apply 2 times
Effects / User Defined Filter / Emboss 3
Layers / Duplicate
Image / Mirror / Mirror Horizontal
Image / Mirror / Mirror Vertical
Select none
Blend Mode: Burn - on copy
Effects / 3D Effects / Inner Bevel same as before
Add credits
Merge all
Save as jpeg

|