|

This tutorial is from STARDESIGNPSP who I thank for
letting me translate their tutorials.

Original here

Tubes

Material

Plugins
Abstract Curves - Graphic Plus
You can find these plugins on the websites of:
Renée
Cloclo
You can also find this tutorial translated into these languages:
(Click on the flag)


|
Notes:
> Open the material / Duplicate (shift+d) / Close the originals
> Change the blend mode of the layers to match their colors.
> In older versions of PSP, Mirror Horizontal=Mirror / Mirror Vertical=Flip /
Pick tool=deformation
> Open the masks in psp and
minimize
>Adjust the size of the tubes according to your images
|
SCRIPT
Images:
1 female tube
*
Save the texture in the PSP
Textures folder
*
1
Open a new transparent image with 950x670px
Copy the image [5398-luzcristina]
Paste as a new layer
No need to move
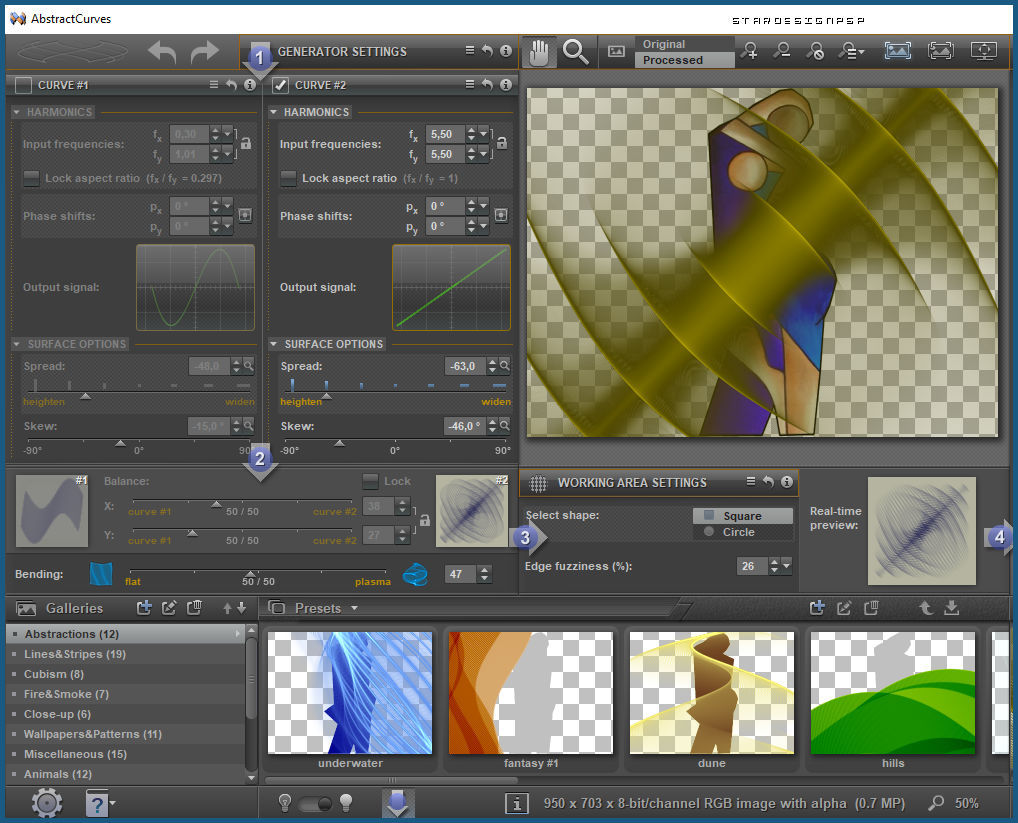
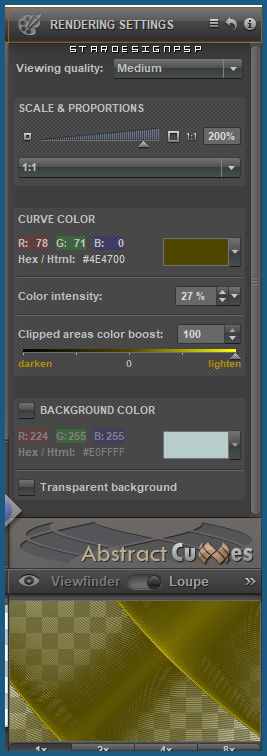
Effects / Plugins / Abstract Curves
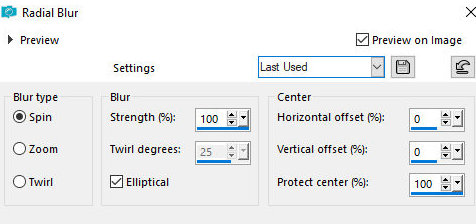
Adjust / Blur / Radial Blur
Rotation (1°) 100 25 x 0 0 100
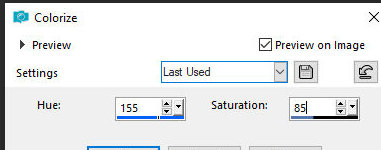
Adjust / Hue and Saturation / Colorize
(Note: you can also use Adjust / Variation)
155 85
Merge all
2
Add a new layer
Selections / Select all
Copy the image [SCS-EndlessLove-Paper22]
Paste into the selection
Blend Mode: Soft Light
Keep the selection
3
Open the image [6-pressed]
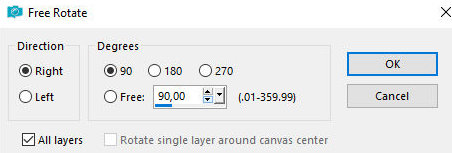
Image / Free Rotation - Right 90 -
all layers Marked
Right 90
Copy (will be saved)
Return to your main image
Add a new layer
Paste into the selection
Blend mode: Hard Light
Select none
4
Copy [5398-luzcristina]
Paste as a new layer
Position as shown in the model
Image / Resize: 90% - all layers unchecked
Layers / Duplicate
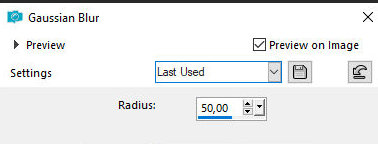
Activate the layer below
Adjust / Blur / Gaussian Blur: 50
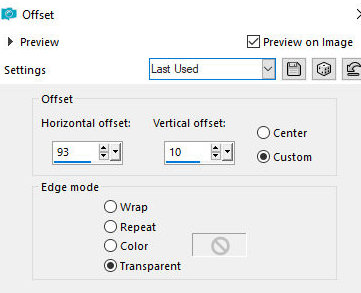
Effects / Image Effects / Offset
93/10
Blend Mode: Hard Light
5
Activate the top layer
Copy [nicole-mist-deco-2017]
Paste as a new layer
Position as shown in the model
Blend mode: Multiply
6
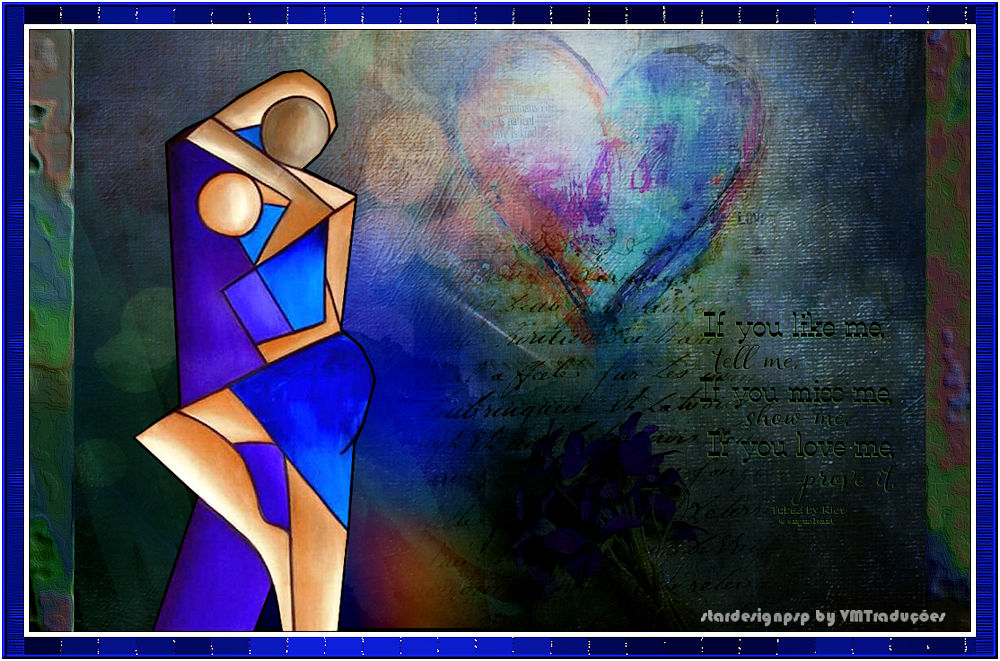
Copy the image [Riet_Tekst if you like me_368-300118]
Paste as a new layer
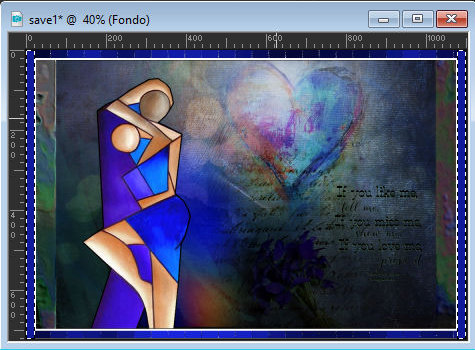
Position as shown in the model Model
Drop shadow: 1 -1 60 1 color #5f8f55
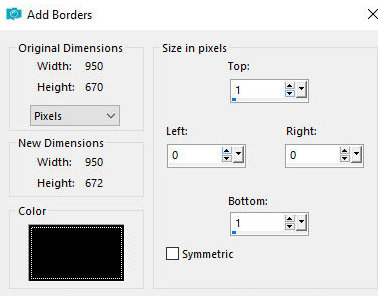
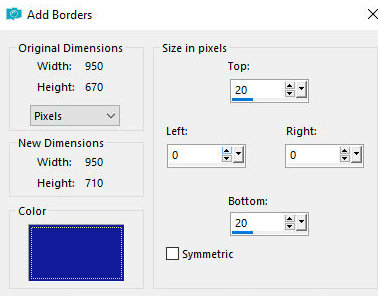
7.
Border: Symmetric unchecked - color
#000000
1 0 0 1
8.
Border: symmetric unchecked - color
#090f96
0 50 50 0
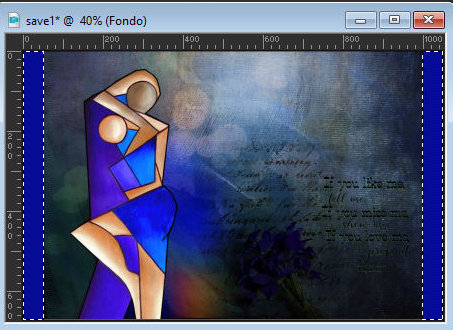
9.
Select both borders with the magic
wand
Open the image [6-pressed]
Image / Free Rotate right/90 - all
layers checked
Copy
Return to your main image
Paste into the selection
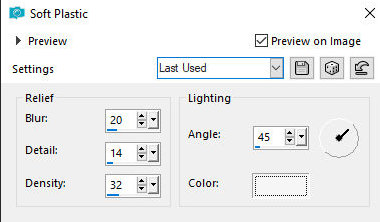
Effects / Texture Effects / Soft Plastic
20 14 32 45 color: #f6f6f6
Select none]
10.
Border: symmetric checked - 5px/white
11.
Copy the image [misted-stvalentin6-tine-01-2021-140]
Paste as a new layer
Image / Resize: 50% - all layers unchecked
Position according to the model
Blend Mode: Soft Light
12.
Border: symmetric unchecked - color
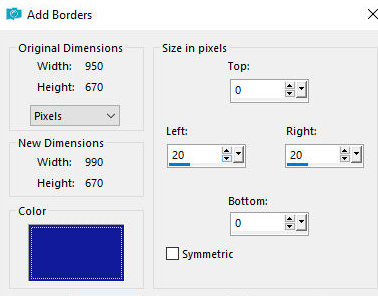
#121b9b
20 0 0 20
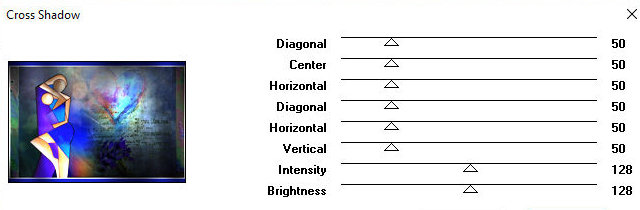
Select the top and bottom borders
with the Magic Wand
Effects / Plugins / Graphic Plus /
Cross Shadow - default
Effects / Texture Effects / Mosaic
Antique
25 25 x 100 2 30
Select none
13.
Border: symmetric unchecked - color
#121b9b
0 20 20 0
Select the right and left borders
with the Magic Wand
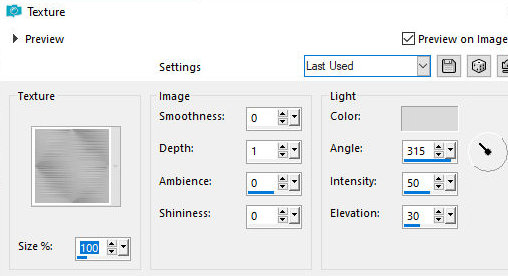
Effects / Texture Effects / Texture
- Texture [texture-DC-01]
100 / 0 1 0 0 / br 315 50 30
Effects / Edge Effects / Enhance
Select none
14.
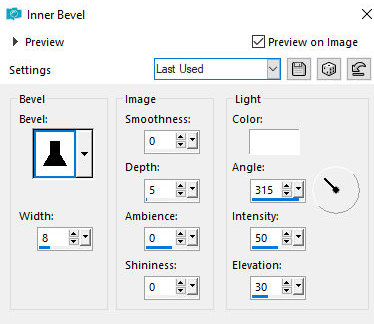
Border - 5px - Color #121b9b
Select this border with the Magic Wand
Effects / 3D Effects / Inner Bevel
bv12 8/0 5 0 0 /br 315 50 30
Select none
Border - 2px - white
15.
Add the signatures
Merge all
Save as jpeg

|