|
You will need:
1 main tube
1 landscape tube
1 jpg image (background)
*
1. Open a new transparent image with 1000x650px
2. Selections / Select all
3. Copy the jpeg image (background) [Valentijn-achtergronden-valentijns-wallpapers-13]
4. Paste it into the selection
5. Select none
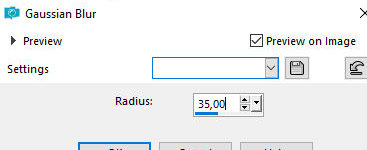
6. Adjust / Blur / Gaussian Blur:35
7. Layers / Duplicate
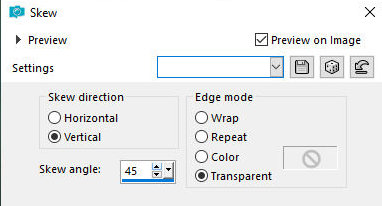
8. Effects / Geometric Effects / Skew
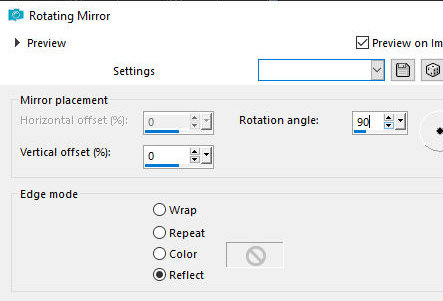
9. Effects / Reflection Effects / Rotating Mirror
10. Image / Mirror / Mirror Horizontal
11. Objects / Align / Left
12. Layers / Duplicate
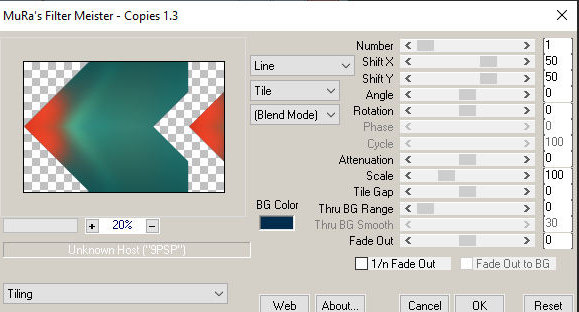
13. Effects / Plugins / Mura's meister / Copies
14. Layers / Duplicate
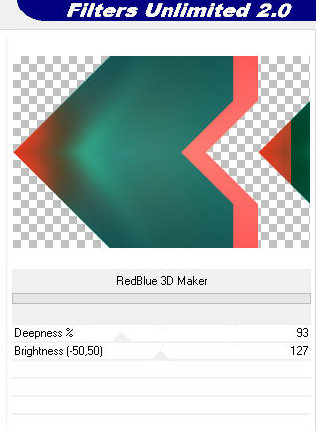
15. Effects / plugins / unlimited 2 / Krusty's FX Vol I
/ RedBlue 3D Maker
16. Image / Mirror / Mirror Horizontal
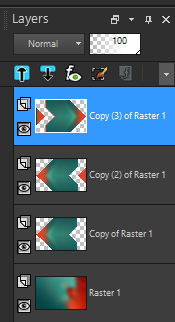
17. The layers will look like this:
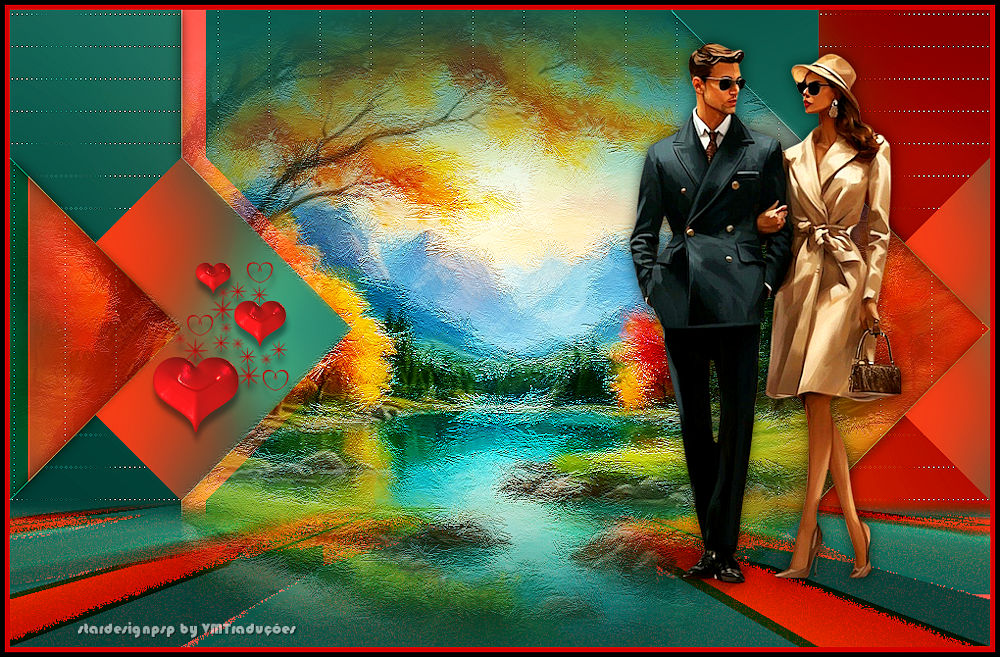
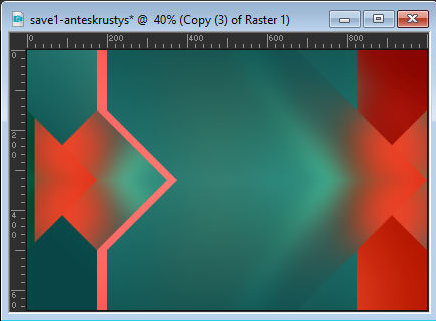
18. The image will look like this:
19. Edit / Copy Special / Copy Merged
20. Paste as a new layer
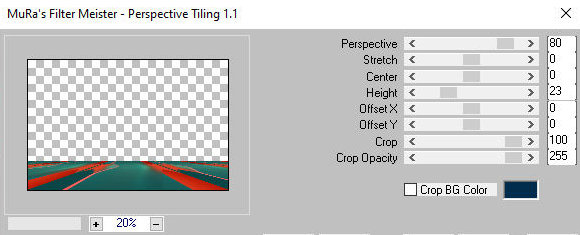
21. Effects / Plugins / Mura's Meister / Perspective
Tiling
22. Select the transparent part of the layer with the
Magic Wand (tolerance=20/Feather=25)
23. Press Delete 4 times
24. Select none
25. Effects / Plugins / AP 01 [Innovations] / Noise
Gritty
26. Activate the layer below - Copy (3) of Raster 1
27. Select the transparent part with the Magic Wand (tolerance=20
/ Feather=0) (close the other layers for better
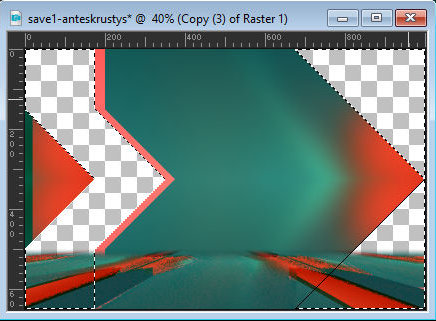
visualization)
28. The image will look like this:
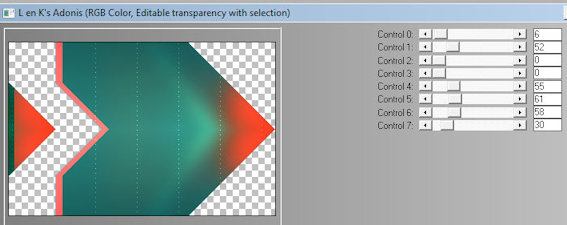
29. Selections / Invert
30. Effects / Plugins / L en K's / L en K's Adonis
31. Effects / Edge Effects / Enhance
32. Keep the selection
33. Activate the background layer - Raster 1
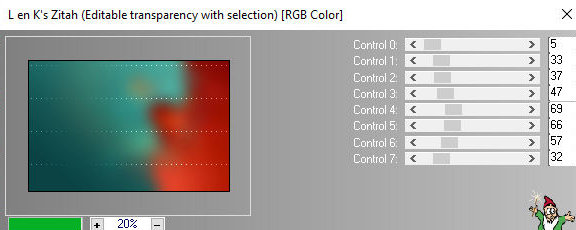
34. Selections / invert
35. Effects / plugins / L en K's / L en K's Zitah
36. effects / Edge Effects / Enhance
37. Selections / invert
38. Drop shadow: 0 0 60 20 black
39. Activate the Copy (3) or Raster 1 layer (layer with
the Adonis effect)
40. Selections / invert
41. Drop Shadow: 0 0 60 20 black
42. Keep the selection
43. Selections / invert
44. Activate the top layer
45. Add a new layer
46. Copy the landscape tube [vvs-landscape0472]
47. Paste into the selection
48. Select none
49. Layers / Duplicate - 2 times
50. Activate the first image layer - Raster 3
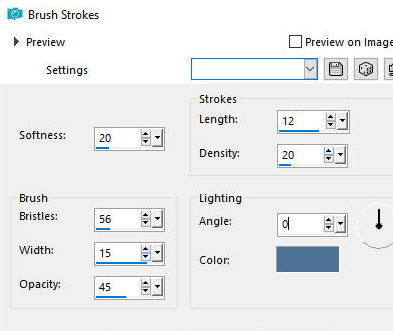
51. Effects / Art Media Effects / Brush Strokes - Color:
#4e7296
52. Activate the middle layer - Copy of Raster 3
53. Layers / Properties / Blend mode: Soft Light
54. Activate the Copy (2) of Raster 3 layer
55. Layers / Properties / Blend Mode: Soft Light /
Opacity: 60%
56. Copy the image [vmqj68-732075]
57. Paste as a new layer
58. Position to the left as per the model
59. Copy the tube [couples_0030_lisat]
60. Paste as a new layer
61. Image / Resize: 80% - all layers unchecked
62. Position as per the model
63. Drop shadow: 0 0 60 20 black
64. Adjust / sharpness / Sharpen
65. Add text if you prefer, or another type of
embellishment.
66. Border: 5px / #cb000b
5px / black
67. Add signatures
68. Merge all
69. Save as jpeg
|