|
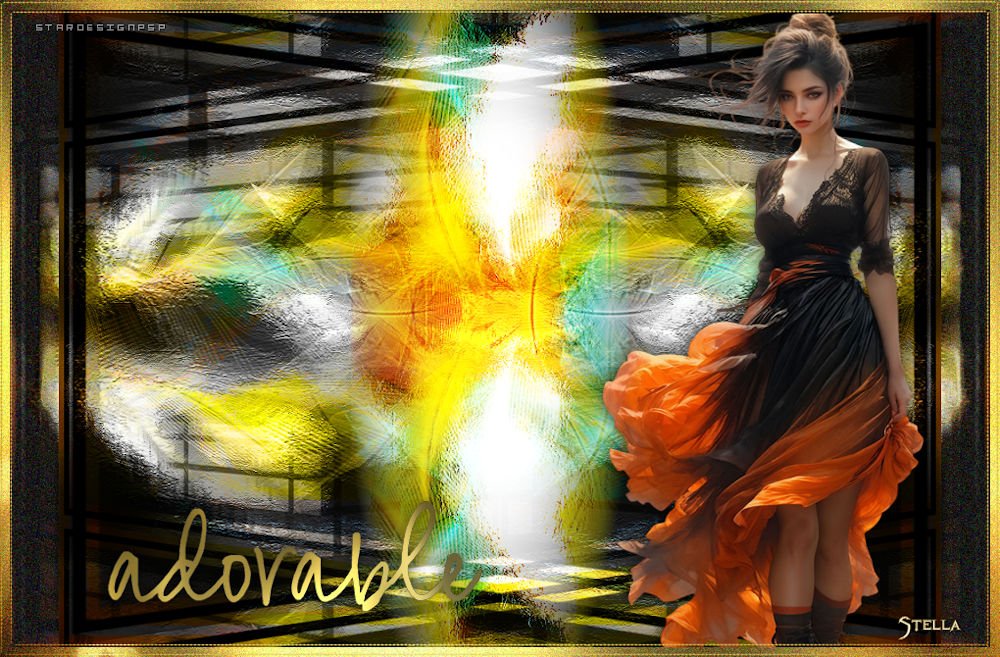
(versão original de stardesignpsp)
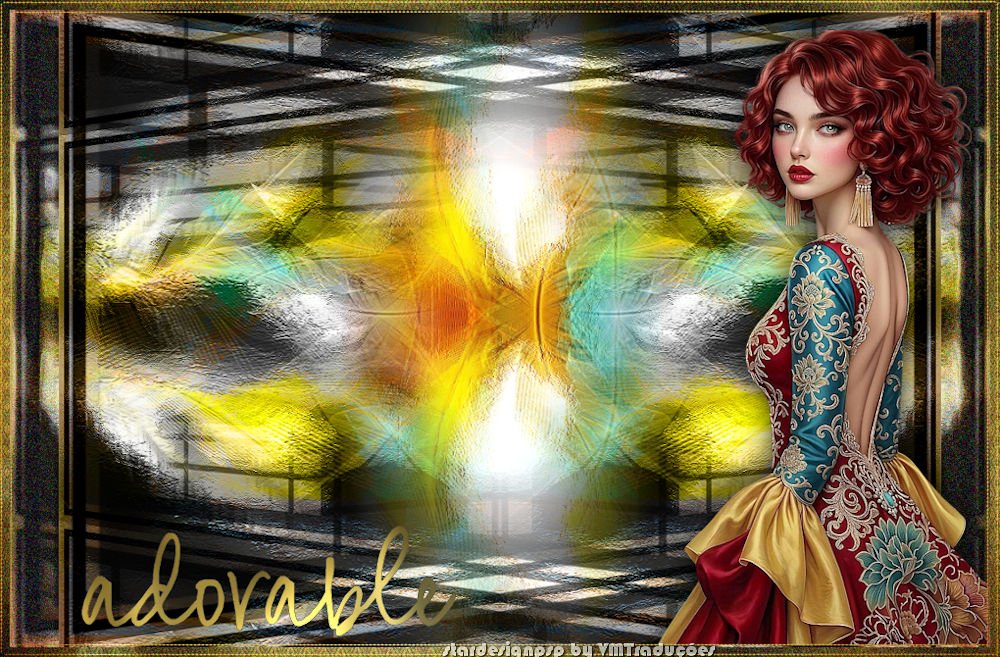
(minha versão)

This tutorial is from STARDESIGNPSP who I thank for
letting me translate their tutorials.
Original here

Tubes

Material
Plugins
Graphic Plus
You can find these plugins on the websites of:
Renée
Cloclo
You can also find this tutorial translated into these languages:
(Click on the flag)


|
Notes:
> Open the material / Duplicate (shift+d) / Close the originals
> Change the blend mode of the layers to match their colors.
> In older versions of PSP, Mirror Horizontal=Mirror / Mirror Vertical=Flip /
Pick tool=deformation
> Open the masks in psp and
minimize
>Adjust the size of the tubes according to your images
|
TUTORIAL
Materials
1 female tube
***
1.
Open image [921f66c377bc6cc8faeb8d438c442349]
Duplicate (Shift+D) – Close the original
(If using a different image, ensure it has the same dimensions as this one)
Add a 10px white border
Selections - Select All
Selections - Modify - Contract: 10
Selections - Invert
Open image [53b9e192ccde20356343a7f741757aa4]
In the Materials palette, choose the "Pattern" option and select the image above
Configure according to the screenshot
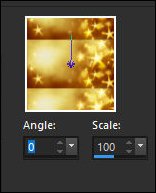
Activate your main image
Fill the selection with this pattern
Effects - Plugins - Graphic Plus - Cross Shadow - default settings
2
Select None
Add a 10px black border
Add a 10px white border
Select this 10px white border using the Magic Wand tool
Fill it with the gold pattern
Effects - Plugins - Graphic Plus - Cross Shadow (apply while slightly varying
the values to your preference)
Select None
3
Image - Free Rotate [Right/90]
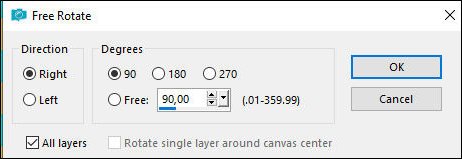
Copy
Open a new transparent image, 1000 x 570px
Selections - Select All
Paste the image currently in your clipboard into the selection
Select None
4
Layers - Duplicate
Image - Mirror Horizontal
Blend Mode: Screen
Edit - Copy Special - Copy Merged
Paste as a new layer
Effects - Art Media Effects - Brush Strokes - color #4e7296
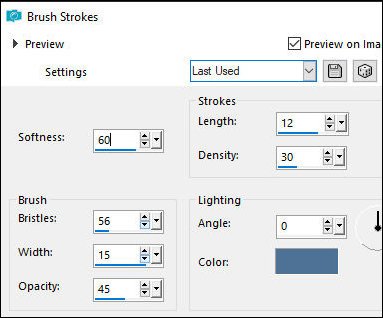
Blend Mode: Hard Light (or another mode of your choice)
Edit - Copy Special - Copy Merged
5
Open a new image, 900 x 650px
Selections - Select All
Paste the image from your clipboard into the selection
Select None
Layers - Duplicate
Effects - Geometric Effects - Perspective Horizontal
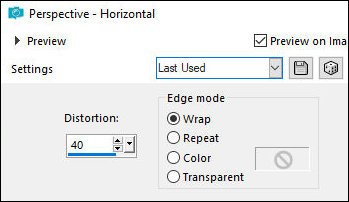
Layers - Duplicate
Image - Mirror - Mirror Horizontal
Blend mode: Multiply
Result 1
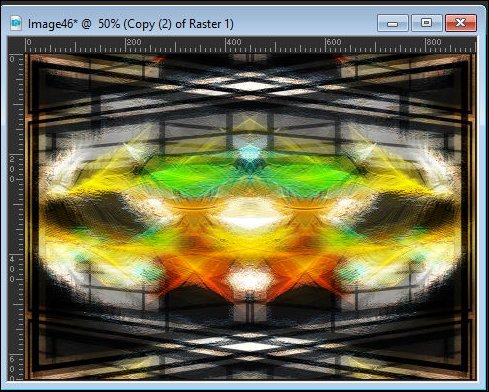
Merge down
6
Activate the Selection Tool - Custom Selection and configure it:
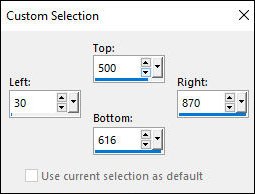
Selections - Invert
Edit - Cut (it will be stored in memory)
Select none
Paste as a new layer
Blend mode: Luminance (L) or another option of your choice
7
Activate the background layer
Image - Mirror - Mirror Vertical
Activate the Selection Tool (rectangle)
Make a selection as shown in the screenshot
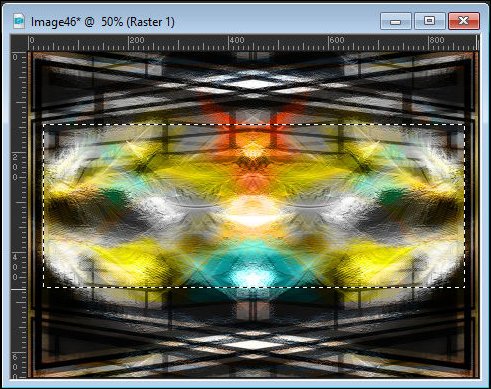
This selection will depend on the image you are using
Selections - Promote selection to layer
Layers - Arrange - Bring to top
Select none
8
Layers - Load mask from disk - Mask [20 20]
Merge group
Image - Free Rotate [left/90]
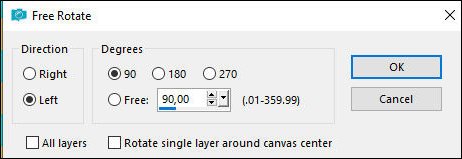
Blend mode: Hard Light
Position the image as you prefer
If the image appears too harsh, you can reapply the [20 20] mask [with the "fit
to layer" option selected]
Edit - Copy Special - Copy Merged
9
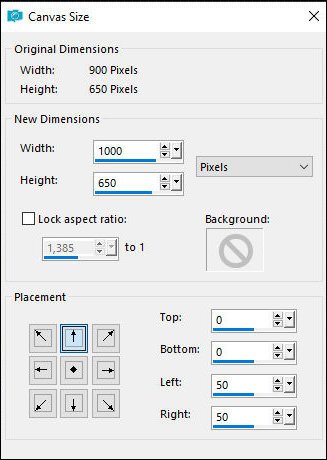
Image - Canvas Size - 1000 x 650 px - 0 0 50 50
Activate the background layer
Select both transparent sides using the Magic Wand
Add a new layer
Paste the image currently in memory into the selection
Layers - Duplicate
Effects - Texture Effects - Soft Plastic
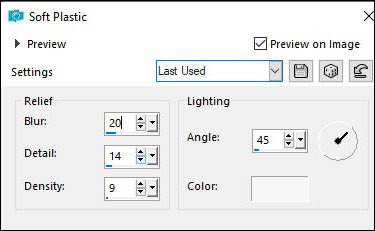
Opacity: 55%
Select none
Adjust - Add/Remove Noise - Add Noise
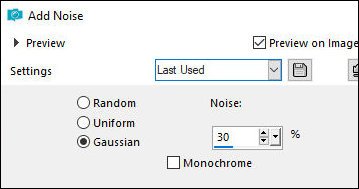
Apply twice
10
Activate the top layer
Copy your main tube
Paste as a new layer
Adjust the size
Position as you prefer
Add a drop shadow of your choice
11
Copy [filo dorado]
Activate your project
Add a new layer
Selections - Select all
Paste into the selection
Select none
12
Copy the text [word_art] (there are two options; choose one)
Paste as a new layer
Position it on the side opposite to your main tube
13
Border - 10px - black
Selections - Select all
Selections - Modify - Contract: 10
Selections - Invert
Fill with a gold pattern
Effects - Plugins - Graphic Plus - Cross Shadow - default
Adjust - Add/Remove Noise - Add Noise - same as previous
You may replace this border with another one in a different color, depending on
your project
Selections - Select all
Add a new layer
Copy the [gold border/trim] again
Paste into the selection
Select none
14
Add credits
Merge all
Save as JPEG

|