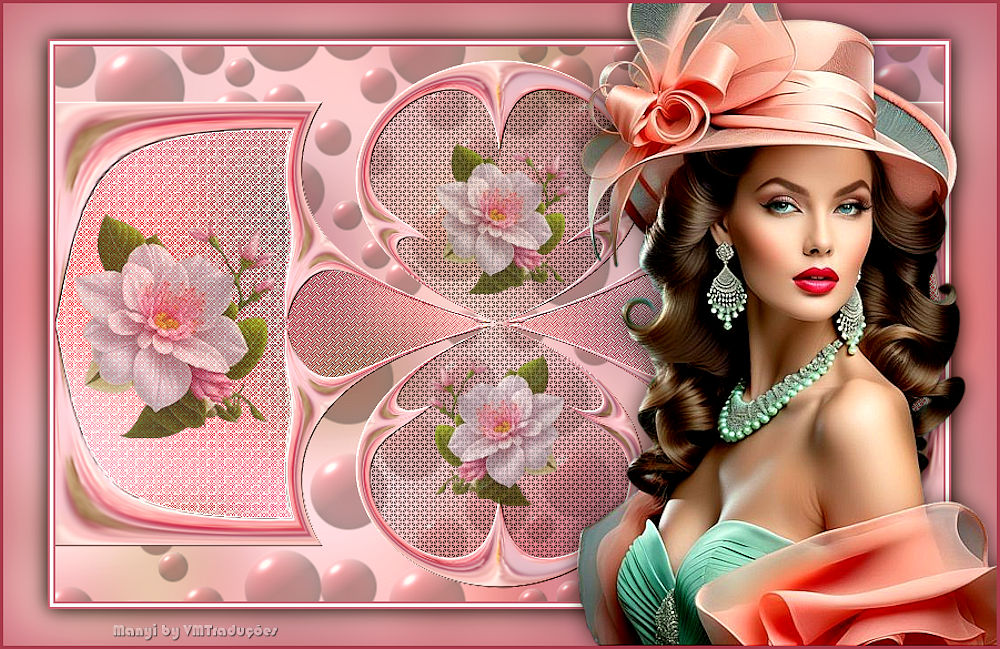
| 1.
Abra o alpha channel [2025-Lidia] /
Duplique (shift+D) / Feche o original
Layers / Duplicate
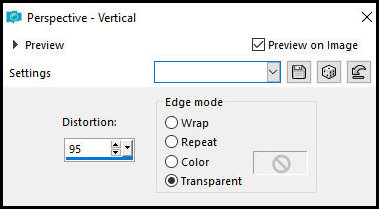
Effects / Geometric Effects /
Perspective Vertical
[95 trans]
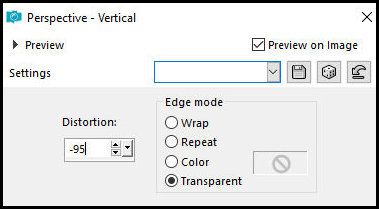
Repita o Perspective Vertical com esta
outra configuração
[-95 trans]
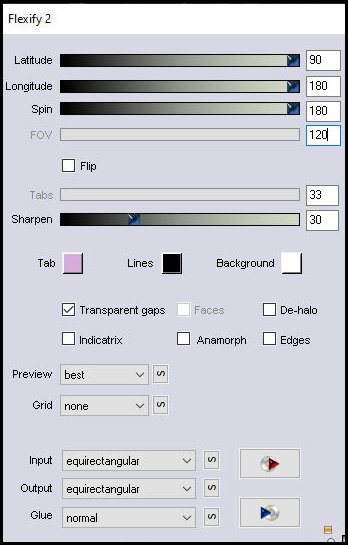
Effects / plugins / Flaming Pear /
Flexify 2
[90 180 180 120 33 30 equirectangular
equirectangular]
Effects / plugins / GMIC-QT/
Deformations / Circle Transform]
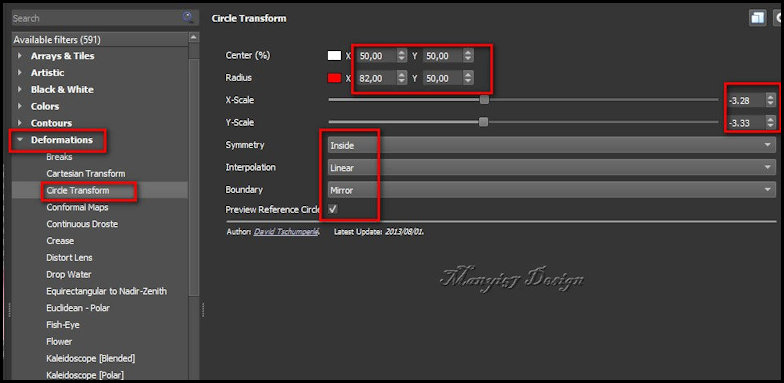
2
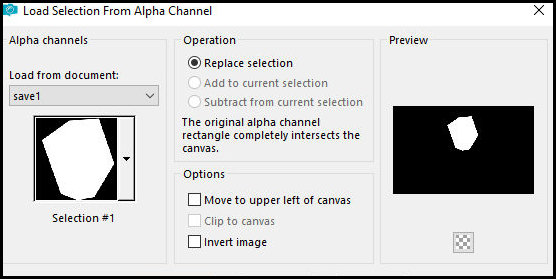
Selections / Load selection from alpha
channel / Selection #1
Pressione Delete (você pode fechar a
layer de fundo para ver melhor)
Select none
Layers / Duplicate
Image / Mirror / Mirror Vertical
3
Merge Down
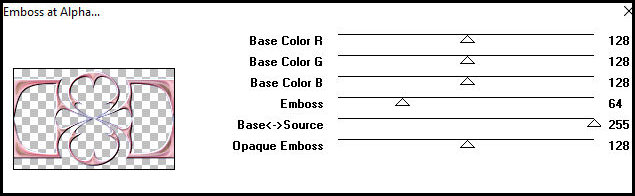
Effects / Plugins / Mura's Seamless /
Emboss at Alpha
[128 128 128 64 255 128]
Ative a abra a layer de fundo
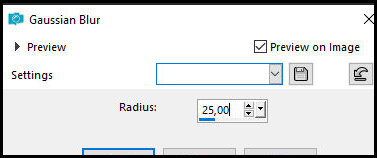
Adjust / Blur / Gaussian Blur
[25]
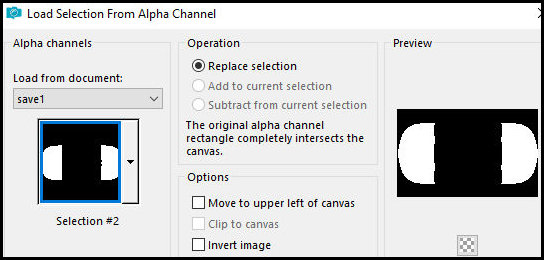
Selections / Load Selection from Alpha
Channel / Selection #2
4
Continue na layer de fundo
Selections / Promote selection to
layer
Select none
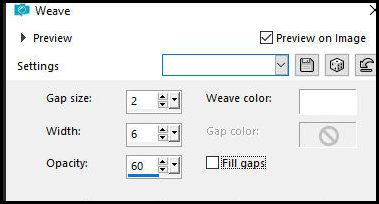
Effects / Texture Effects / Weave
[2 6 60 br br des]
Ativada a layer do meio
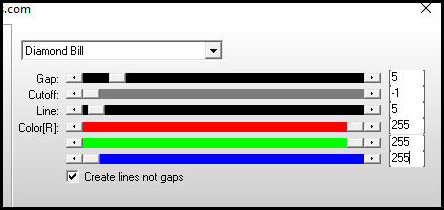
Effects / Plugins / AP[Lines] /
SilverLining
[diamond bill 5 -1 5 255 255
255]
5
Effects / Edge Effects / Enhance
Ative a layer de fundo
Selections / Load selection from alpha
channel / Selection #3

Layers / Promote selection to layer
Select none
Effects / Plugins / AP [Lines] /
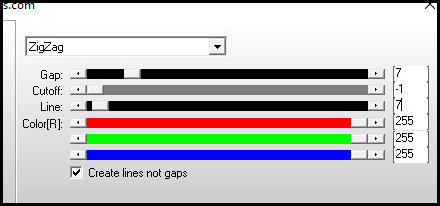
Lines-SilverLining
[ZigZag 7 -1 7 255 255
255]
6
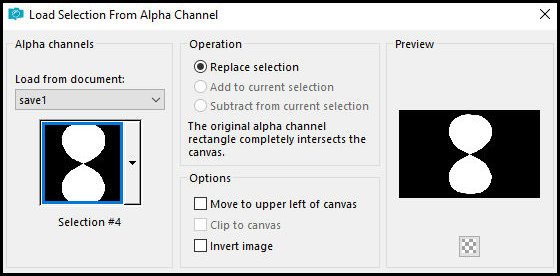
Effects / Edge Effects / Enhance
Selections / Load selection from alpha
channel / Selection #4
Com a layer de fundo ativada:
Selections / Promote selection to
layer
7
Effects / Plugins / unlimited 2 /
Screenworks / Net Pattern

Layers / Properties / Opacity:
50-55%(depende do tube)
Select none
Ative a layer de fundo
Effects / Artistic Effects / Balls and
Bubbles
[atomatica 50 15 50 des non
intersecting des 20]
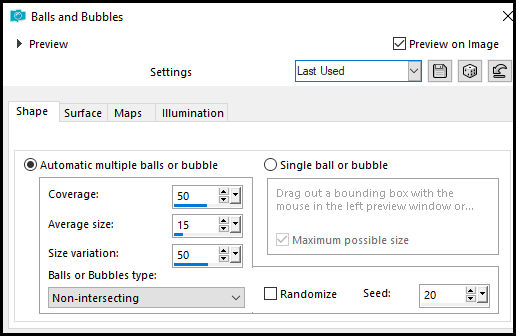
Obs: Clique na aba Surface e escolha
uma cor que combine
8
Borda:
-
2px / #c46a82
-
3px / #ffffff
-
2px / c46a82
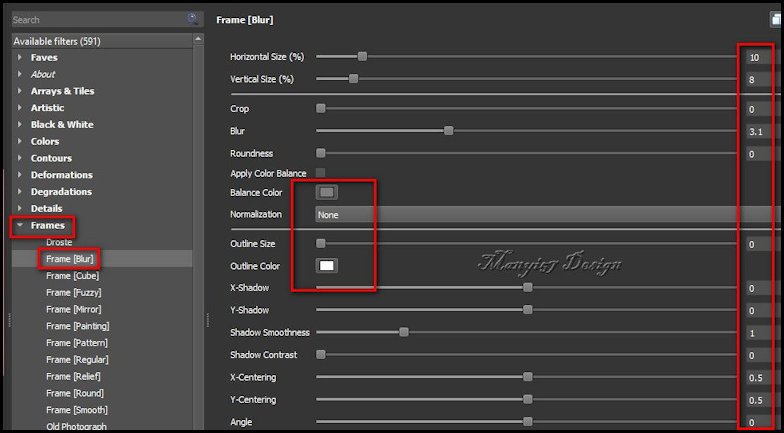
Abra uma pasta com o nome gmic-lidia
Effects / Plugins / GMIC-QT/ Frames /
Frame (blur)
Retorne ao PSP
Salve a imagem na pasta gmic-lidia com
o nome: 1
Abra a imagem 1 no psp e delete a
imagem anterior (ou salve pra deletar depois)
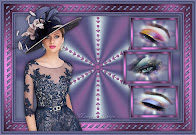
9
Copie [virágom]
Cole como nova layer
Não precisa mover
Copie o tube principal
Cole como nova layer
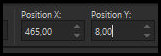
Ative a pick tool e configure; X=465
Y=8 - Pressione M]
Ou posicione manualmente
10
Adjust / Sharpness / Sharpen
Drop shadow: 0 0 60
30 preto
Borda: 3px / branco
Coloque as assinaturas
Merge all
Salve como jpeg
|