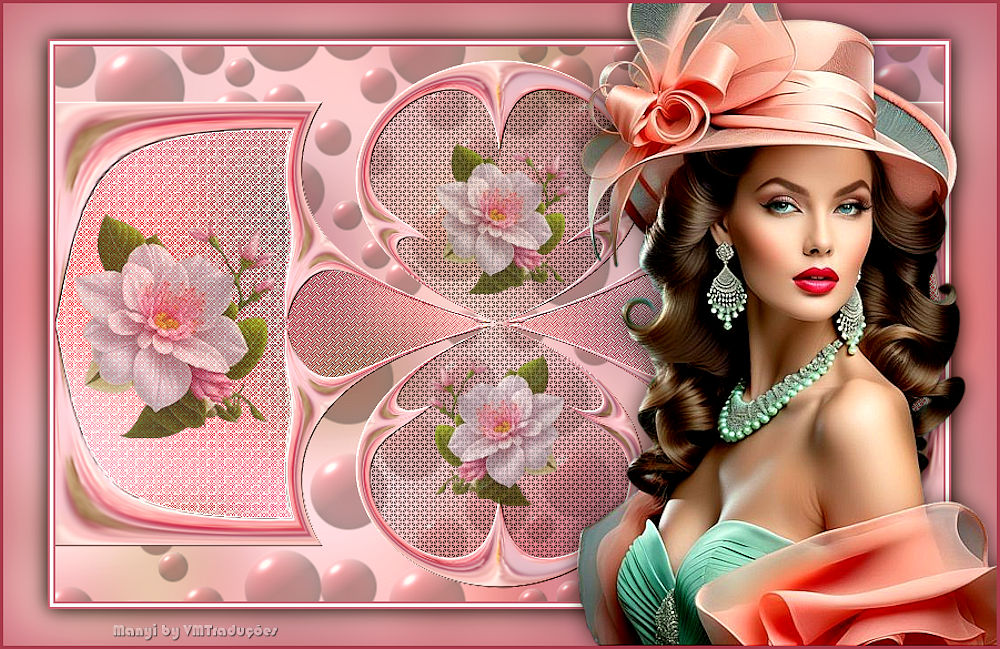
|


This tutorial is by Manyi, whom I thank for letting me translate her tutorials.

Original HERE


Tubes


Material


Plugins
Gmic Plugins-X86-version 3.2.0.
Flaming Pear-Flexify2
MuRa's Seamless-Emboss at Alpha
AP Lines–Silverlining
Screen Works-Net Pattern


You can find these plugins on the websites of:
Renée
Cloclo

You can also find this tutorial translated into these languages:
(Click on the flag)


SCRIPT
|
Notes:
> Open the material / Duplicate (shift+d) / Close the
originals
> Change the blend mode of the layers to match their
colors.
> In older versions of PSP, Mirror Horizontal = Mirror /
Mirror Vertical = Flip / Pick tool = deformation
> Open the masks in PSP and minimize
> Adjust the size of the tubes according to your images
|
*
|
1.
Open the alpha channel [2025-Lidia] / Duplicate (shift+D)
/ Close the original
Layers / Duplicate
Effects / Geometric Effects / Perspective Vertical
[95 trans]
Repeat the Perspective Vertical with this other setting
[-95 trans]
Effects / plugins / Flaming Pear / Flexify 2
[90 180 180 120 33 30 equirectangular equirectangular]
Effects / plugins / GMIC-QT / Deformations / Circle
Transform]
[]
2
Selections / Load selection from alpha channel /
Selection #1
Press Delete (you can close the background layer for a
better view)
Select none
Layers / Duplicate
Image / Mirror / Mirror Vertical
3
Merge Down
Effects / Plugins / Mura's Seamless / Emboss at Alpha
[128 128 128 64 255 128]
Activate and open the background layer
Adjust/Blur/Gaussian Blur
[25]
Selections / Load Selection from Alpha Channel /
Selection #2
4
Continue with the background layer
Selections / Promote selection to layer
Select none
Effects / Texture Effects / Weave
[2 6 60 br br des]
Activated the middle layer
Effects / Plugins / AP[Lines] / SilverLining
[diamond bill 5 -1 5 255 255 255]
5
Effects / Edge Effects / Enhance
Activate the background layer
Selections / Load selection from alpha channel /
Selection #3
Layers / Promote selection to layer
Select none
Effects / Plugins / AP [Lines] / Lines-SilverLining
[ZigZag 7 -1 7 255 255 255]
6
Effects / Edge Effects / Enhance
Selections / Load selection from alpha channel /
Selection #4
With the background layer activated:
Selections / Promote selection to layer
7
Effects / Plugins / Unlimited 2 / Screenworks / Net
Pattern
Layers / Properties / Opacity: 50-55% (depends on the
tube)
Select none
Activate the background layer
Effects / Artistic Effects / Balls and Bubbles
[atomatica 50 15 50 des non intersecting des 20]
Note: Click the Surface tab and choose a matching color
8
Border:
2px / #c46a82
3px / #ffffff
2px / c46a82
Open a folder named gmic-lidia
Effects / Plugins / GMIC-QT / Frames / Frame (blur)
Return to PSP
Save the image in the gmic-lidia folder with the name: 1
Open image 1 in PSP and delete the previous image (or
save to delete later)
9
Copy [viragom]
Paste as a new layer
No need to move
Copy the main tube
Paste as a new layer
Activate the pick tool and set; X=465 Y=8 - Press [M]
Or position manually
10
Adjust / Sharpness / Sharpen
Drop shadow: 0 0 60 30 black
Border: 3px / white
Place the signatures
Merge all
Save as jpeg |


|