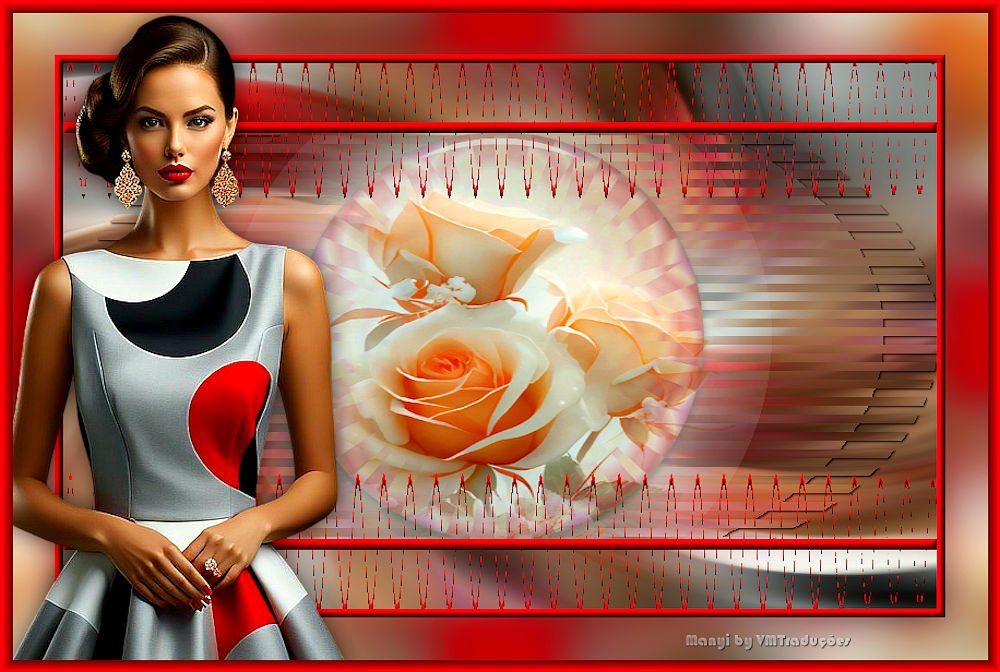
|
Step 1
1. Open the alpha channel file / Duplicate (shift+D) /
Close the original
2. Set the color #fac68e to the foreground and the color
#805743 to the background
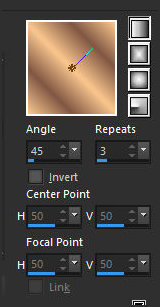
3. Prepare this gradient
4. Paint the image with it
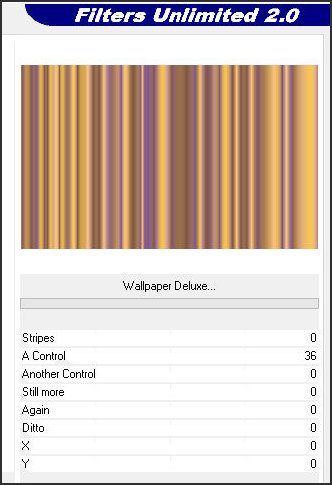
5. Effects / Plugins / Unlimited 2 / Enki's Filters /
Wallpaper Deluxe
Step 2
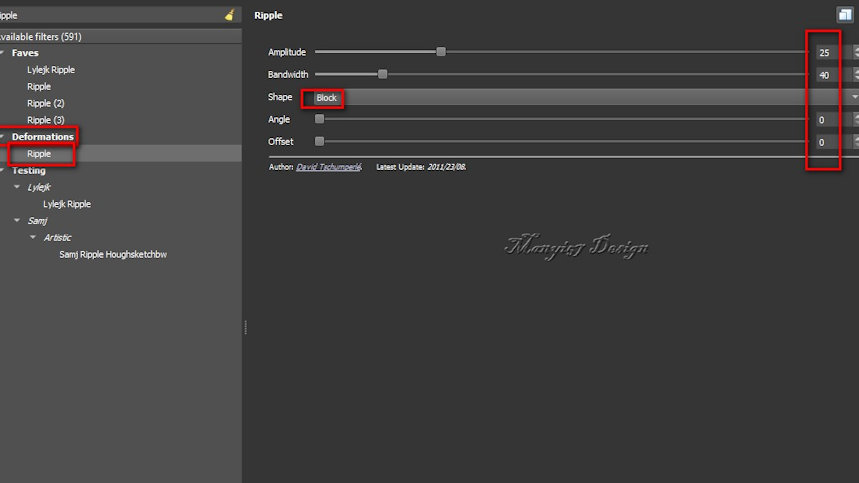
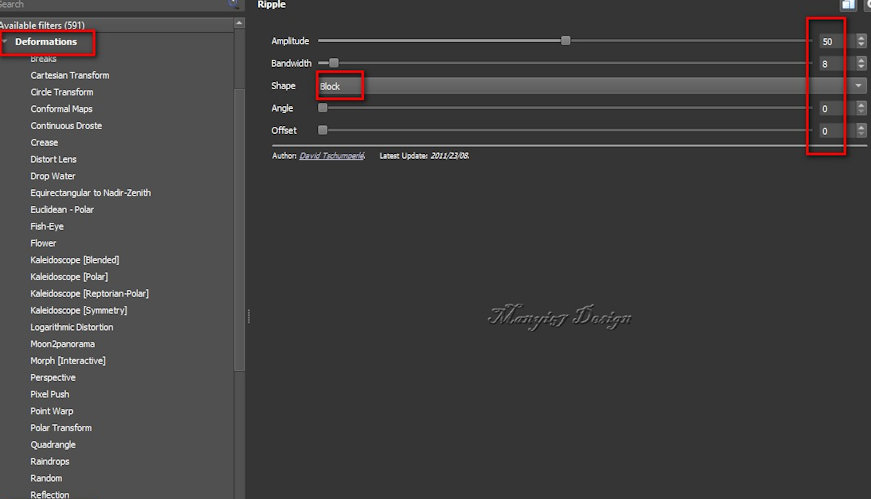
6. Effects / Plugins / GMIC-QT / Deformations / Ripple
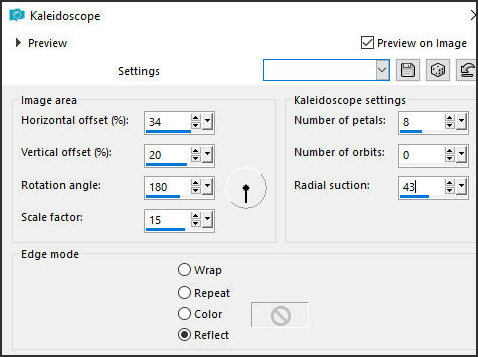
7. Effects / Reflection Effects / Kaleidoscope
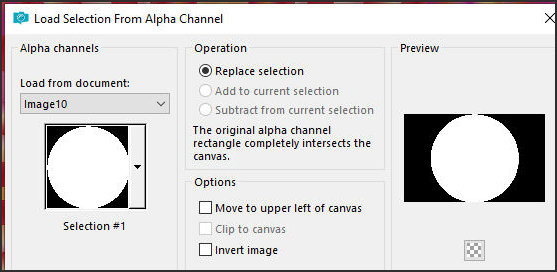
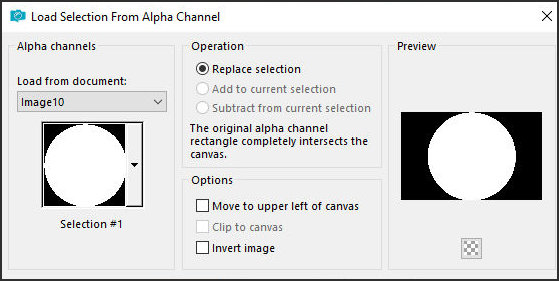
8. Selections / Load selection from alpha channel /
Selection #1
9. Selections / Promote selection to layer
10. Select none
Step 3
11. Image / Resize: 75% - all layers unchecked
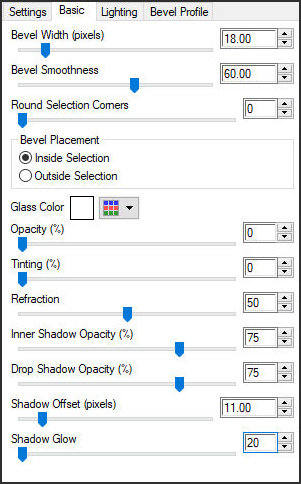
12. Effects / Plugins / Eye Candy 5: Impact / Glass
13. Activate the Raster 1 layer
14. Selections / Select all
15. Copy the Character tube
Step 4
16. Paste into selection
17. Select none
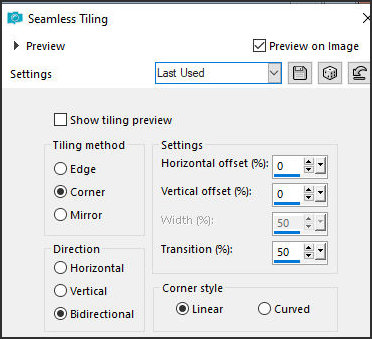
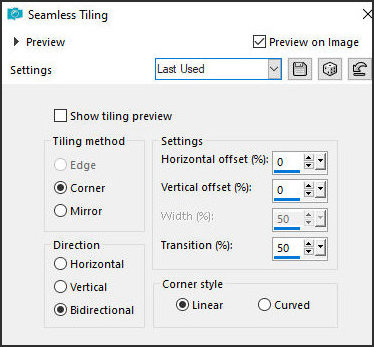
18. Effects / Image Effects / Seamless Tiling
19. Adjust / Blur / Radial Blur

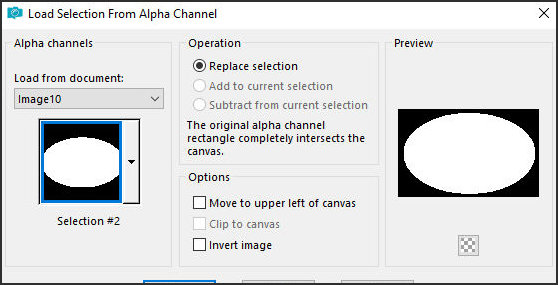
20. Selections / Load selection from alpha channel /
Selection #2
Step 5
21. Selections / Promote selection to layer
22. Select none
23. Effects / Plugins / GMIC_QT / Deformations / Ripple
24. Drop shadow: 1 1 85 3 black
25. Activate the top layer
Step 6
26. Add a new layer
27. Selections / Load selection from alpha channel /
Selection #1 again
28. Copy the tube [virágom]
29. Paste into selection
30. Select none
Step 7
31. Add a new layer
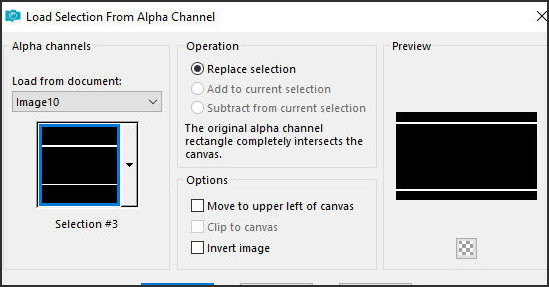
32. Selections / Load selection from alpha channel /
Selection #3
33. Color the selection with the color #805743
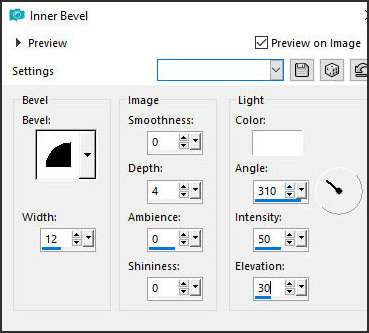
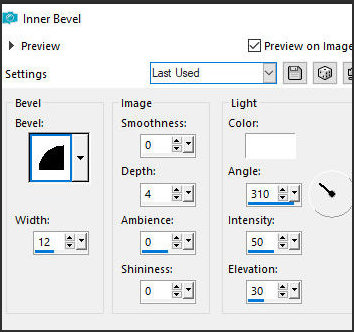
34. Effects / 3D Effects / Inner Bevel
35. Select none
Step 8
36. Continue on this layer
37. Activate the Magic Wand (tolerance/feather=0)
38. Select the upper and lower rectangle as shown in the
print
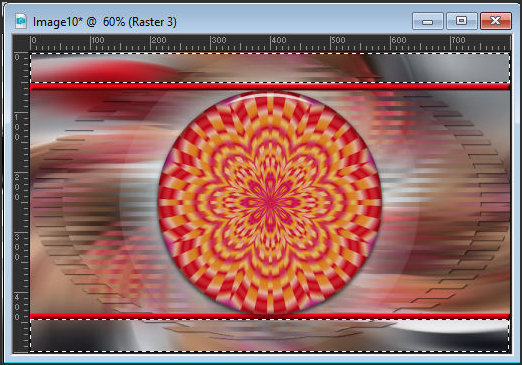
39. Activate the flower layer
40. Press Delete
Step 9
41. Activate the Promoted Selection 1 layer
42. Press Delete
43. Select none
44. Activate the top layer
45. Layers/Duplicate
Step 10.
46. Effects / Distortion Effects / Wave

47. Layers / Arrange / Move Down
48. Selections / Select all
49. Border: 8px / #805743
50. Selections / Invert
Step 11
51. Effects / 3D Effects / Inner Bevel - Same as above
52. Selections / Select all
53. Border: 50px / #805743
54. Effects / Image Effects / Seamless Tiling - same as
above
55. Selections / Invert
Step 12
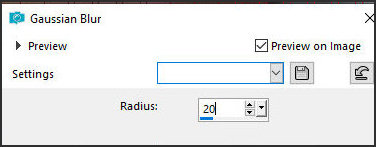
56. Adjust / Blur / Gaussian Blur: 20
57. Select none
58. Copy the character tube
59. Paste as a new layer
60. Adjust the size
Step 13
61. Adjust / Sharpness / Sharpen
62. Drop Shadow: 0 0 60 30 black
63. Merge all
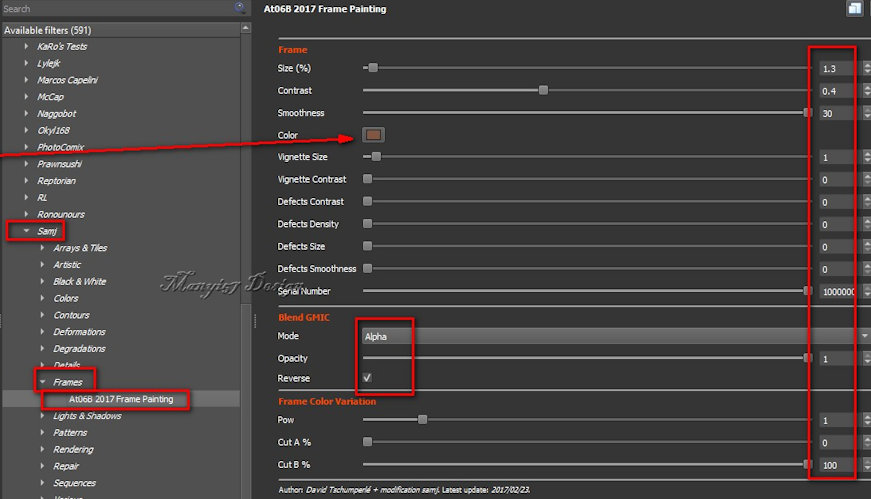
64. Effects / Plugins / GMIC-Q / Samj / Frames / AT06B
2017 Frame Painting - color #805743
65. Image / Resize: 900x605px
Step 14
Place the signatures
Merge all
Save as jpeg |