|
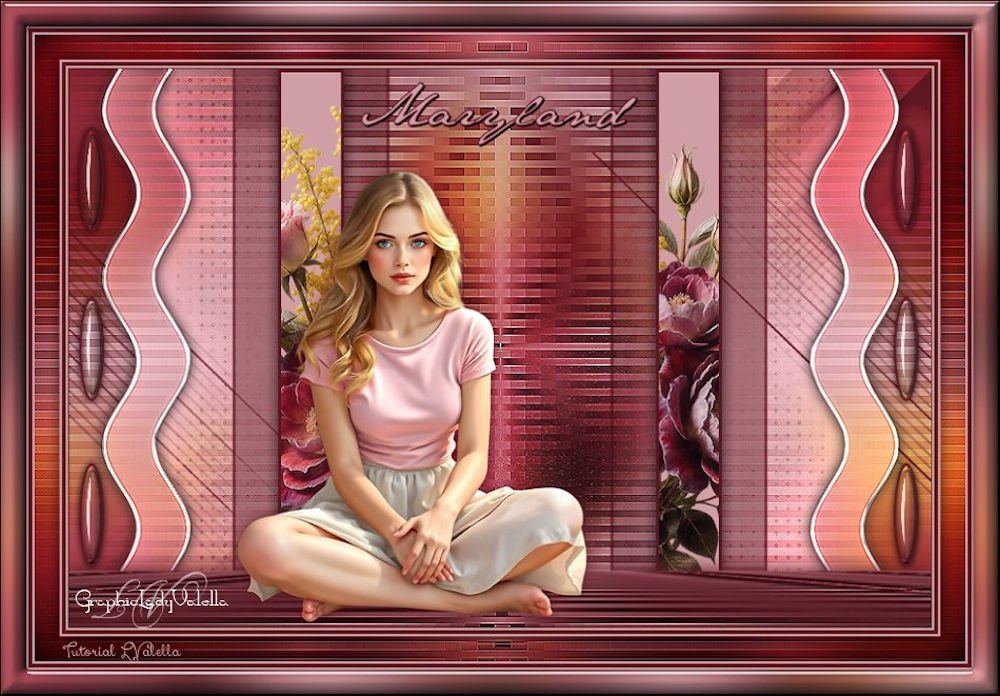
(versão original de Lady Valella)
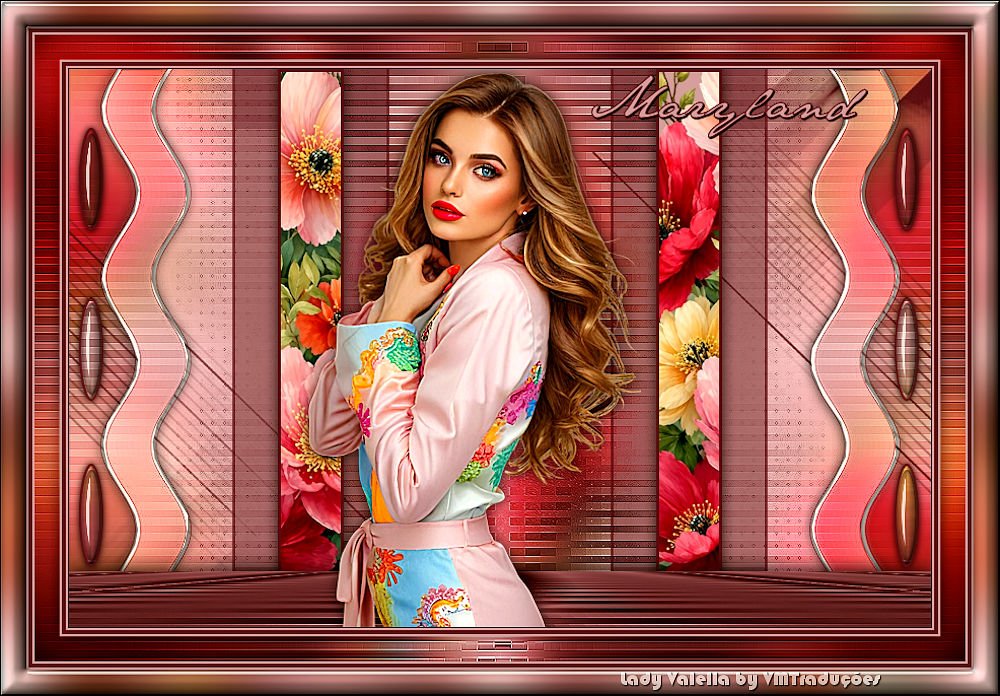
(minha versão)

This tutorial is from Lady Valella who I thank for
letting me translate their tutorials.

Original here

Tubes

Material
Plugins
RCS Filter Pack 1.0 - Mura's
Meister - Eye Candy 5: Impact
You can find these plugins on the websites of:
Renée
Cloclo
You can also find this tutorial translated into these languages:
(Click on the flag)


|
Notes:
> Open the material / Duplicate (shift+d) / Close the originals
> Change the blend mode of the layers to match their colors.
> In older versions of PSP, Mirror Horizontal=Mirror / Mirror Vertical=Flip /
Pick tool=deformation
> Open the masks in psp and
minimize
>Adjust the size of the tubes according to your images
|
TUTORIAL
Materials:
1 female tube
1 floral tube
***
Step 1
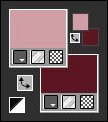
Colors: Foreground: #d09ea5 - Background: #5c1723
Open the alpha file [Alpha TutMaryland base]
Duplicate (Shift+D) - Close the original
Prepare this Radial gradient
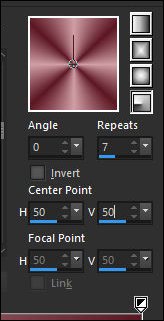
Fill the image with the gradient
Effects - Plugins - RCS Filter Pack 1.0 - RCS Digi-Lens - Window ShadesII
Effects - Edge Effects - Enhance
Copy [459 F-AI-LV25]
Paste as a new layer
Effects - Image Effects - Seamless Tiling - default
Adjust - Blur - Gaussian Blur: 25
Blend mode: Overlay
Step 2
Add a new layer
Fill with white
Layers - New mask layer - From image - Mask [MascheraAst5-LV20]
Merge group
Effects - Reflection Effects - Rotating Mirror
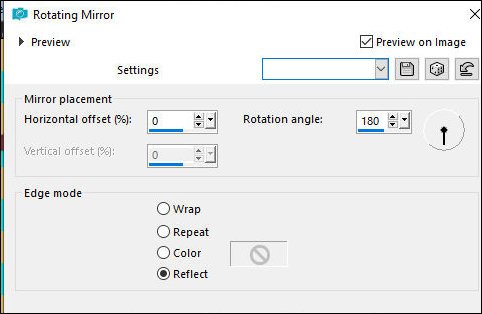
Blend mode: Luminance (L)
Effects - Edge Effects - Enhance
Step 3
Add a new layer
Fill with the background color
Layers - New mask layer - From image - Mask [creation.tine_masque334]
Merge group
Selections - Load selection from alpha channel - Selection [LV-SelMary1]
Selections - Modify - Contract: 1
Press Delete
Add a new layer
Drop Shadow: 0 0 100 20, black
Select None
Step 4
Add a new layer
Selections - Load selection from alpha channel - Selection [LV-SelMary2]
Fill the selection with the background color
Selections - Modify - Contract: 3
Fill the selection with the foreground color
Step 5
Copy [459F-AI-LV26]
Paste as a new layer
Using the Move Tool, position the image within the selection on the left as
desired
Selection - Invert
Press Delete
Selections - Invert
Paste Paste the tube [459F-AI-LV26] again as a new layer
Position the image within the selection on the right as you prefer
Selections - Invert
Press Delete
Select none
Merge down - twice
Drop Shadow: 0 0 75 20.00
Step 6
Copy [Decor M]
Paste as a new layer
Layers - Arrange - Move Down
Blend mode: Darken
You can adjust the color using Adjust - Hue and Saturation - Colorize, or
another method of your choice
Step 7
Activate the Raster 1 layer
Layers - Duplicate
Effects - Plugins - Mura's Meister - Perspective Tiling
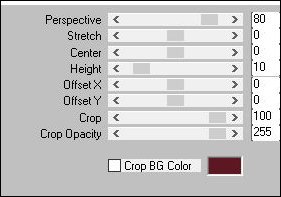
Adjust - Brightness and Contrast - Curves
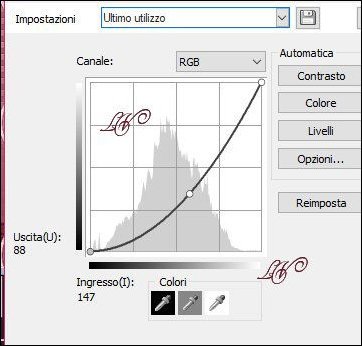
Drop Shadow: 0 0 100 30.00 (using the background color)
Layers - Arrange - Bring to top
Step 8
Copy [1069 D-AI-LV26]
Paste as a new layer
Image - Resize: 70% (ensure "all layers" is unchecked)
Position it at the bottom left—refer to the example
Drop Shadow: 0 0 75 20 (black)
Adjust - Sharpness - Sharpen
Copy the title [Maryland]
Paste as a new layer
Position it at the top center
Copy the tube [Decor M.1]
Paste as a new layer
If you find it necessary, colorize it using your preferred method
Drop Shadow: 0 0 90 10 (black)
Step 9
Add border - 1px - black
Copy
Add border - 2px - foreground color
Add border - 4px - background color
Add border - 2px - foreground color
Selections - Select all
Add border - 25px - white
Selections - Invert
Paste the image currently in your clipboard into the selection
Adjust - Blur - Gaussian Blur: 20
Step 10
Add a new layer
Copy [CorniceM]
Paste it onto the Selection
Change the color if you deem it necessary
Blend Mode: Overlay
Selections - Invert
Drop Shadow: 0 0 100 25 black
Select none
Step 11
Border - 2px - foreground color
Border - 4px - background color
Border - 2px - foreground color
Selections - Select all
Border - 25px - white
Effects - Image Effects - Seamless Tiling - Default
Selections - Invert
Adjust - Blur - Gaussian Blur: 30
Effects - 3D Effects - Inner Bevel
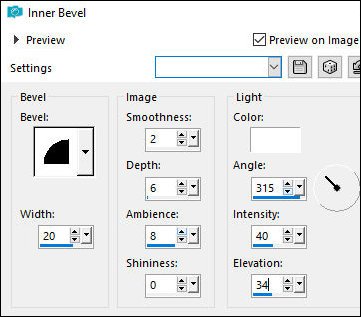
Effects - Plugins - Eye Candy 5: Impact - Glass - Preset [clear]
Select none
Border - 1px - black
Add credits
Resize: 950px (width)
Merge all
Save as JPEG

|