|

This tutorial is from Lady Valella who I thank for
letting me translate their tutorials.

Original here

Tubes

Material

My images:
Here
Plugins
Mehdi - Alf's Border FX - Mura's
Meister
You can find these plugins on the websites of:
Renée
Cloclo
You can also find this tutorial translated into these languages:
(Click on the flag)


|
Notes:
> Open the material / Duplicate (shift+d) / Close the originals
> Change the blend mode of the layers to match their colors.
> In older versions of PSP, Mirror Horizontal=Mirror / Mirror Vertical=Flip /
Pick tool=deformation
> Open the masks in psp and
minimize
>Adjust the size of the tubes according to your images
|
SCRIPT
Required Images
1 female tube
1 landscape
1 or 2 decorative tubes (or use those from the material)
*
Step 1
Open the alpha file [baseAlphaDreamings] / Duplicate (shift+d) /
Close the original
Colors: Foreground: #6A0306 - Background: #FEFF80
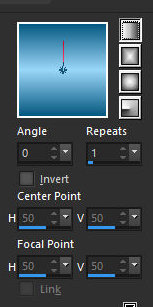
Prepare a Linear gradient
Selections / Load selection from
disk / Selection [#1 LV2_23]
Paint the selection with the gradient
Select none
Step 2
Effects / Geometric Effects / Circle - Transparent
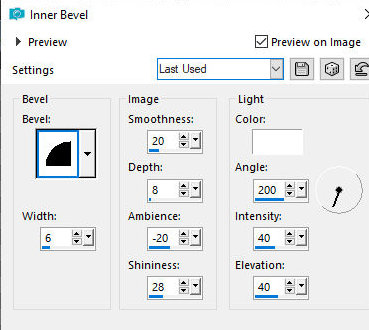
Effects / 3D Effects / Inner Bevel
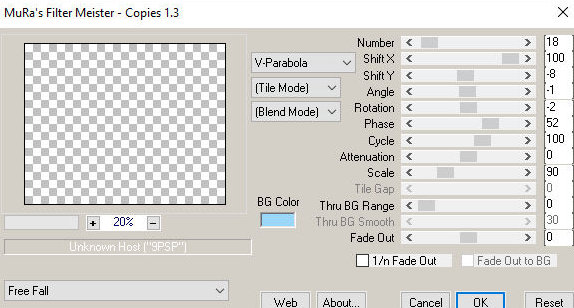
Effects / Plugins / Mura's meister / Copies
Layers / Duplicate
Image / Mirror / Mirror Horizontal
Merge down
Objects / Align / Top (move a little higher until it meets the edge)
Drop Shadow: 1 2 80 10,00 Black
Adjust / Sharpness / Sharpen
Step 3
Layers / Duplicate
Image / Mirror / Mirror Vertical
Step 4
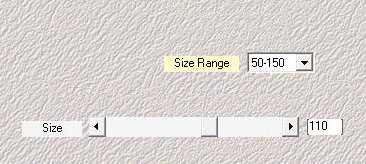
Add a new layer
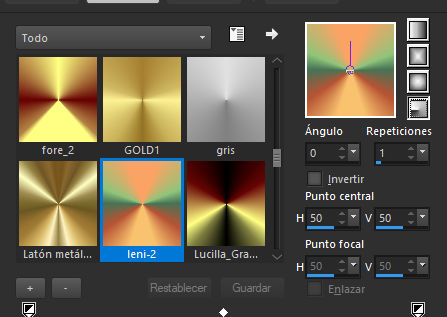
Activate the foreground and select the [leny2] gradient provided
in the material and configure as shown in the screenshot
Paint the layer with the gradient
Effects / Plugins / Mehdi / Sorting Tiles
Effects / Edge Effects / Enhance
Effects / Plugins / Unlimited 2 / Alf's Border FX / Border Fade II
Effects / Plugins / Unlimited 2 / Alf's Borders FX / Mirror Bevel
Layers / Arrange / Send to Bottom
Step 5
Activate the background layer
Layers / Duplicate
Effects / plugins / Mehdi / Weaver
Effects / Edge Effects / Enhance
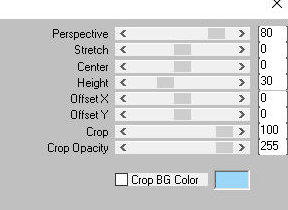
Effects / plugins / Mura's meister / Perspective Tiling
Activate the Magic Wand (tolerance: 0/Feather+10) and click on the
transparent area.
Press Delete 4 times. Select none.
Step 6.
Add a new layer.
Paint with black.
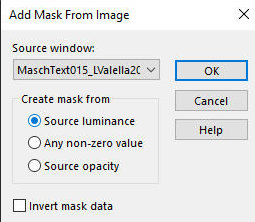
Layers / New Mask Layer / From
image / Mask [MaschText015_LValella20]
Merge Group.
Effects / Edge Effects / Enhance.
Opacity: 80%.
Step 7.
Copy the landscape tube
[2109-MP(A.I.@LValella24)].
Paste as a new layer.
Blend Mode: Lighten.
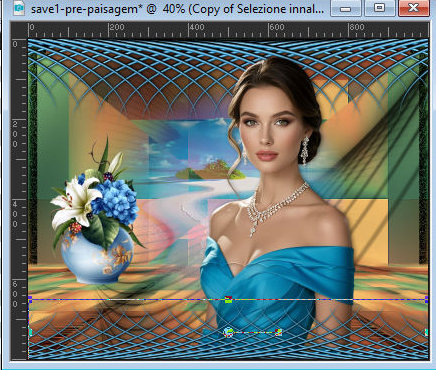
Copy the main tube [0141-TD(A.I.LValella25)].
Paste as a new layer.
osition as per model.
Drop Shadow: 0 4 50 15 black.
Step 8.
Copy the [cartoline] tube (I didn't
include it in my version).
Paste as New layer
Position as per model
Copy the tube [TubeA.I.LValellaFiori]
Paste as a new layer
Position as per model
Step 9
Activate the ruler: View/ rulers
Activate the top layer
Activate the Pick Tool / Click on the center node and drag down to a
height of 650px
Step 10
Merge Visible
Copy (will be in memory)
Border: 3px / #ffff80
Selections / Select all
Border: 25px / white
Selections / Invert
Paste the image from memory into the selection
Adjust / Blur / Gaussian Blur: 4
Select none
Border: 3px / #ffff80
Adjust / Sharpness / Sharpen
Image / Resize: 1000px (width)
Copy [title]
Paste as a new layer
Position as per model
Place the Signatures
Merge all
Save as jpeg

|