|
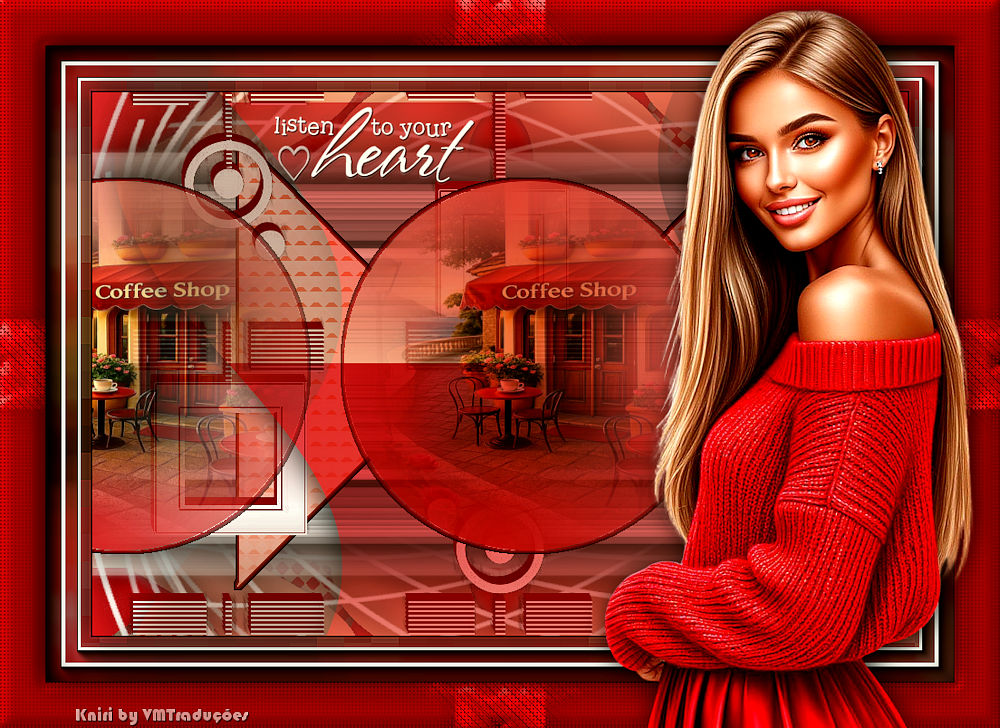
(Minha versão)
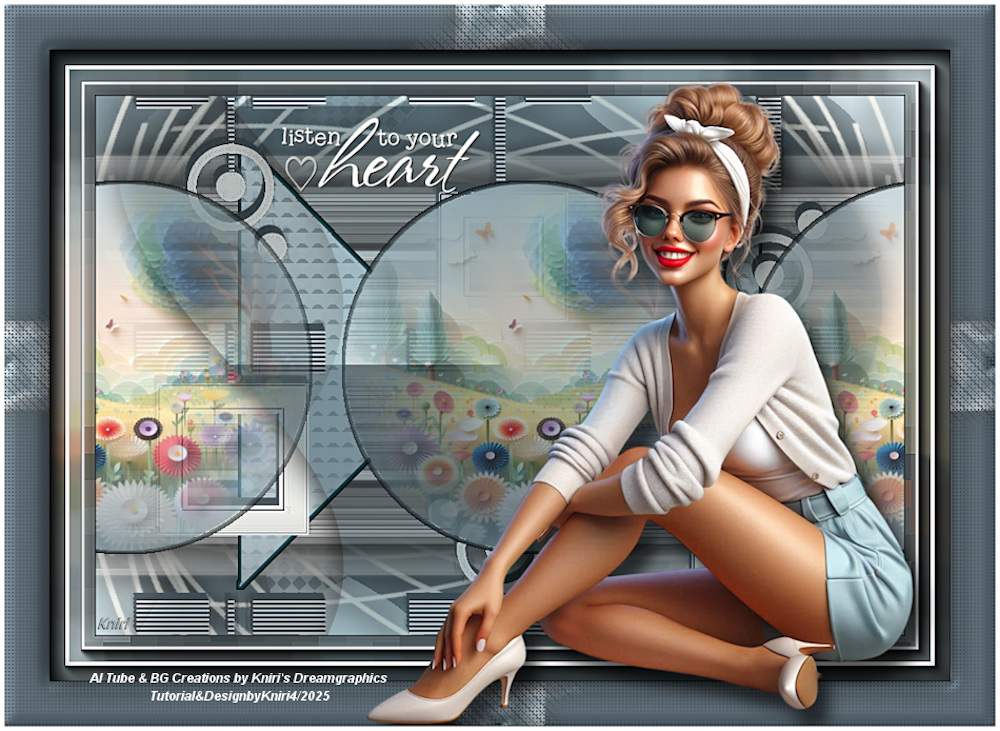
(Imagem original de Kniri)

This tutorial is from Kniri who I thank for
letting me translate their tutorials.
Original here

Tubes

Material
Plugins
Unlimited 2 - Eye Candy 5: Impact -
AP [Distort] - AAA Frames
You can find these plugins on the websites of:
Renée
Cloclo
You can also find this tutorial translated into these languages:
(Click on the flag)


|
Notes:
> Open the material / Duplicate (shift+d) / Close the originals
> Change the blend mode of the layers to match their colors.
> In older versions of PSP, Mirror Horizontal=Mirror / Mirror Vertical=Flip /
Pick tool=deformation
> Open the masks in psp and
minimize
>Adjust the size of the tubes according to your images
|
SCRIPT
Images:
1 female tube
1 misted landscape tube
**
Material:
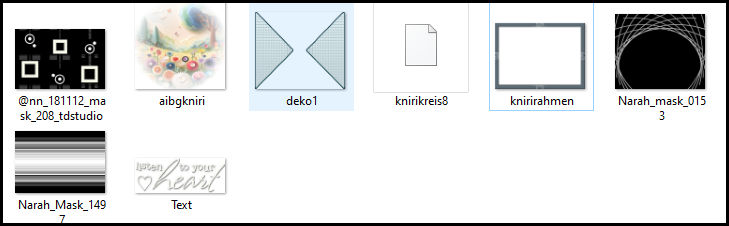
**
My images
**
Save the selection [kinirikreis8] in the PSP Selections folder
**
#1
1. Colors: foreground:#e9f9fd - #768891
2. Prepare a Radial gradient
print
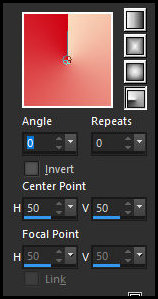
3. Open a new transparent image with 900x600px
4. Paint with the gradient
5. Layers / Duplicate
6. Image / Free Rotate - left/90
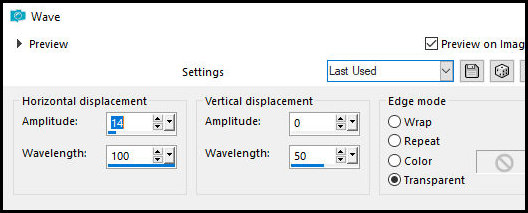
7. Effects / Distortion Effects / Wave
print
#2
8. Layers / Duplicate
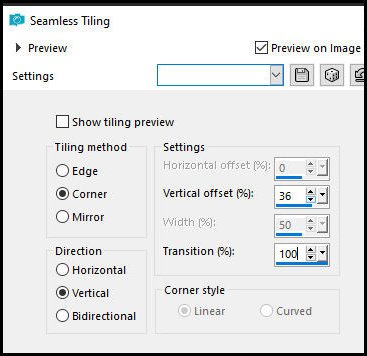
9. Effects / Image Effects / Seamless Tiling
print
10. Drop Shadow: 0 0 80 45 black
10-1 Blend mode: multiply / Opacity: 80%
#3
11. Activate the middle layer (copy of raster) 1)
12. Selections / Load selection from disk / Selection [knirikreis8]
13. Selections / Promote selection to layer
15. Copy [aibgkniri] or another background of your choice
16. Paste into selection
17. Effects / 3D Effects / Chisel - background color
print
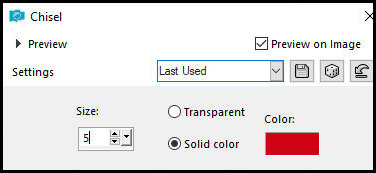
18. Select none
#4
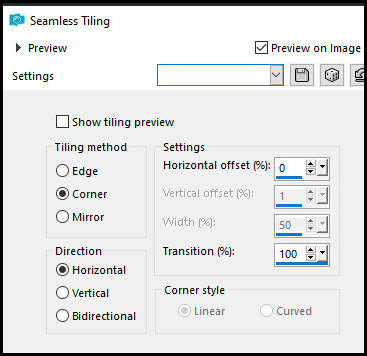
19. Effects / Image / Effects / Seamless Tiling
print
#5
21. Activate the Copy of Raster 1 layer
22. Effects / Plugins / Unlimited 2 / BKG Designer sf10 III / VMT
Instant Tile [179/222]
23. Effects / Geometric Effects / Skew
print
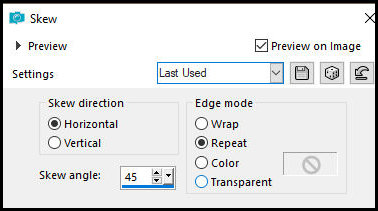
24. Drop shadow same as above
#6
25. Layers/Duplicate
26. Image / Mirror / Mirror Horizontal
27. Effects / Plugins / Unlimited 2 / BKG Designer sf10 III / VMT
Instant Tile [138/76]
28. Merge Down
29. Add new layer
30. Paint with white color
31. Layers / New Mask Layer / From Image / Mask [@nn 181112 mask 208
studio]
32. Merge group
33. Effects / User Defined Filter / Emboss 3
34.Adjust/Sharpness/Sharpen
34-1 Put color 2 in the background again
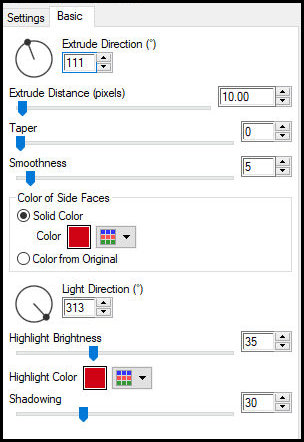
35. Effects/ Plugins / Eye Candy 5: Impact / Extrude - background
color
print
#7
36.Activate the Raster 1 layer
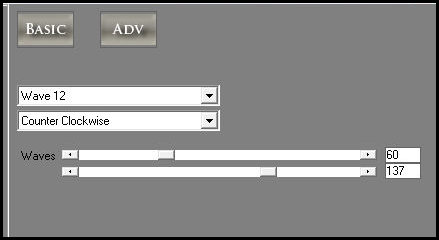
37.Effects / Plugins / AP Distort / Wavy City
print
#8
38.Activate the Copy of Raster 1 layer
39.Add new layer
40.Paint with white color
41.Layers / New Mask layer / From Image / Mask [Narah Mask 1497]
42.Merge group
43.Adjust / Sharpness / Sharpen More
44.Drop Shadow same as above
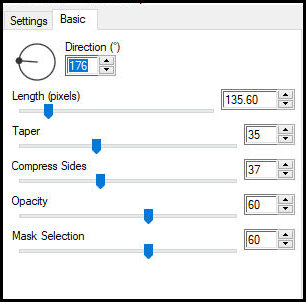
45.Effects / Plugins / Eye Candy 5: Impact / Motion Trail
#9
46.Stay on the layer
47.Copy [deko1]
48.Paste as a new layer
49.Selections / Load selection from disk / Selection [knirikreis8]
50.Press Delete
51.Select none
52.Activate the Copy of Raster 1 layer
53.Add a new layer
54.Paint with white
55.Layers / New Mask Layer / From Image / Mask [Narah Mask 0153]
56.Merge group
57.Drop Shadow as before
58.Layers / Duplicate
59.Image / Mirror / Mirror Vertical
60.Layers / Duplicate
61.Merge down - 2 TIMES
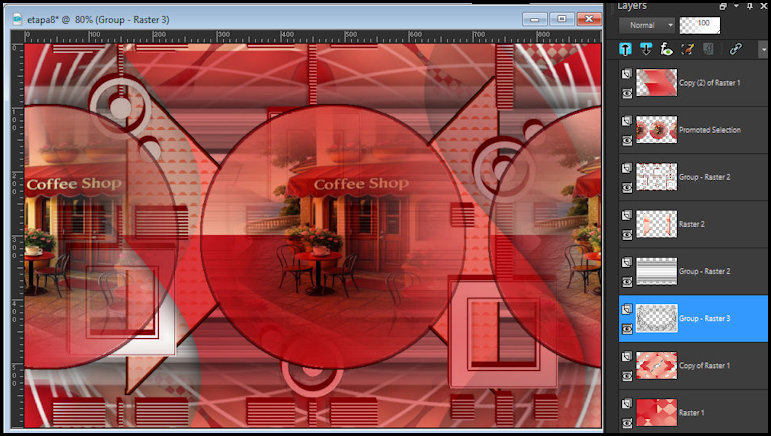
62.The image will look like this:
#10
63.Image / Add borders / 2px / black
64.Selections / Select all
65.Copy (will be stored in memory)
66.Image / Add borders / 50px / white
67.Selections / Invert
68.Paste into the selection
69.Adjust / Blur / Gaussian Blur: 15.
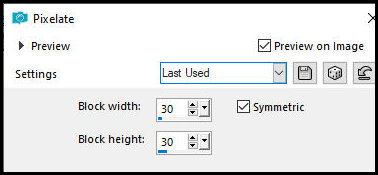
70.Effects / Distortion Effects /
Pixelate
print
71.Adjust / Sharpness / Sharpen more
#11.
72.Effects / Plugins / AAA Frames /
Photo Frame
print
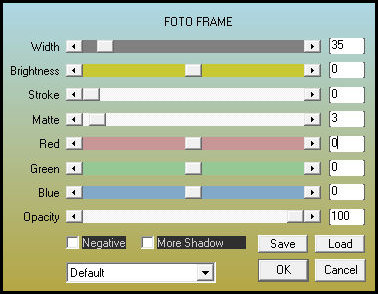
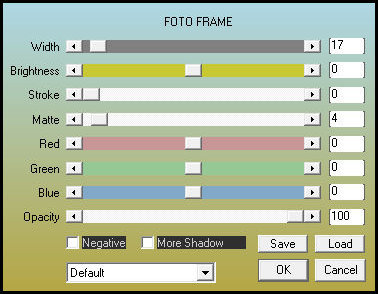
73.Effects / Plugins / AAA Frames / Photo Frame with this other
configuration
print
74.Selections / Invert
75.Drop Shadow as before
76.Select none
#12.
77.Image / Add borders / 50px /
white
78.Select this border with the Magic Wand
79.Copy [knirirahmen]
80.Paste into the selection
81.Drop Shadow as before
82.Selections / Invert
83.Drop shadow as before
84.Select none
85.Copy [text]
86.Paste as a new layer
87.Position on top as per the model
88.Copy your main tube
89.Paste as a new layer
90.Adjust the size
91.Move the tube to the right as per the model
92.Drop shadow of your choice
93.Add the credits
94.Image / Add borders / 5px / white
95.Image / Resize: 900px (width)
96.Adjust / Sharpness / Unsharp mask [2 30 3 unchecked]
97.Save as jpeg

|