|
You will need:
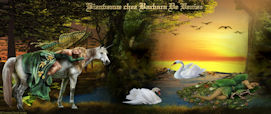
1 female tube
1 landscape jpg image
1 misted landscape (formed with the jpg image)
* Step 1
Original colors: foreground: #b5c9df - Background:
#365972
[colors]
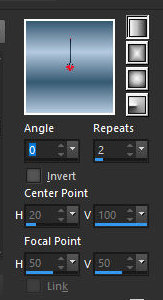
Step 2
Prepare a Linear gradient
[0 2 des]
Open the alpha channel file [hiver magique]/Duplicate (shift+d)
/ Close the original
Copy the jpg image [fond]
Paste as a new layer
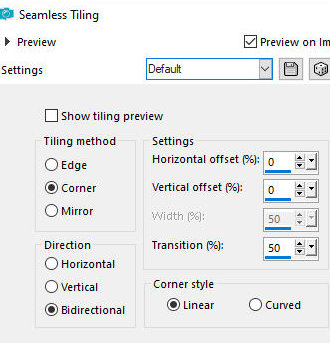
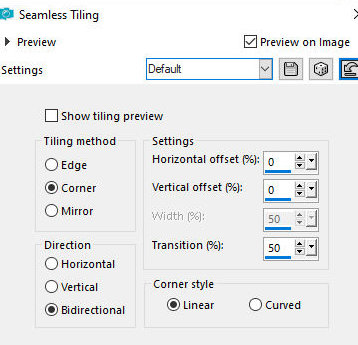
Effects / Image Effects / Seamless Tiling
[default]
Effects / Edge Effects / Enhance
Layers / Properties / Opacity: 35% (or according to your
image)
Merge visible
Step 3
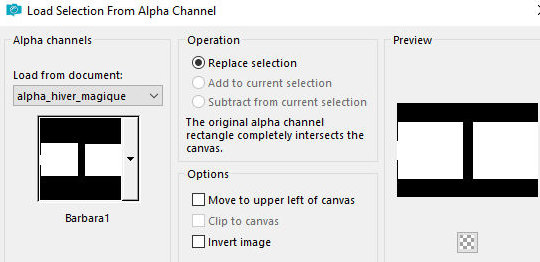
Add a new layer
Selections / Load selection from alpha channel /
Selection [barbara1]
[sel barbara1]
Paint the selection with the gradient
Selections / Modify /Contract: 30
[30]
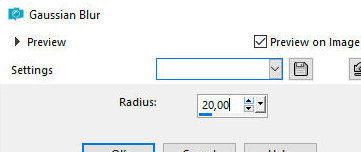
Adjust/Blur/Gaussian Blur: 20
[20]
Step 4
Effects / Plugins / Textures / Grain
[35 55 tamisé]
Selections / Promote selection to
layer
Select none
Step 5
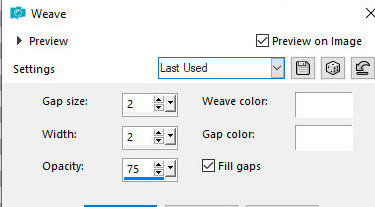
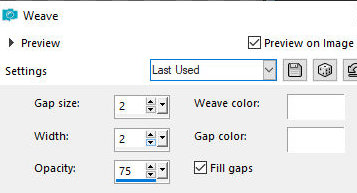
Effects / Texture Effects / Weave
[2 2 75 white white x]
Step 6
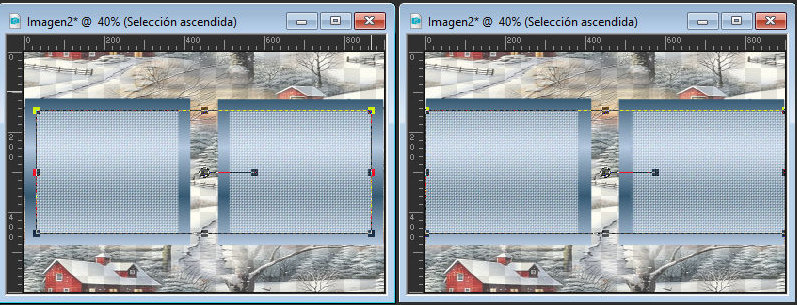
Using the Pick Tool, stretch each side of the image to
the edge as shown in the print
[print]
Select none
Merge down
Effects / Plugins / Simple / 4 way average
[print]
Effects / Plugins / Simple / Pizza
Slice Mirror
Effects / Edge Effects / Enhance
Step 7
Layers/Duplicate
Effects / plugins / Simple / 4 way average
[print]
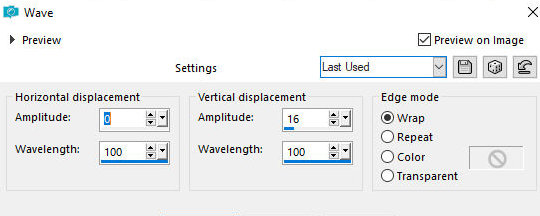
Effects / Distortion Effects / Wave
[0 100 16 100 wrap]
Image / Mirror / Mirror Vertical
Effects / Image Effects / Seamless Tiling - same as
above
[print]
Layers / Properties / Blend mode:
Luminance (L)
Step 8
Activate the layer above
Add new layer
Paint with the background color
Layers / New Mask layer / From image / Mask [Narah-mask-0629]
Effects / Edge Effects / Enhance
Layers/Duplicate
Merge group
Drop Shadow: 0 0 25 0 black
Step 9
Copy the tube [Deco]
Paste as new layer
Layers / Properties / Blend mode: Luminance
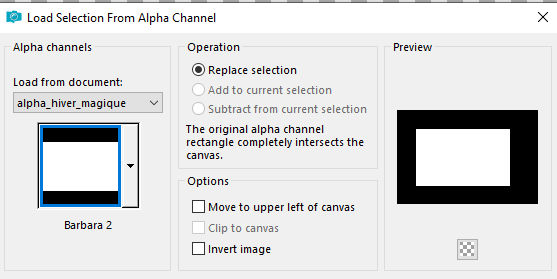
Selections / Load selection from alpha channel /
Selection [barbara 2]
[sel barbara2]
Add new layer
Copy tube misted landscape
Paste into selection
Select none
Layers / Duplicate
Merge down
Step 10
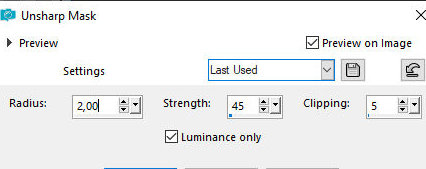
Adjust/Sharpness/Unsharp Mask
[2 45 5x]
Merge all
Layers / Promote background to layer
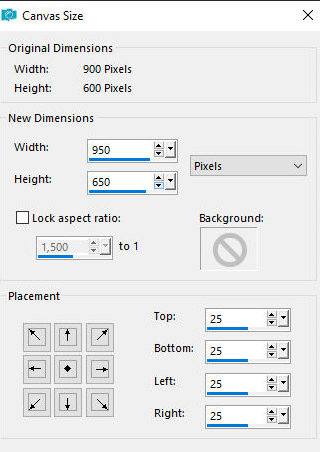
Image/Canvas Size
[950x650 25 25 25 25(900x600)]
Step 11
Add new layer
Layers / Arrange / Move Down
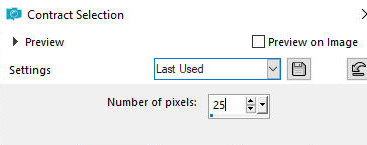
Selections / Select all
Selections/Modify/Contract:25
[25]
Selections/Invert
Paint with the gradient
Effects / Texture Effects / Weave - same as above
[same weave]
12Selections / Invert
Drop Shadow: 0 0 80 25 black
Select none
Merge all
Border: 3px / background color
Step 12
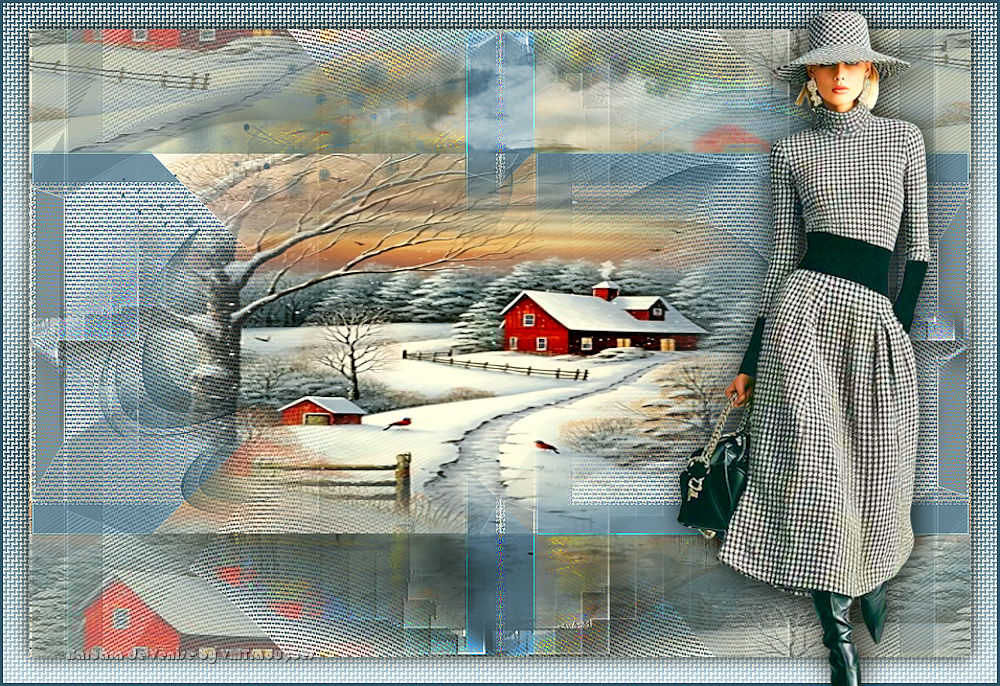
Copy the female tube [Femme-Cloclo]
Paste as New layer
Adjust the size
Position it to the right as per the model
Drop Shadow: 0 0 65 30 black
Add the signatures
Merge all
Image / Resize: 1000px (width)
Save as jpeg |