|
Save the
selections to the PSP Selections folder.
*
For this tutorial you will need:
1 main tube
1 JPG image for the foreground (floral, abstract, etc.)
*
Set the color #ffffff to the background
Open a new transparent image measuring 850x550px
Selections / Select all
Copy your JPG image (background)
Paste into the selection
Select none
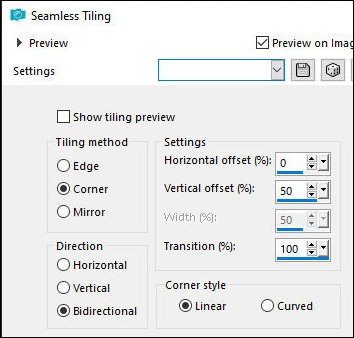
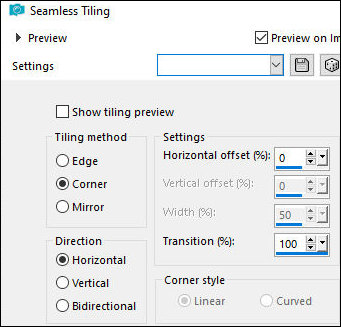
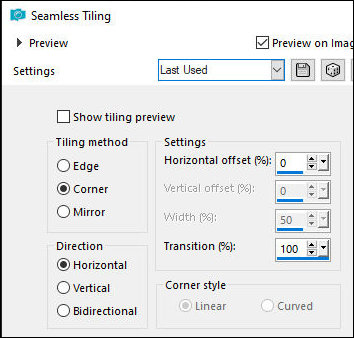
Effects / Image Effects / Seamless Tiling
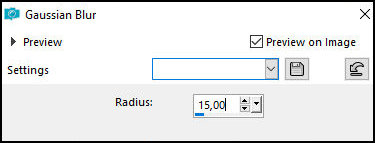
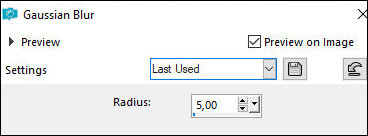
Adjust / Blur / Gaussian Blur: 15
Layers / Duplicate
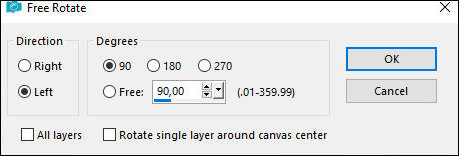
Image / Free Rotate [left/90]
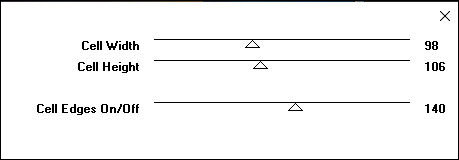
Effects / Plugins / Toadies / Weaver
Effects / Edge Effects / Enhance
Drop Shadow: 10 10 85 20 black
Repeat the Drop Shadow with negative V and H
Add a new layer
Selections / Select all
Copy your JPEG image
Paste into the Selection
Keep the selection
Layers / Arrange / Move Down
Layers / Properties / Blend Mode: Luminance
Activate the top layer - Copy of Raster 1
Layers / Properties / Blend Mode: Multiply
Merge Visible
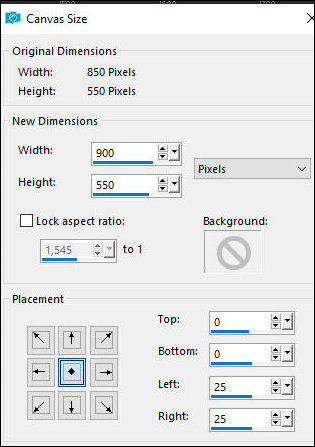
Image / Canvas Size [900x550 0 0 25 25]
Effects / Image Effects / Seamless Tiling
Drop Shadow: 0 0 85 20 black
Select none
Add a new layer
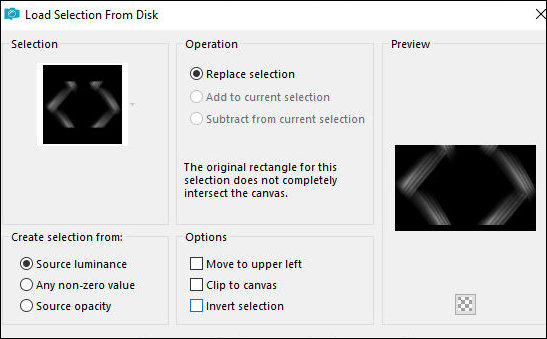
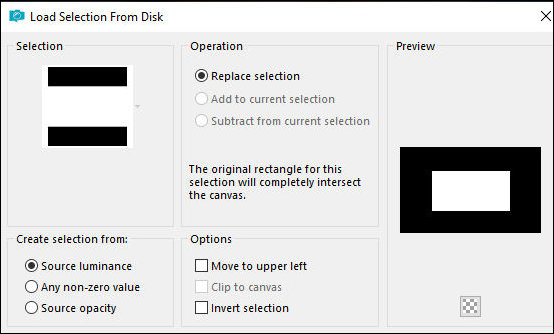
Selections / Load selection from disk / Selection
[Avina1-Tsha]
Paint the selection with white twice
Select none
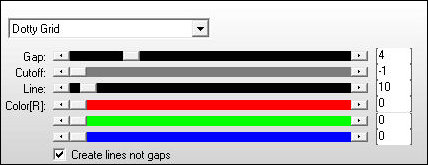
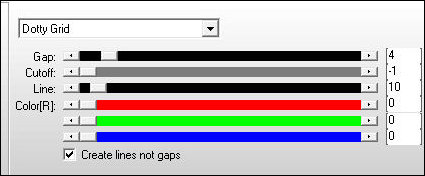
Effects / Plugins / AP [Lines] / Silver Lining
Layers / Properties / Blend Mode: Dodge
Layers / Duplicate
Choose a light color from your image and place it in the
foreground
Selections / Load selection from disk / Selection
[Avina2-Tsha]
Add new layer
Paint the selection with the foreground color
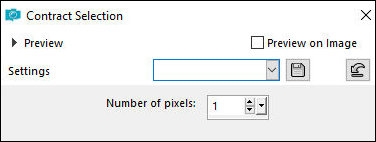
Selections / Modify - Contract: 1
Copy your jpeg image
Paste into selection
Select none
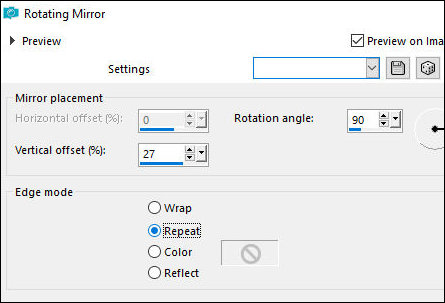
Effects / Reflection Effects / Rotating Mirror
Effects / Image Effects / Seamless Tiling
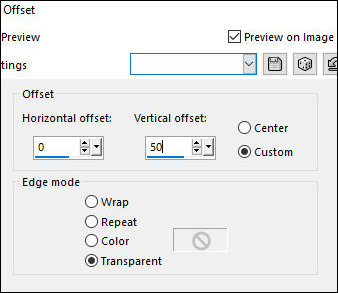
Effects / Image Effects / Offset [0/-50]
Drop Shadow - same as above
Layers/Duplicate
Image / Mirror / Mirror Vertical
Merge Down
Layers / Properties / Blend Mode: Soft Light
Layers/Duplicate
Copy the tube [deco-stars]
Paste as new layer
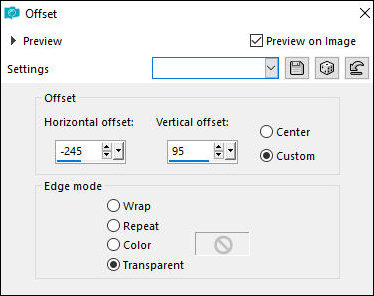
Effects / Image Effects / Offset [-245/95]
Layers/Duplicate
Image / Mirror / Mirror Horizontal
Image / Mirror / Mirror Vertical
Merge Down
Layers / Properties / blend Mode: Dodge
Add new layer
Paint the Layer with the foreground color
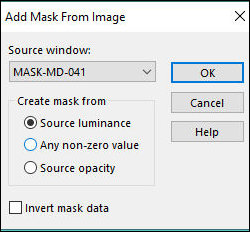
Layers / New Mask Layer / From Image / Mask [MASK-MD-041]
Merge group
Layers / Properties / Blend Mode: Soft Light
Layers / Duplicate
Choose a dark color and place it in the background
Border: 2px / background color
Copy (will stay in memory)
Border:
10px / white
2px / background color
Selections / Select all
Border: 50px / white
Selections / Promote selection to layer
Drop Shadow: 0 0 85 20 black
Selections / Invert
Activate the background layer
Paste the image that is in memory into the selection
Stay on the layer
Adjust / Blur / Gaussian Blur: 5
Effects / Plugins / AP [Lines] / SilverLining
Add a new layer
Paint the selection with the foreground color
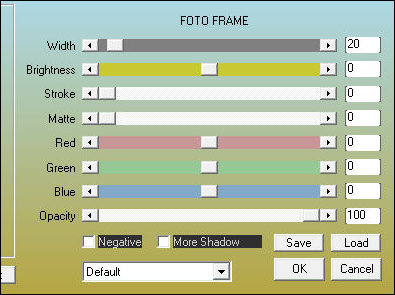
Effects / Plugins / AAA Frames / Photo Frame
Layers / Properties / Blend mode: Multiply
Select none
Activate the top layer - Promoted Selection
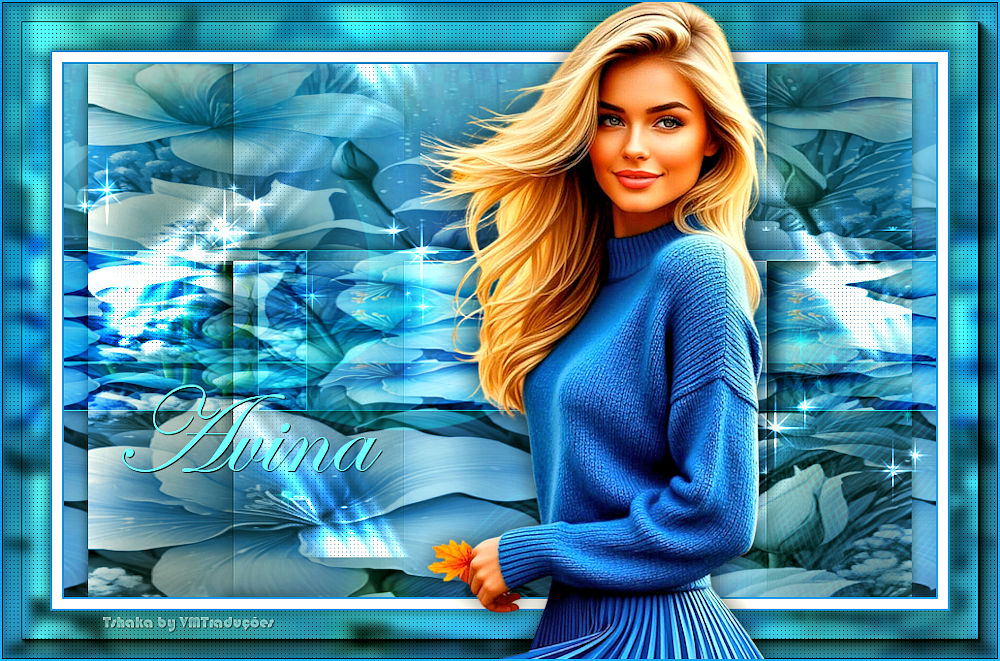
Copy the main tube
Paste as a new layer
Drop Shadow of your choice
Choose a font and configure it as you prefer
Enter the name "Avina" or another of your choice
Right-click the text layer
Select Convert to Raster Layer
Position as you prefer
Border: 2px / background color
Place the signatures
Merge all
Save as a jpeg |