|

This tutorial is from Tetê Samuel who I thank for
letting me translate their tutorials.

Original here
Tubes

Material

Many thanks to the creators of
these materials
Plugins
Unlimited 2 - FF Gallery G - Mura's
Seamless - Mehdi - Cybia - AAA Frames
You can find these plugins on the websites of:
Renée
Cloclo
You can also find this tutorial translated into these languages:
(Click on the flag)


SCRIPT
Notes:
> Open the material / Duplicate (shift+d) / Close the originals
> Change the blend mode of the layers to match their colors.
> In older versions of PSP, Mirror Horizontal=Mirror / Mirror Vertical=Flip /
Pick tool=deformation
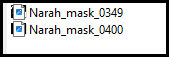
> Open the masks in psp and
minimize
>Adjust the size of the tubes according to your images
*
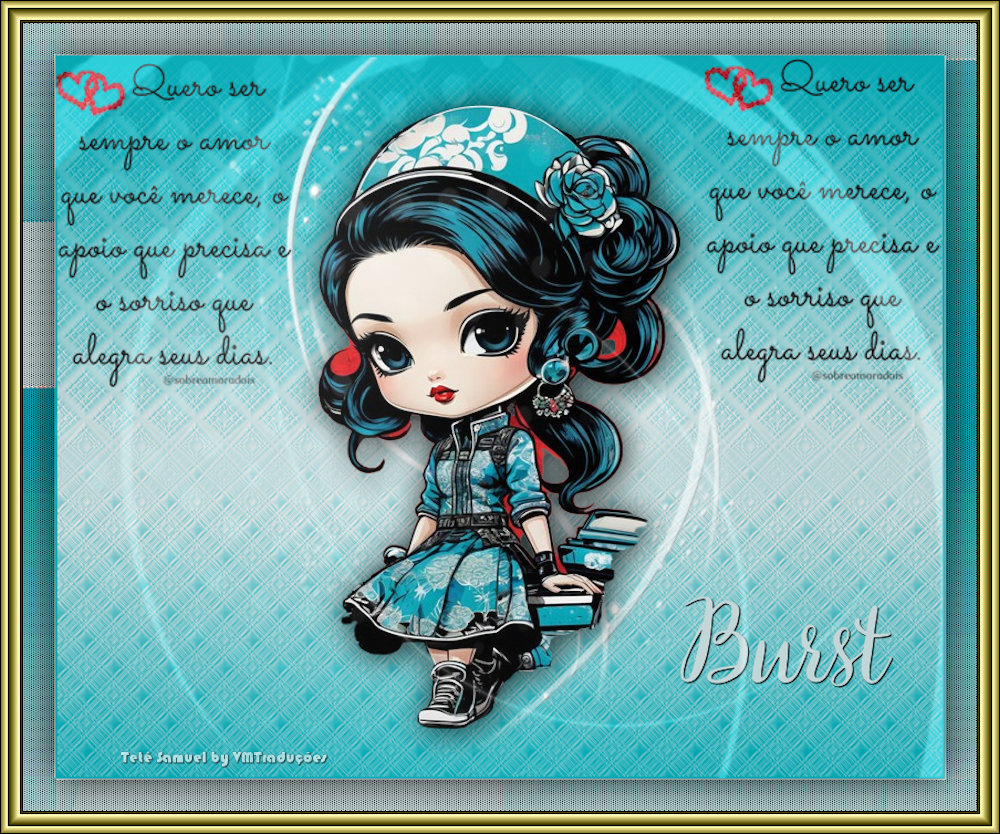
Open a new transparent image
measuring 800x650px
Choose two colors from your tube, a dark one for the foreground and
a light one for the background
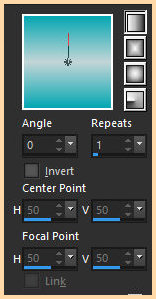
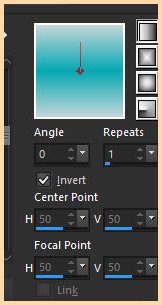
Prepare a Linear gradient
Paint the image with this gradient
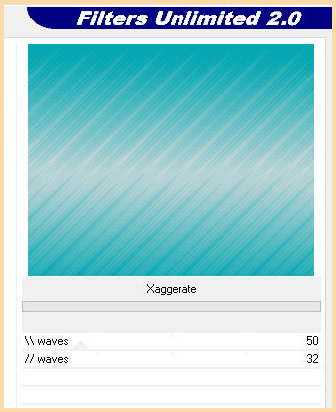
Effects - plugins - Unlimited 2 - FF Gallery G - Xaggerate
Layers - Duplicate
Image - Mirror - Mirror Horizontal
Layers - Properties - Blend Mode: Lighten
Merge Down
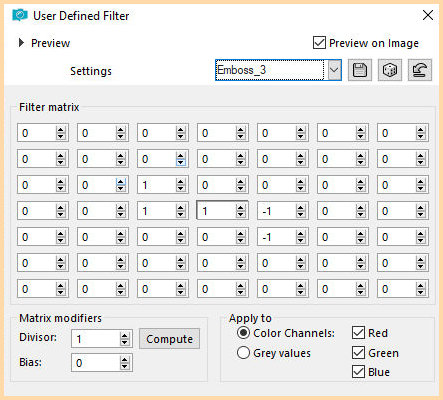
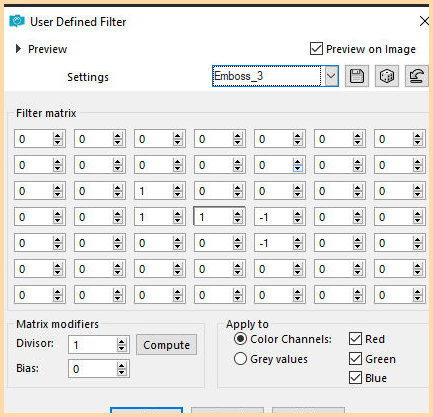
Effects - User Defined Filter - Emboss 3
Add new layer
Paint the layer with white color
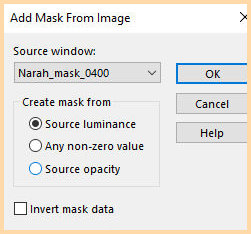
Layers - new Mask Layer - From Image - Mask [Narah_Mask_0400]
Merge Group
Effects - plugins - Mura's Seamless - Emboss at alpha - default
Image - Add borders - 2px -
foreground color
Selections - Select all
Image - Add borders - 50px - white
Selections - Invert
Add new layer
Paint the selection with the initial gradient - INVERT MARKED
Effects - Plugins - Mehdi - Sorting
Tiles
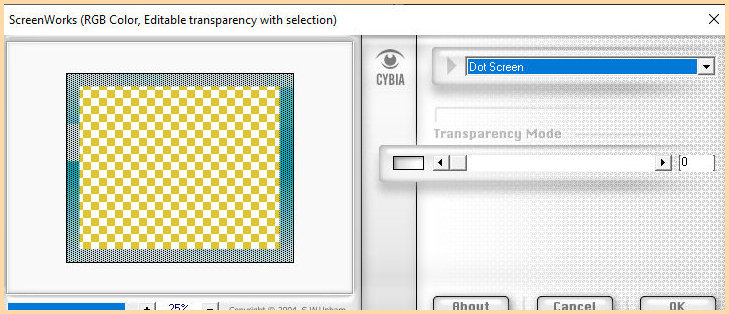
Effects - plugins - Cybia -
Screenworks - Dot Screen
Effects - User Defined Filter -
Emboss 3
Selections - invert
Drop shdow: 0 0 80 50 black
Select none
Copy the text and paste as a new layer
Position along the left edge - see the model
Layers - Duplicate
Position along the right edge
Merge Visible
Copy your main tube and paste as a new layer
Adjust the size
Drop Shadow to taste
Position as you prefer
Add a new layer
Choose a font - Type "Burst" - Configure (size, color and position)
Layers - Convert to rater layer
Merge Visible
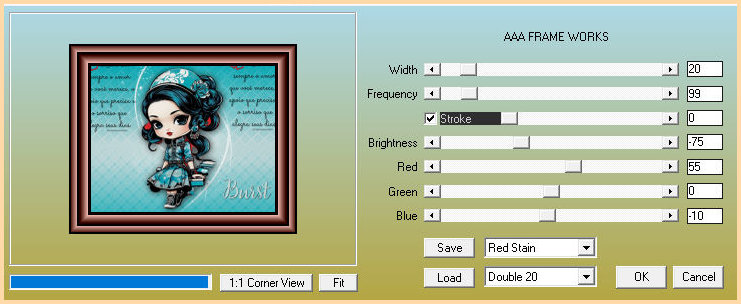
Effects - Plugins - AAA Frames - Frame Works (in Red, Green, Blue
put the RGB values of the color you want) choose)
Selections - Select all
Selections - Modify - Contract: 50
Add new layer
Paint with white color
Layers - New Mask Layer - From image - Mask [Narah_Mask_0349]
Merge Group
Layers - Properties - Blend Mode: Luminance (L) - Opacity=30
Select none
Place signatures
Merge all
Save as jpeg
*

|