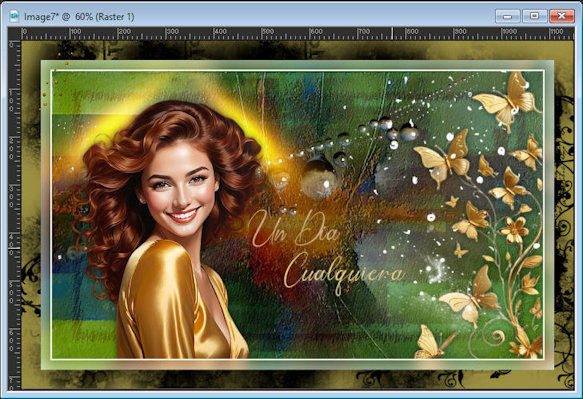
|
1
Set the color #326e12 to the foreground and the color
#2f525d to the background.

Open the mask [1250181972_nikita_masque] / Duplicate (shift+d)
/ Close the original.
Activate the Change Color tool.
Click on the light part of the image with the Change
Color tool using the color #2f525d (background) (or
another color of your choice).
2
Open the mask again [1250181972_nikita_masque] /
Duplicate (shift+d) / Close the original.
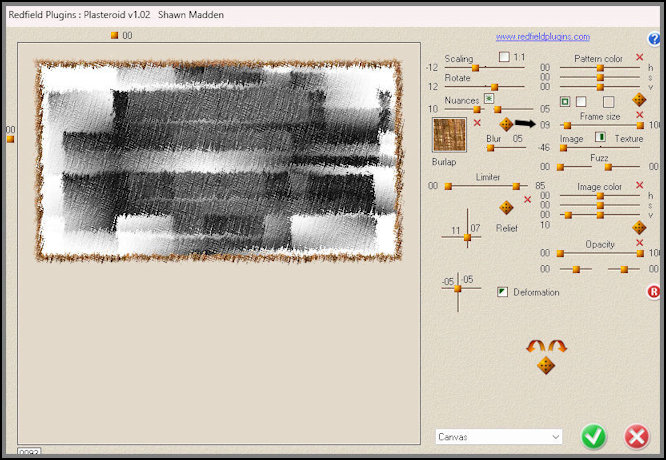
Effects / Plugins / Redfield / Plasteroid - Preset [coarse]
- Frame Size: 9.
Copy and return to your work.
Paste as a new layer.
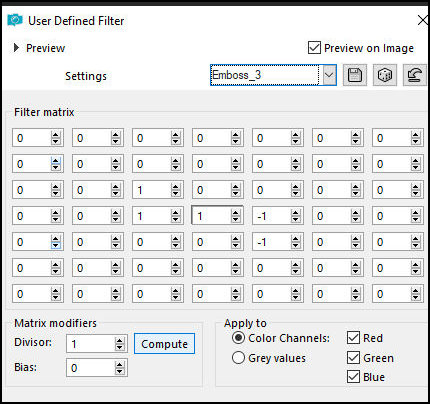
Effects / User Defined Filter / Emboss 3
Layers / Properties / Blend Mode: Soft Light (or another
according to your image).
3
Copy the mask. [1250181886_nikita_masques]
Paste as a new layer
Activate the Change Color tool and apply by
double-clicking, using the foreground color
Layers / Properties / Blend Mode: Overlay
4
Add a new layer
Selections / Select all
Copy the image [background-1]
Paste into the selection
Select none
Effects / User Defined Filter / Emboss3
Layers / Properties / Opacity=51%
5
Copy the image [12930422558_divers_nikita]
Paste as a new layer
Position according to the model
6
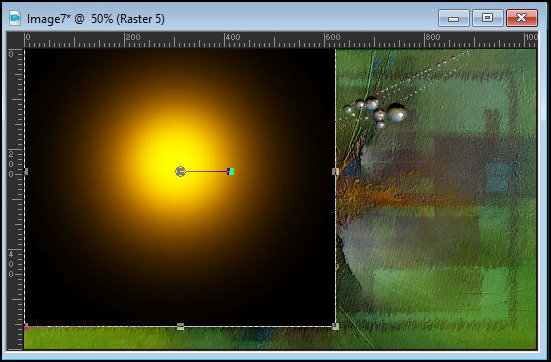
Copy the image [background-2]
Paste as a new layer
Activate the Pick Tool / Reduce and position according
to the print
7
Effects / Plugins / Unlimited 2 / BKG Designer sf10 I -
Center Mirror
[8 128]
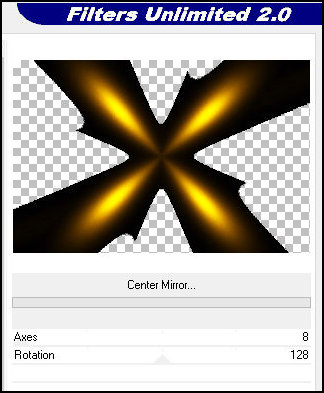
Layers / Properties / Blend Mode: Screen / Opacity=95%
Position in the upper left (At the moment, the position
doesn't really matter; when you place the main tube, you
can position it appropriately).
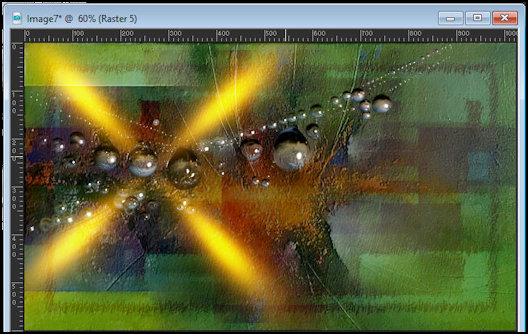
7
Copy the image [MBbackgrounds_49]
Paste as a new layer
Position in the upper right according to the template
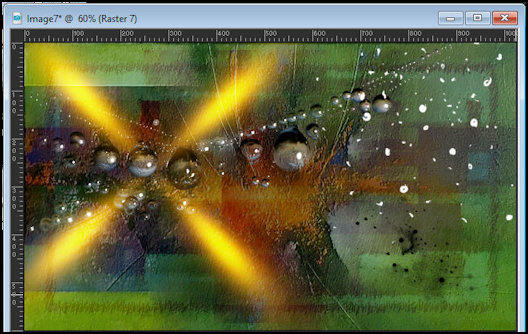
Image / Negative Image
8
Copy the image [sakura-starfield_112]
Paste as a new layer
Place in the lower right according to the template
Image / Negative Image
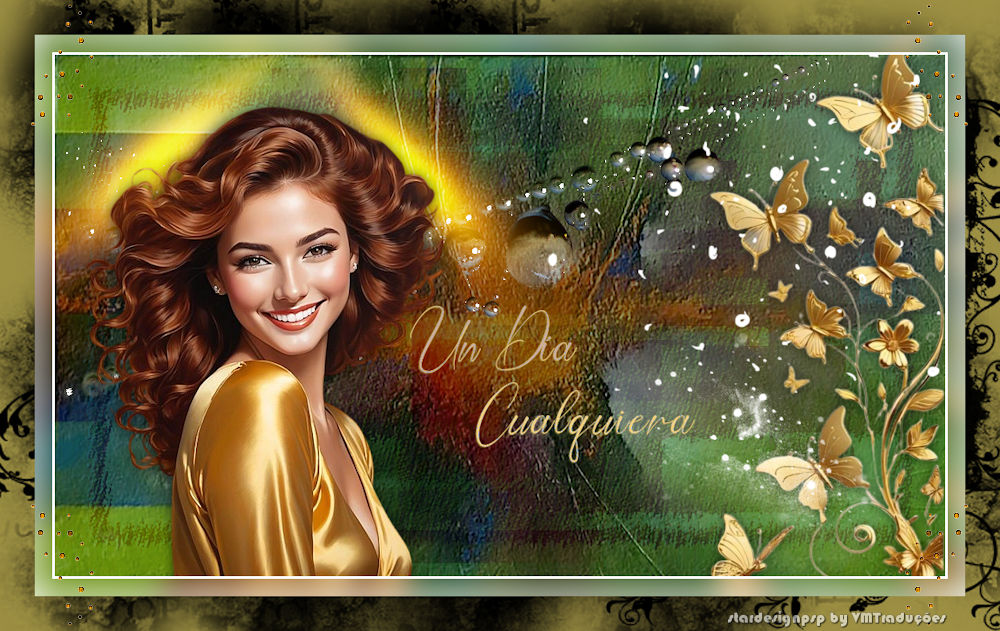
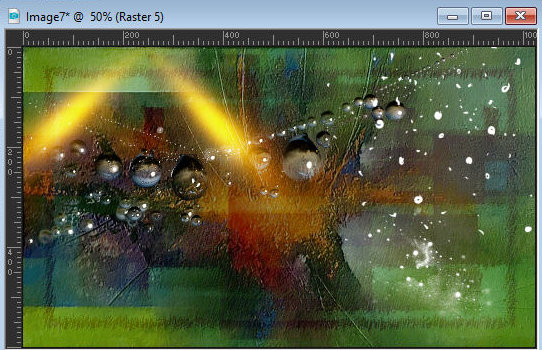
The image will look like this:
9
Copy the image [mariposas_doradas_rb]
Paste as a new layer
Image / Mirror / Mirror Horizontal
Position according to the template
Adjust / Sharpness / Sharpen
Drop Shadow: 0 0 60 20 black
10
Copy your main tube
Paste as a new layer
Image / Resize: 90% - all layers unchecked
Position according to the template
Adjust / Sharpness / Sharpen
Drop Shadow: 0 0 60 20 black
11
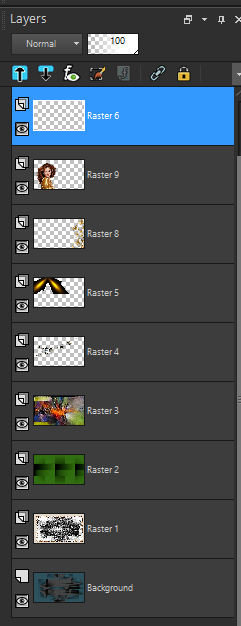
The layers will look like this:
12
Open the text [texto_undiacualquiera]
Using the Selection Tool (rectangle), select the text [Un
Dia]
Copy and paste as a new layer
Position as you see fit
Image / Negative Image
Colorize as desired
Return to the text
Select none
Select the part that says [Cualquiera]
Copy and paste as a new layer
Position below the other text according to the model
Image / Negative Image
Merge down
Drop Shadow: 1 -1 60 1 #9d9043
13
Border: 3px / white
Copy and paste as a new image. Minimize
Border: 20px / any color
Select this border with the Magic Wand (tolerance/feather=0)
Paste the minimized image into the selection
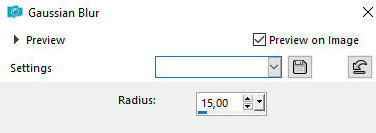
Adjust / Blur / Gaussian Blur: 15
Select none
Border: 40px / #9c3901 (or background color)
Select this 40px border
Copy the image [marco_un_dia]
Paste into the selection
Select none
14
Copy the image [puntos_dorados_2]
Paste as a new layer
Position in the upper left corner as per the template
Effects / Plugins / Simple / Top Left Mirror
Place the signatures
Merge all
Save as a jpeg |