|


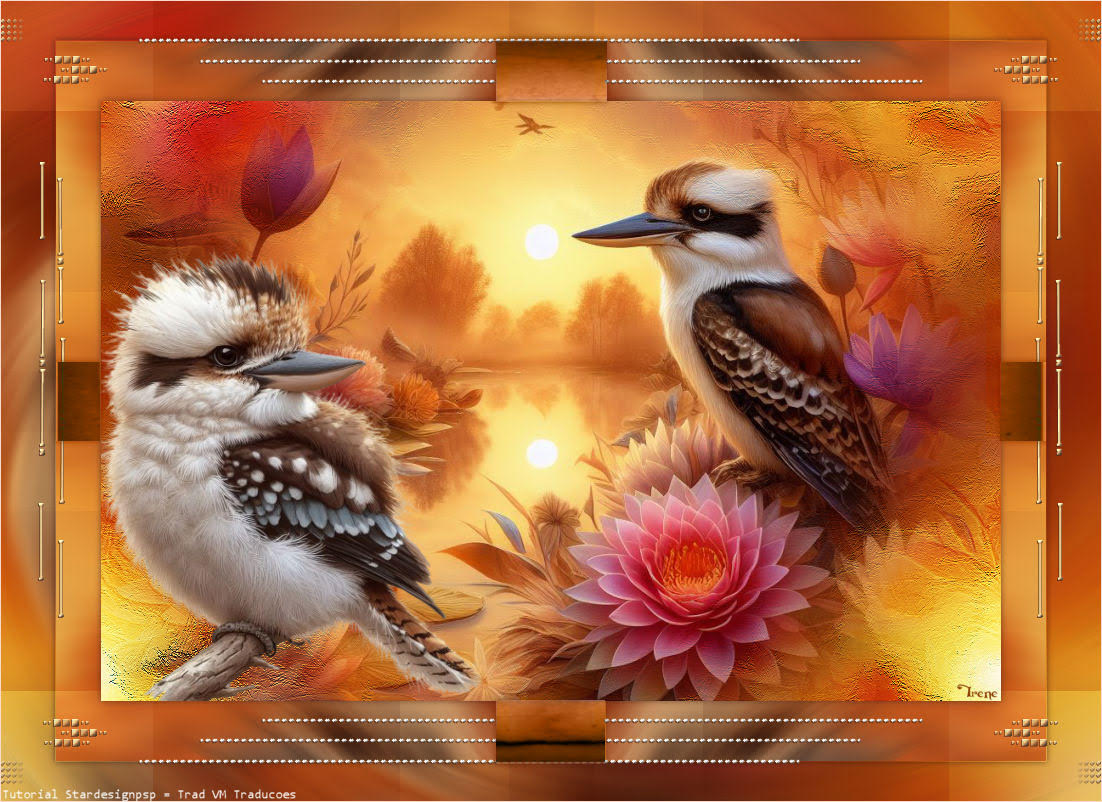
This tutorial is from Stardesignpsp who I thank for
letting me translate their tutorials.

Original here


Tubes


Material

Many thanks to the creators of
these materials
20 20 -
mask
1356-vmtubes
adornos_1.6.23
mentali_papetterie15(1)
paisaje_ariarttg2
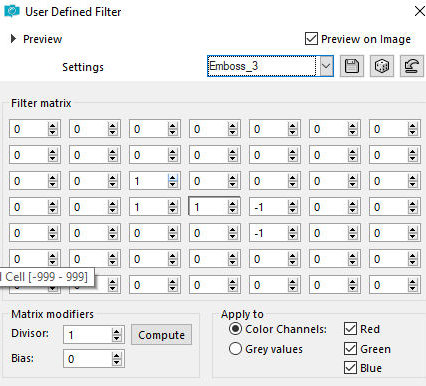
Preset_UserDefinedFilter_Emboss_3 - colocar pasta Presets
sel1_1.06_23_stella - colocar pasta Selections

Plugins
Unlimited 2/ [AFS IMPORT]_ MIRROFF
Unlimited 2/ Toadies_ What are you?

You can find these plugins on the websites of:
Renée
Cloclo

You can also find this tutorial translated into these languages:
(Click on the flag)


SCRIPT
Notes:
> Open the material / Duplicate (shift+d) / Close the originals
> Change the blend mode of the layers to match their colors.
> In older versions of PSP, Mirror Horizontal=Mirror / Mirror Vertical=Flip /
Pick tool=deformation
1
Colors used in the original version:
Open a new transparent image measuring 900x600px
Open the image [paisaje_ariarttg2] in psp
Layers / Promote Background Layer
Layers - Load mask from disk - Mask [20-20]
Merge Group
Copy the image
Return to your working image
Paste as a new layer
Do not move
2
Activate the background layer
Paint the layer with the color #3b5c41
3
Activate the layer with the landscape
Layers / duplicate
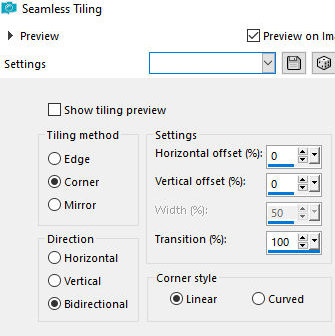
Effects - Image Effects - Seamless Tiling
Layers - Arrange - Move down
Merge down
4
Layers - duplicate
Effects - Artistic Effects - Brush Strokes -color #4e7296
Layers - Properties - blend Mode: Overlay
5
Activate the top layer - Raster 2
Objects - Align - Left (it may have (you need to slide the image a
little bit to the left)
6
Activate the background layer - Raster 1
Layers - Duplicate
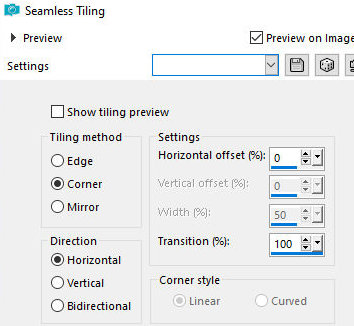
Effects - Image Effects - seamless Tiling
Effects - User Defined Filter - Emboss 3
Activate the background layer
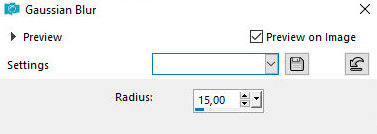
Adjust - blur - gaussian blur=15
Activate the layer above - copy of raster 1
Layers - properties - blend mode: soft light or another of your
choice
7
Copy the main tube [1356-vmtubes4] and paste it as a new layer
Layers - Arrange - bring to top
Image - resize: 75% - all layers unchecked
Position it to the right according to the model
Drop shadow of your choice
8
Edit - copy special - copy merged
Paste as a new image and minimize (we will use it later)
9
Open a new transparent image measuring 1100x800px
Selections - select all
Paste in the selection the image copied above
Select none
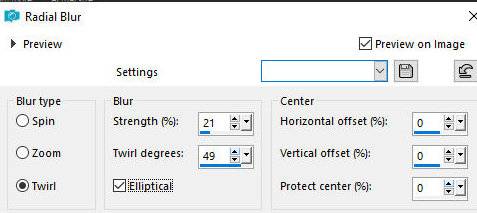
Adjust - blur - radial blur
10
Layers - duplicate
Image - resize: 90% - all layers unchecked
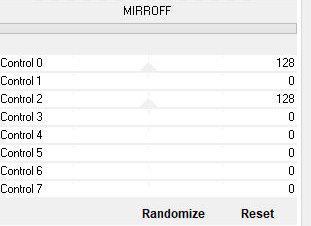
Effects - plugins - Unlimited 2 - [AFS IMPORT] - MIRROFF - default
11
Layers - duplicate
Effects - plugins - unlimited 2 - toadies - what are you?
Layers - properties - blend mode: multiply
12
Activate the layer below - copy of raster 1
Selections - select all
Selections - float - selections - defloat
Selections - modify - expand:1
Drop shadow: 0 0 70 10 black
Select none
13
Activate the upper layer - copy (2) of raster 1
Activate the reserved image again
Edit - copy special - copy merged
Return to your working image (second image)
Paste as a new layer
Drop Shadow: 0 0 70 10 black
14
Activate the Raster 2 layer
Open the tube [adornos_1.6.23] in psp
With the Raster 2 layer activated, copy and paste as a new layer
Do not move
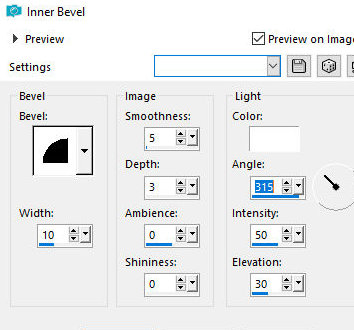
Effects - 3D effects - inner bevel
Drop Shadow - 1 (-1) 70 1 #66b370
15
Add new layer
Selections - load selection from disk - selection [sel1_1.06_23_stella]
Copy the image [mentali-papetterie15 (1)] and
paste it into the selection
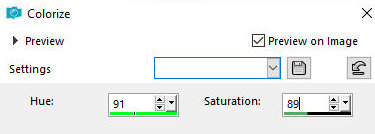
Adjust - Hue and saturation - colorize (optional)
Drop shadow: 0 0 70 10 black
Select none
16
Copy the image [adornos_1.6.23] again, this time with the Raster 1
layer activated
Activate the Raster 1 layer of your work
Paste as a new layer
Image / Add borders / 1px / #40ff40
Finalize:
Place the signatures
Merge all
Save as jpeg
*
Thank you Irene for testing my translations


|


