|
Save the
selections in the Selections folder on the psp
Save the texture (Grid - Corel_15_006) in the Textures
folder on the psp
*
Open a new transparent image measuring 900x650px
Selections / Select all
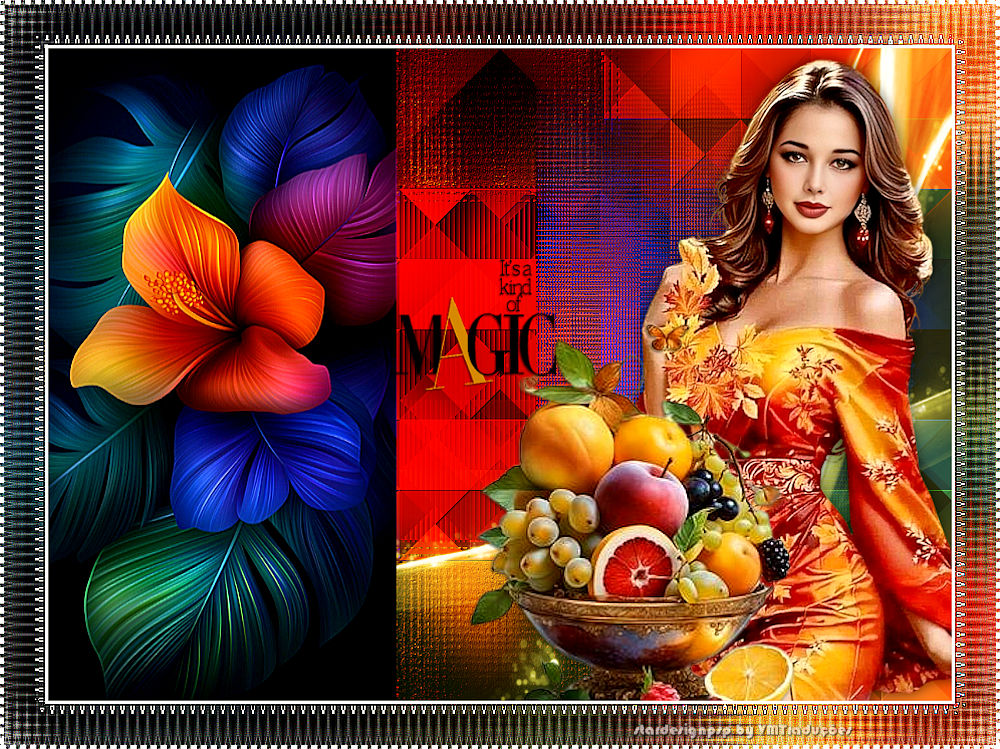
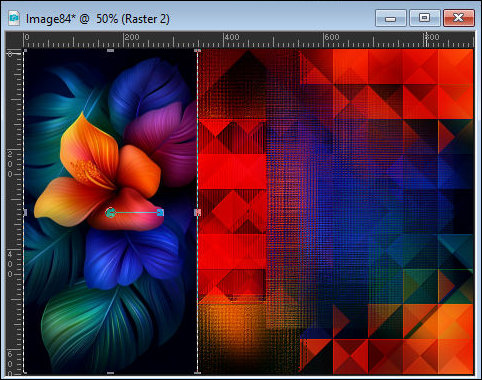
Open the image [226931a8d1407fb491c4b431ca2fbd0c]
Image / Free Rotate - left/90
Copy and paste into selection
Select none
Adjust/Blur/Gaussian Blur: 25
Effects / Plugins / Simple / Blintz
Layers/Duplicate
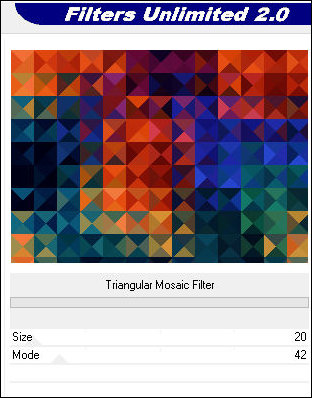
Effects / Plugins / Unlimited 2 / FF Gallery A /
Triangular Mosaic Filter - default
Layers/properties/Soft Light
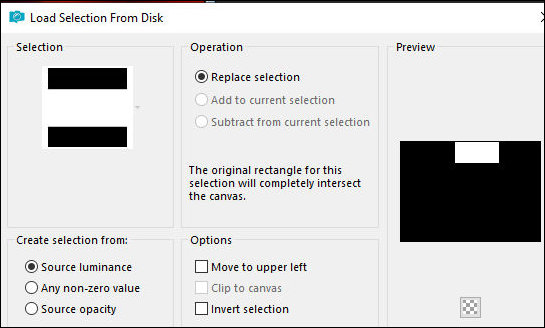
Selections / Load Selection from disk / Selection [sel-1.1.25-kindmagic-stella]
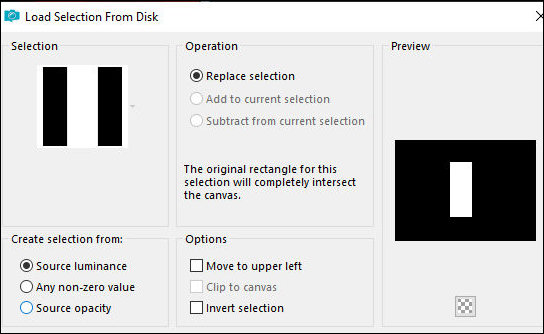
Selections / Promote selection to layer
Layers / Properties / blend mode: Overlay
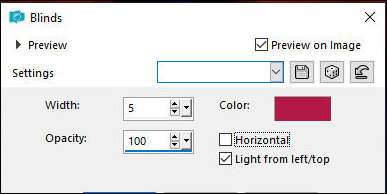
Effects / Texture Effects / Blinds - dark color
Select none
Adjust / Sharpness / Sharpen More
Enable Layer Copy of Raster 1
Selections / Load selection from disk /Selection [sel-2.1.25-kindmagic-stella]
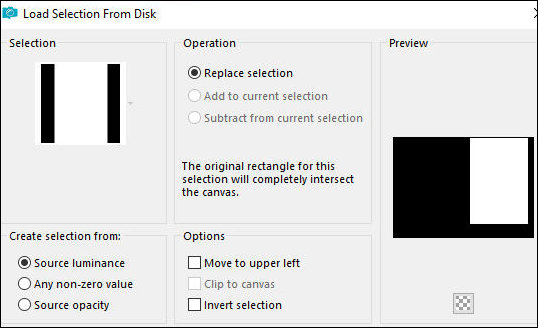
Selections / Promote selection to layer
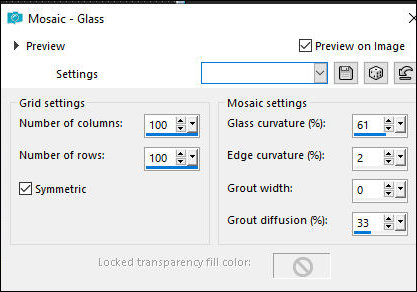
Effects / Texture Effects / Mosaic-glass
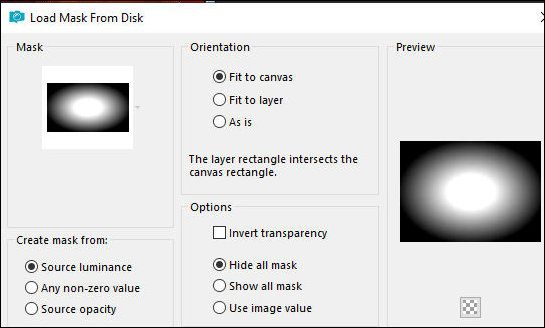
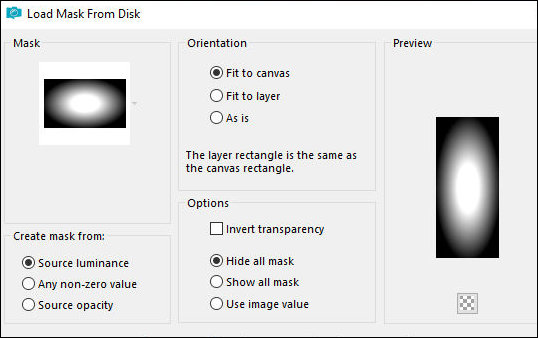
Layers / Load mask from disk / Mask [20 20]
Merge Group
Adjust / Sharpness / Sharpen More
Select none
Activate the Copy of Raster 1 layer
Selections / Load selection from disk / Selection [sel-3.1.25-kindmagic-stella]
In the color palette, select the Textures option / Find
the pattern [youbackground03] and configure it according
to the print
Color the selection with this Pattern
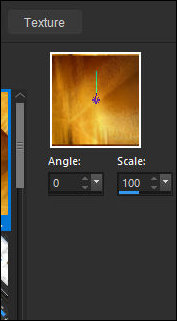
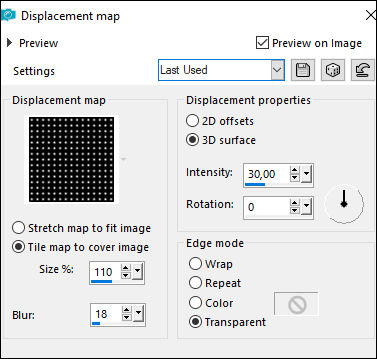
Effects / Distortion Effects / Displacement Map -
Texture Grid
Select none
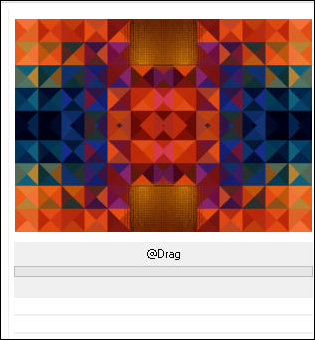
Effects / Plugins / Unlimited 2 / BKG Designers sf10 IV
/ @Drag
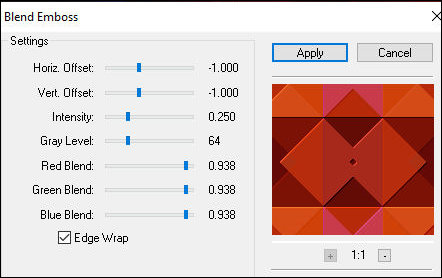
Effects / Plugins / FM Tile Tools / Blend Emboss -
default
(Optional) Layers / Properties / Blend Mode: one
according to your colors or leave unchanged
Activate the top layer
Copy the image [226931a8d1407fb491c4b431ca2fbd0c]
Paste as a new layer
Layers / Load mask from disk / Mask [20 20]
Merge Group
Translator's note (in my version I didn't apply this
mask)
Adjust the size if necessary
(Optional) Image / Mirror / Horizontal Mirror
Adjust / Sharpness / Sharpen More
Objects / Align / Left - or position Manually
Copy the main tube
Paste as a new layer
Position to the right according to the model
Adjust the size
Drop Shadow: 0 0 60 20 black
Copy the floral tube [ea00d4259a5e0bb8624bce406c8f8e75-removebg-preview]
Paste as a new layer
Position according to the model or as you prefer
Adjust the size
Adjust / Sharpness / Sharpen
Droop Shadow: 1 -1 60 2 black
Activate the Promoted Selection layer
Add a new layer
Selections / Select all
Copy the Mask [Narah-Mask_1190]
Paste into the selection
Select none
Image / Mirror / Mirror Horizontal
Layers / Properties / Blend Mode: Screen
If you want, you can colorize this tube, if you use the
material's:
Adjust / Hue and Saturation / Colorize [41 115]

Activate the top layer
Copy the text
Paste as a new layer
Position according to the template
If desired, you can colorize it according to your image
Drop Shadow: same as above
Border: 4px / white
Copy (it will remain in memory)
Border: 40px / any color
Select this border with the Magic Wand (tolerance/feather=0)
Paste the image that is in memory into the selection
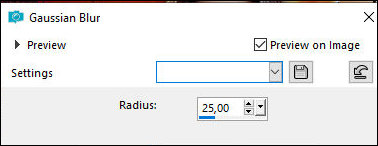
Adjust / Blur / Gaussian Blur: 25
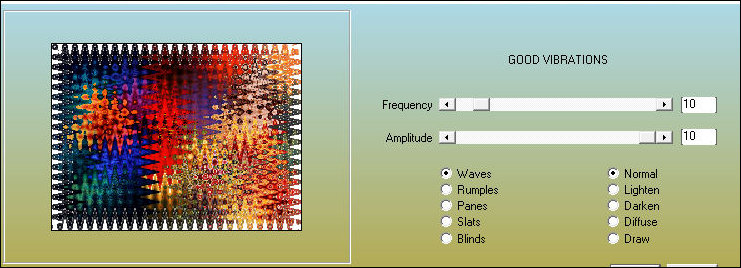
Effects / Plugins / AAA Filters / Good Vibrations
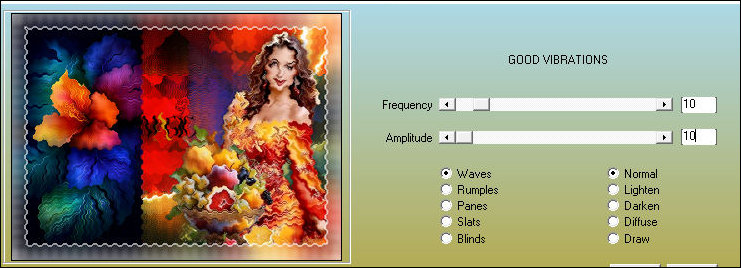
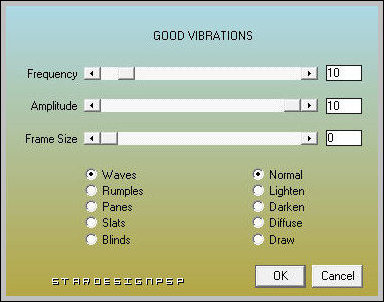
Translator's note: My version of this plugin only has
two fields for making changes. Below is a screenshot of
my version and the author's.
Effects / Edge Effects / Enhance More
Selections / Promote selection to layer
Effects / Edge Effects / Enhance More
Layers / Properties / Blend Mode: Multiply
Select none
Border: 4px/white
Select this edge with the Magic Wand
Effects / Plugins / AAA Filters / Good Vibrations - same
as above
Select none
Insert signatures
Merge all
Save as jpeg |