|
1. Open the masks in psp and minimize
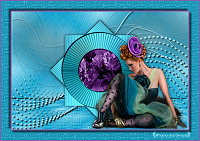
2. You will need a main tube
3. Choose two colors from your tube: a dark one for the
foreground and a light one for the background
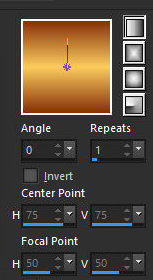
4. Prepare a Linear gradient
5. Position the mouse cursor on the
dark color and note the RGB values
6. Open a new transparent image measuring 1000x600px
7. Paint with the gradient
8. Adjust - Add/Remove Noise - Add Noise
9. Selections - Select all
10. Copy the main tube and paste it into the selection
11. Select none
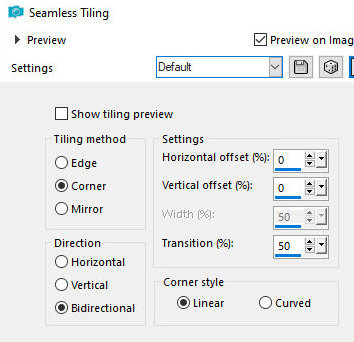
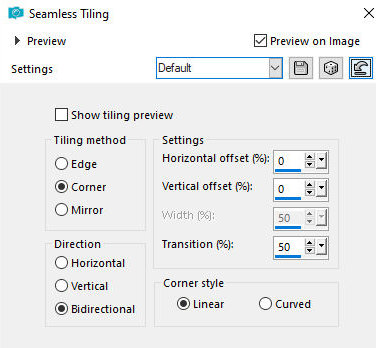
12. Effects - Image Effects - Seamless Tiling - Default
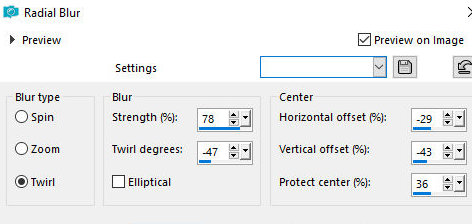
13. Adjust - Blur - Radial Blur
14. Effects - image Effects - Seamless
Tiling - Default
15. Effects - Plugins - FM Tile Tools
- Saturation Emboss
16. Layers - Duplicate
17. Effects - Plugins - Freeware Filters - Needles &
Pins
18. Layers - Properties - Blend Mode:
Overlay
19. Merge down
20. Add new layer
21. Paint with the background color
22. Effects - Plugins - AP 19 (Circus Daze) - Color
Circus Daze
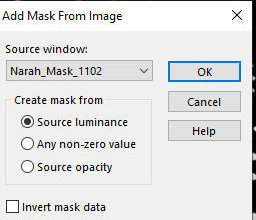
23. Layers - New Mask Layer - From
Image - Mask [Narah_Mask_1102]
24. Merge Group
25. Effects - User Defined Filter - Emboss 3
26. Effects - Plugins - Adjust -
Variation (original - lighter - midtones marked)
27. Drop Shadow: 0 0 80 15 black
28. Copy the main tube and paste it with a new layer
29. Effects - Plugins - Adjust - Variation (original -
darker (or other) - midtones marked)
30. Drop Shadow of your choice
31. Merge visible
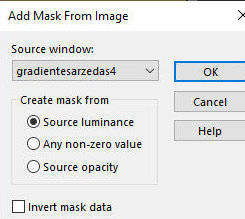
32. Layers - New Mask layer - From Image - Mask
[gradientesarzedas4]
33. Layers - Duplicate
34. Merge Group
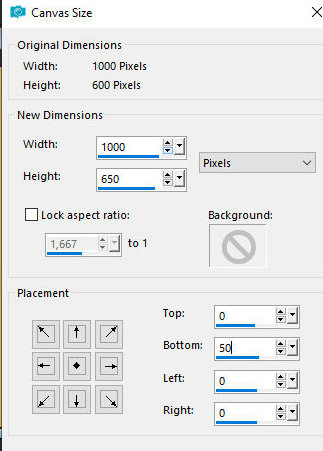
35. Image - Canvas Size: 1000x650px - 0 50 0 0
36. Add new layer
37. Layers - Arrange - Send to Bottom
38. Paint with foreground color
39. Merge visible
40. Add signatures
41. Merge All
42. Save as jpeg
|