|

This tutorial is from Romana who I thank for
letting me translate their tutorials.

Original here
Tubes

Material

Many thanks to the creators of
these materials
Plugins
Flaming Pear - Mehdi - Eye Candy 5:
Textures - Unlimited 2 - VM Toolbox - AAA Fames
You can find these plugins on the websites of:
Renée
Cloclo
You can also find this tutorial translated into these languages:
(Click on the flag)


SCRIPT
Notes:
> Open the material / Duplicate (shift+d) / Close the originals
> Change the blend mode of the layers to match their colors.
> In older versions of PSP, Mirror Horizontal=Mirror / Mirror Vertical=Flip /
Pick tool=deformation
> Open the masks in psp and
minimize
>Adjust the size of the tubes according to your images
*
>> Save the selections in the PSP Selections
folder
>>You will need a tube character and a landscape or scenery
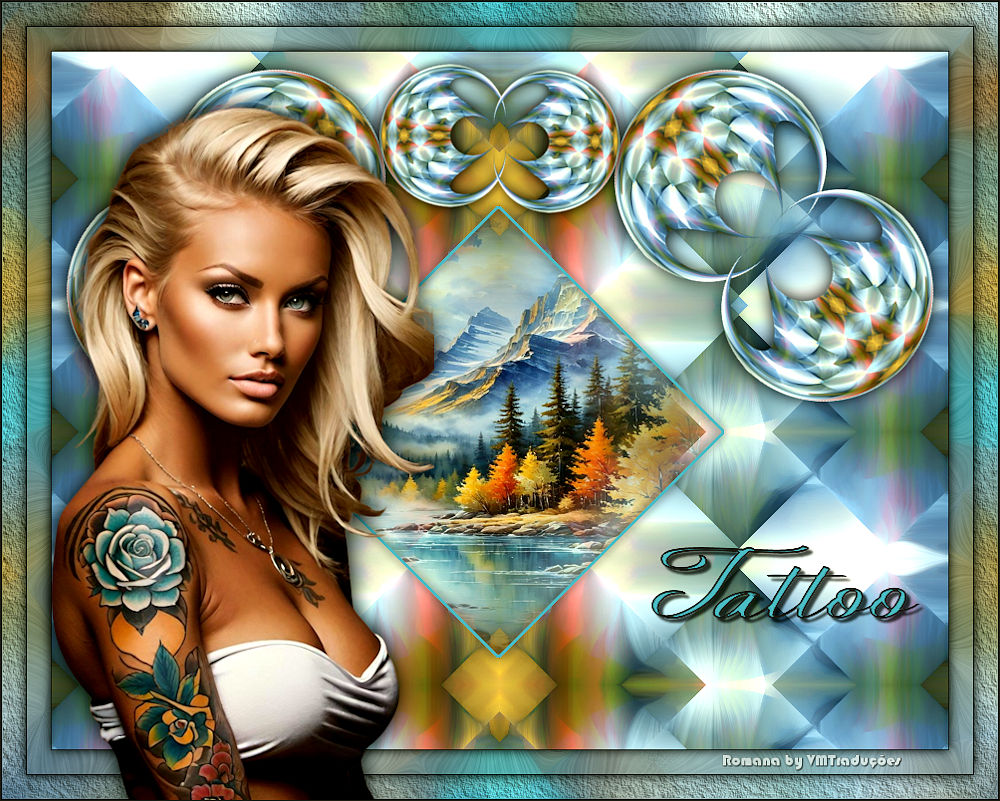
1. Open a new transparent image measuring 900x700px
2. Set the color #202020 to the foreground and the color #50b8c8 to
the background
3. Selections - select all
4. Copy your landscape or scenery and paste it into the selection
5. Select none
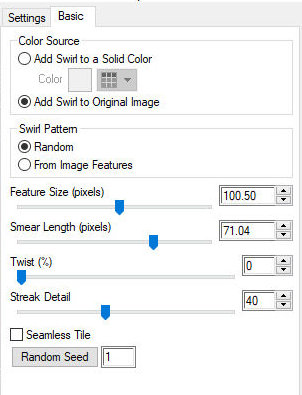
6. Effects - Plugins - Eye Candy 5: Texture - Swirl - Preset [Random,
Large No Twist, Long Streaks]
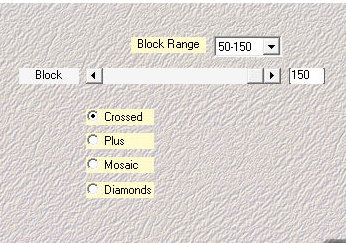
7. Effects - Plugins - Mehdi - Sorting Tiles
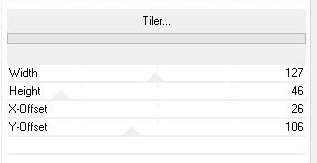
8. Effects - Plugins - Unlimited 2 - VM Toolbox -
Tiler
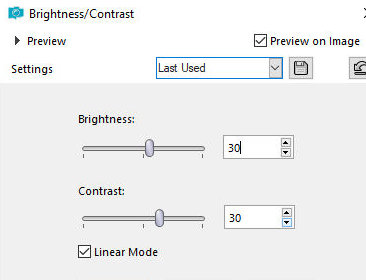
9. If it is too dark, apply:
9b. Adjust - Brightness and Contrast - Brightness/Contrast
10. Layers - Duplicate
11. Image - Resize: 70% - all layers unchecked
12. Effects - Plugins - flaming Pear - Flexify 2
13. Image - Resize: 35% - all layers unchecked
14. Layers - Duplicate
15. Image - Mirror - Mirror Vertical
16. Position the two images according to the print
17. Merge Down
18. Objects - Align - Left
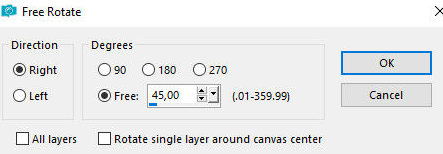
19. Image - Free rotate [right/45]
20. Position according to the print
21. Drop shadow: 0 0 100 25 black
22. Layers - Duplicate
23. Image - Mirror - Mirror Horizontal
24. Layers - Duplicate
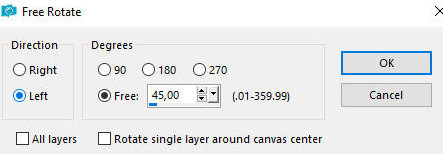
25. Image - Free rotate - [Left/45]
26. Image - Resize: 65% - all layers unchecked
27. Objects - Align - Top
28. Objects - Align - Horizontal Center
29. Add new layer
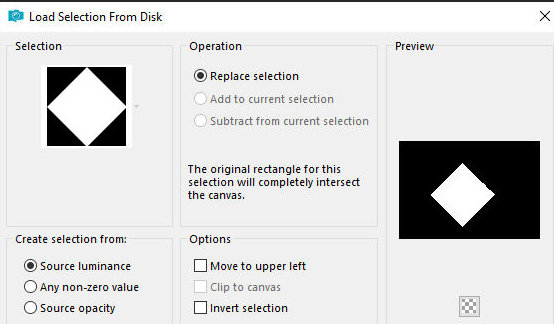
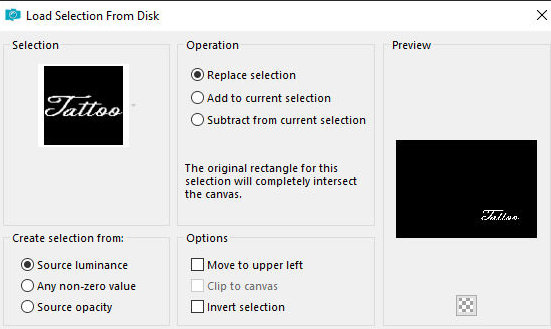
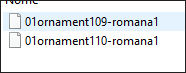
30. Selections - Load selection from disk - Selection
[01ornament109-romana1]
31. Copy your landscape or scenery image and paste
it into the selection
32. Adjust the size if necessary
33. Adjust - Shape - Sharpen
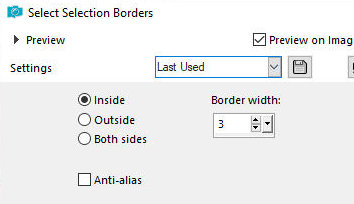
34. Selections - Modify - Select selection borders
35. Paint the selection with the background color
36. Drop Shadow: 0 0 100 15 black
37. Select none
38. Add new layer
39. Selections - Load selection from disk - Selection
[01ornament110-romana1]
40. Paint the selection with the foreground color
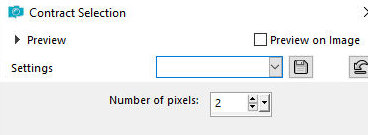
41. Selections - Modify - Contract: 2px
42. Paint with the background color
43. Select none
44. Drop shadow: 4 4 70 3 black
45. Image - Add borders - 1px - foreground color
46. Selections - select all
47. Image - Add borders - 50px - background color
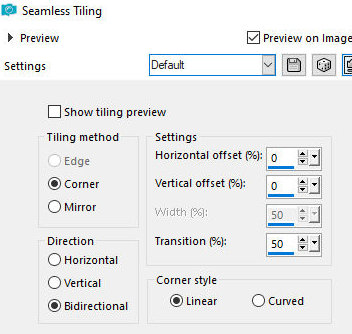
48. Effects - Image Effects - Seamless Tiling
49. Selections - invert
50. Adjust - Blur - Gaussian Blur=25
51. Effects - Plugins - Eye Candy 5: Textures -
Swirl - same as above
52. Effects - Plugins - AAA Frames - Texture Frame
53. Selections - Invert
54. Drop shadow: 0 0 100 15 black
55. Selections - Select all
56. Selections - Modify - Contract: 25
57. Drop Shadow: 0 0 100 15 black
58. Select none
59. Copy your main tube and paste it as a new layer
60. Position at left as per template
61. Adjust size
62. Adjust - Sharpness - Sharpen
63. Drop Shadow: 0 0 100 30 black
64. Image - Add borders - 1px - foreground color
65. Place signatures
66. Merge all
67. Save as jpeg
*

|