|


This tutorial is from Romana who I thank for
letting me translate their tutorials.

Original here


Tubes


Material
There is no material, just PSP
effects and Plugins. The link to the material I used in my version
is here:
My Tubes: HERE

Plugins
Flaming Pear - Flexify 2
Filter Mehdi - Sorting Tiles
VM Instant Art - Tripolis
Alien Skin - Eye Candy 5 - Textures - Swirl

You can find these plugins on the websites of:
Renée
Cloclo

You can also find this tutorial translated into these languages:
(Click on the flag)


SCRIPT
Notes:
> Open the material / Duplicate (shift+d) / Close the originals
> Change the blend mode of the layers to match their colors.
> In older versions of PSP, Mirror Horizontal=Mirror / Mirror Vertical=Flip /
Pick tool=deformation
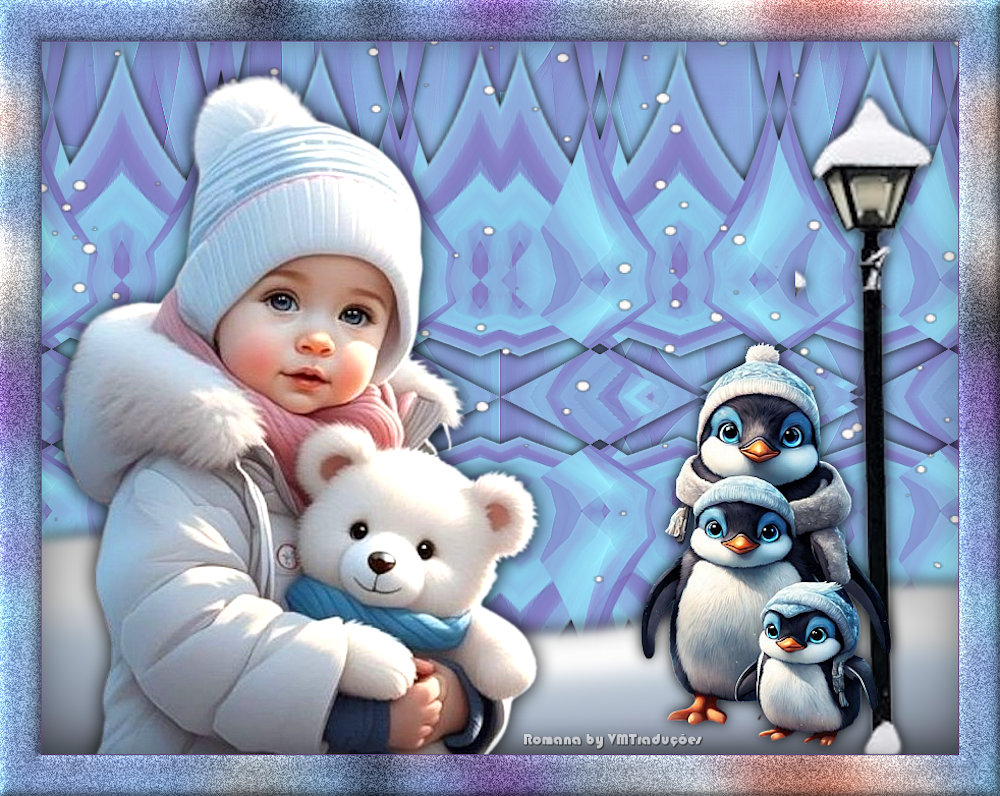
>> You will need a main
tube, decorative tubes, a light fixture, snowflakes and snow (you
can find the one used in my version in the link to the my tubes
folder above)
1. Open a new transparent image measuring 900x700px
2. Colors: Foreground: #7a5ca2 / Background: #7ad0e1
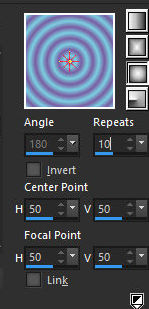
3. Prepare a Sunburst
gradient
4. Color the image with
the gradient
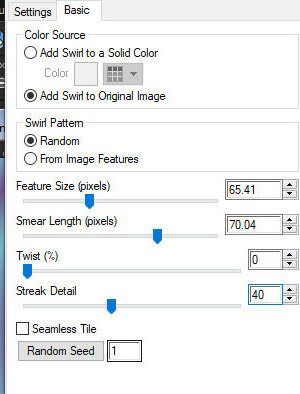
5. Effects / Plugins / Eye Candy 5: Textures / Swirl - Preset [Random,
Large no Twist, Long Streaks]
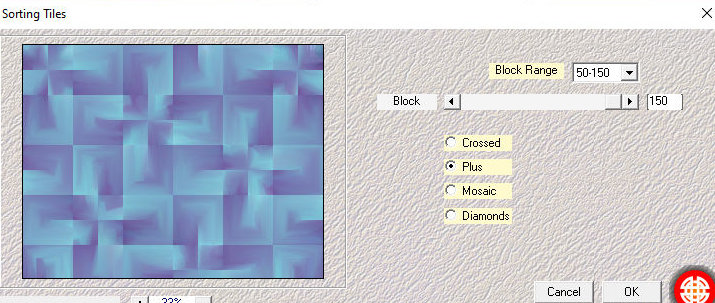
6. Effects / Plugins /
Mehdi / Sorting Tiles
7. Effects / Distortion
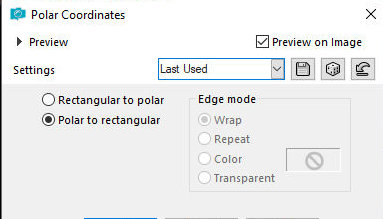
Effects / Polar Coordinates / Polar to Rectangular
8. Layers / Duplicate
9. Image / Mirror / Mirror Vertical
10. Layers / Properties / Opacity=50
11. Merge down
12. Effects / Edge Effects / Enhance
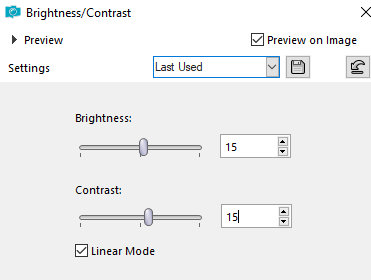
13. If it gets too dark, apply: Adjust / Brightness and Contrast /
Brightness/Contrast
13b. Layers / Duplicate
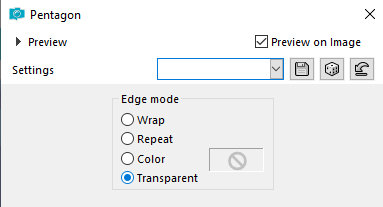
14. Effects / Geometric Effects / Pentagon
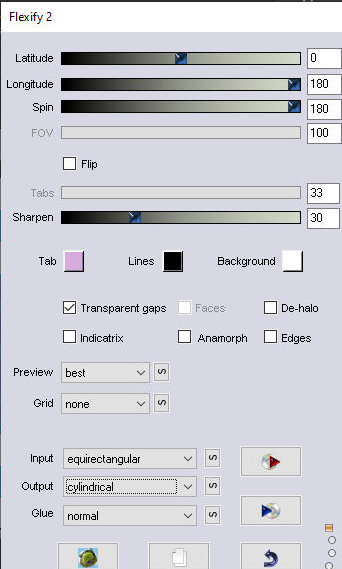
15. Effects / Plugins /
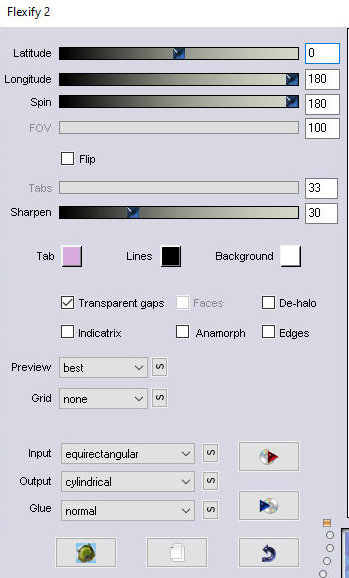
Flaming Pear / Flexify 2
16. Effects / Plugins /
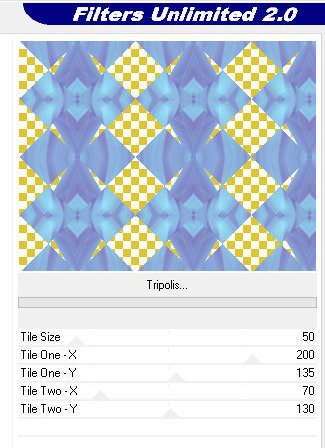
Unlimited 2 / VM Instant Art/ Tripolis
17. Layers / Duplicate
18. Image / Mirror / Mirror Horizontal
19. Merge down
20. Effects / Plugins / Flaming Pear / Flexyfy2 - same as before
21. Drop Shadow: 0 0 100
15 black
22. Add a new layer
23. Selections / Select all
24. Copy the tube (snowflakes) that is in the "my tubes" folder
(link above) and paste it into the selection. You can use another of
your choice
25. Select none
26. Copy the tube (pisoneve) that is in the "my tubes" folder and
paste it as a new layer. You can use another tube of your choice
27. Position it at the bottom according to the model: Objects /
Align / Bottom
27b. Image / Resize: 160% or use the Pick Tool to adjust the size
and leave it as it is in the model
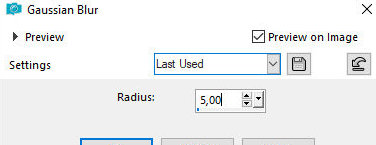
27c. In my version, I applied Adjust / blur / Gaussian Blur = 5
28. Drop shadow: 0 0 100
20 white
29. Copy the tube (lamp2) that is in the "my tubes" folder or use
another of your choice
29b. Image / Resize: 220%
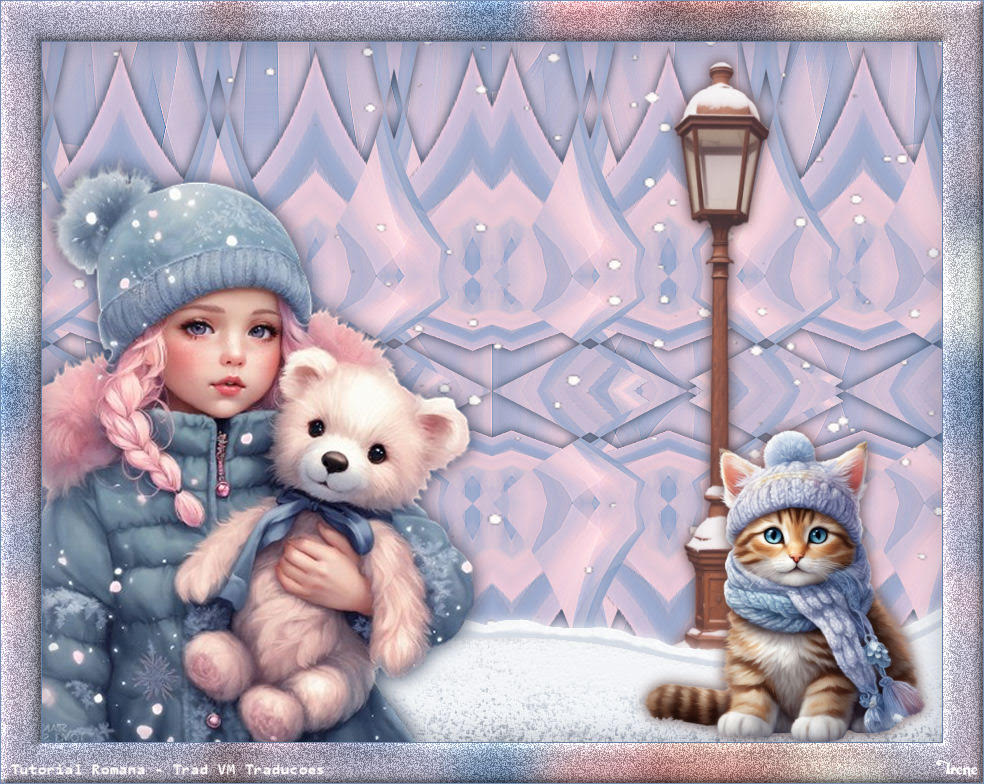
30. Position it to the right according to the model
31. Drop Shadow: 0 0 100 20 black
32. Copy the tube (2) from the "my tubes" folder or use another of
your choice your choice and paste as a new layer
33. Adjust the size and position next to the tube (lamp2)
34. Drop shadow: 0 0 100 20 black
35. Copy the tube (1) from the "my tubes" folder or use another of
your choice and paste as a new layer
36. Adjust the size and position to the left
37. Adjust / Sharpness / Sharpen
38. Drop Shadow: 0 0 100 30 black
39. Image / Add borders / 1px / foreground color
40. Selections / Select all
41. Image / Add borders / 40px / foreground color
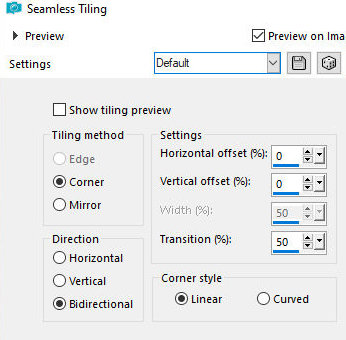
42. Effects / Image Effects / Seamless Tiling - Default
43. Selections / Invert
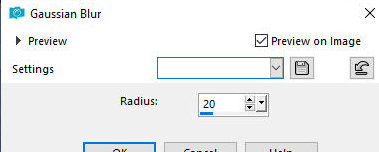
44. Adjust / Blur / Gaussian blur =20
45. Adjust / Add/Remove
Noise / Add Noise
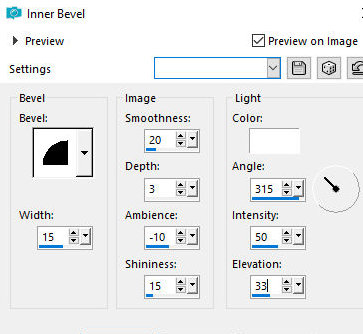
46. Effects / 3D Effects
/ Inner Bevel
47. Selections / invert
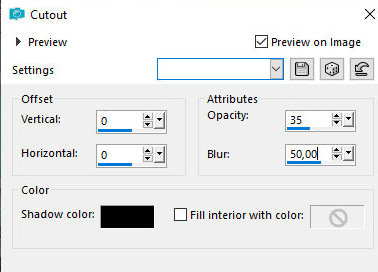
48. Effects / 3D Effects / Cutout
49. Select none
50. Place signatures
51. Image / Add borders / 1px / foreground color
52. Save as jpeg
*
Thank you for testing my
translations


|
