|
For this
tutorial you will need:
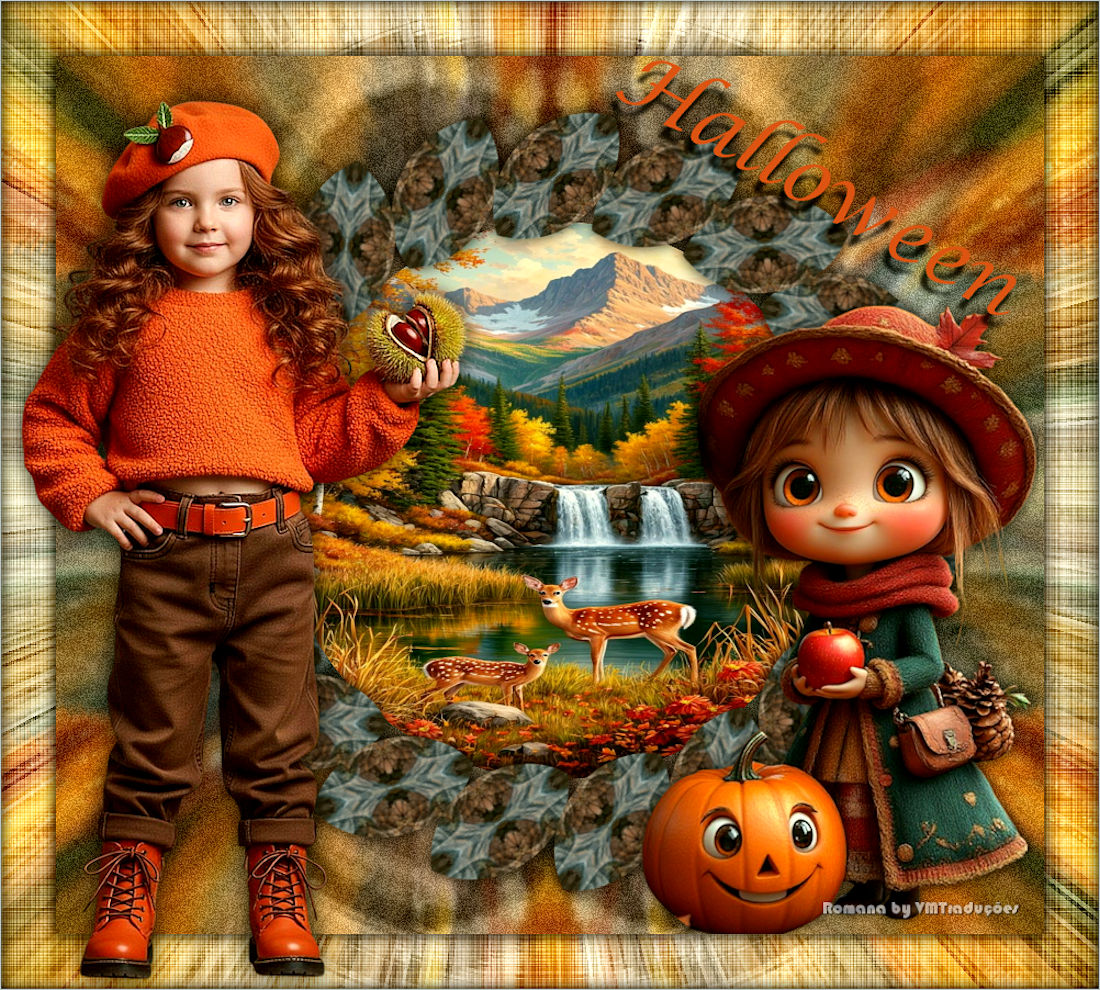
1 female tube
1 decorative tube
1 landscape tube for the background
*
Save the selections in the PSP Selections folder
*
Open a new transparent image measuring 900x800px
Choose 2 colors from your tube.
Original colors: Foreground: d65a26 - Background: b1b9bb
Selections / Select all
Copy your misted landscape
Paste into selection
Select none
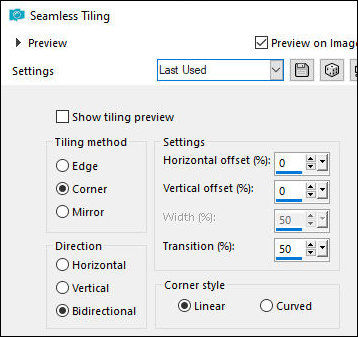
Effects / Image Effects / Seamless Tiling
[color bid 0 0 51 50]
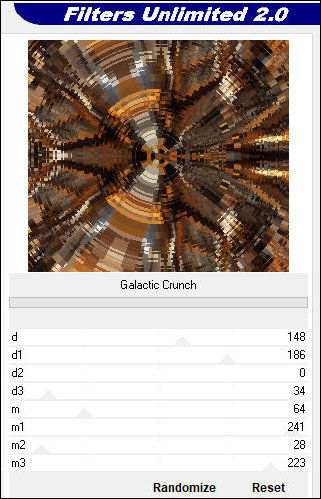
Effects / Plugins / Unlimited 2 / AB Filters / Galactic
Crunch
[148 186 0 34 64 241 28 223]
Layers / Duplicate
Image / Mirror / Mirror Horizontal
Layers / Properties / Opacity: 50%
Merge Down
Copy this image
Paste as a new image and minimize. We'll use it later.
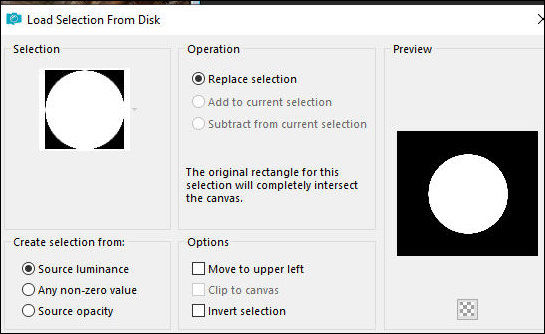
Selections / Load selection from disk / Selection
[01ornament245-romana1]
Selections / Promote selection to layer
Select none
Image / Resize: 40% - all layers unchecked
Effects / Plugins / Flaming Pear / Flexify 2
[0 0 0 120 33 0 mirror ball square]
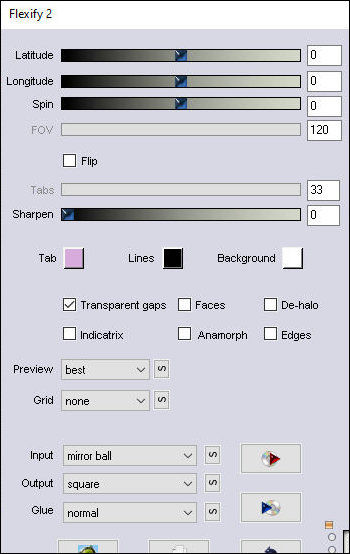
[I used Flexify 2 to create this effect, but it gave
an error, so I used Flexify and it worked.]
Image / Resize: 55% - all layers unchecked
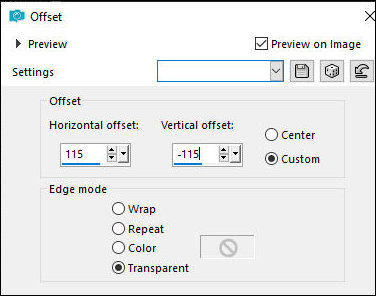
Effects / Image Effects / Offset
[115 / -115]
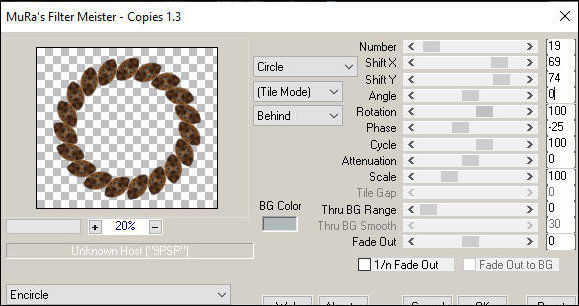
Effects / Plugins / Mura's meister / Copies
[encircle circle tile mode behind 19 69 74 0 100 -25 100
0 100 0 0 30 0]
Drop shadow: 0 0 80 20 black
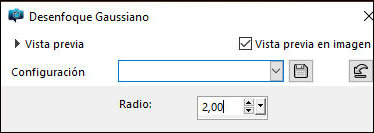
Activate the Raster 1 layer
Adjust / Blur / Gaussian Blur: 2
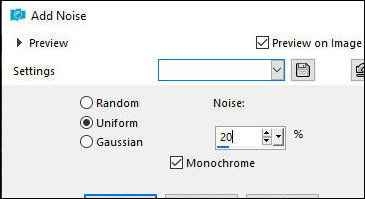
Adjust / Add / Remove Noise / Add Noise
[center 20 x]
Add a new layer
Selections / Load selection from disk / Selection
[01ornament246-romana1]

Copy your misted landscape tube
Paste into the selection
Select none
Activate the top layer
Copy your decorative tube
Adjust the size
Position according to the template
Adjust / Sharpness / Sharpen
Drop Shadow: 0 0 80 20 black
Activate the Text Tool / Choose a font and size
Write the text: [Halloween 2025]
Right-click the layer and select convert to raster layer
Position as desired
Drop Shadow of your choice: 10 -5 80 5 black
Selections / Select all
Border: 50px / #b1b9bb
Selections / Invert
Copy the previously minimized image
Paste into the selection
Effects / Plugins / Unlimited 2 / Texturize / Raw Canvas
[25 100]

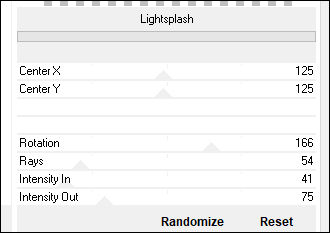
Effects / Plugins / Unlimited 2 / VM / Lightsplash
[125 125 166 54 41 75]
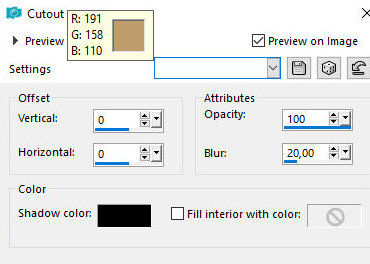
Effects / 3D Effects / Cutout
[0 0 100 20.00 black des]
Select none
Copy your female tube
Paste as a new layer
Adjust the size
Position according to the model
Adjust / Sharpness / Sharpen
Drop shadow: 0 0 80 30 black
Border: 1px / b1b9bb
Place the signatures
Merge all
Save as a jpeg |