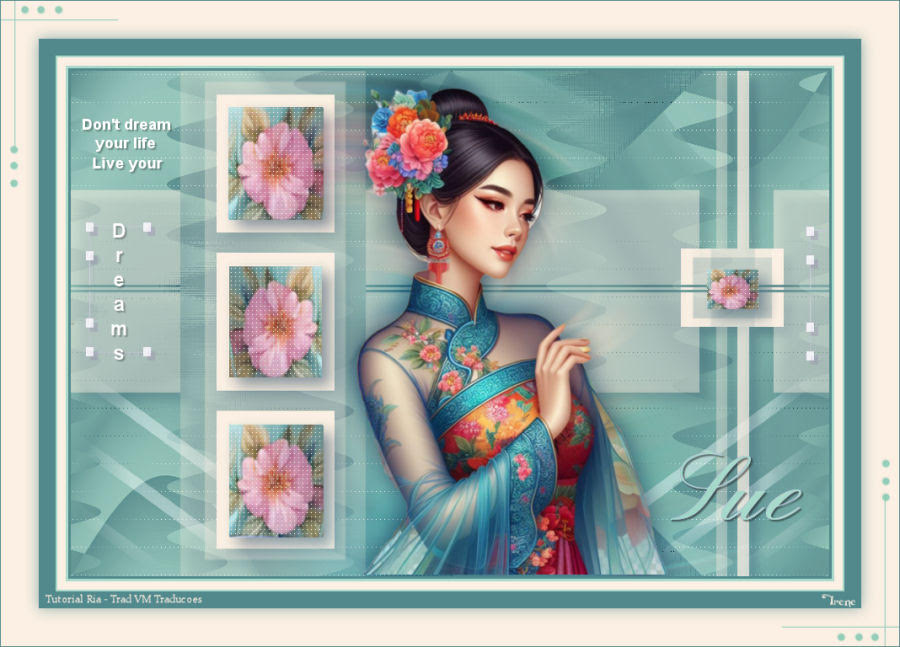
|

This tutorial is by PSP Met Plezier who I thank for letting me translate his
tutorials.

Original here

Tubes

Material

Many thanks to the creators of these materials
> You will need a character tube
Plugins
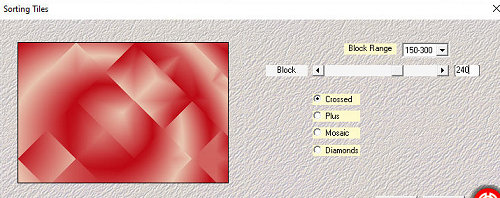
Mehdi / Sorting Tiles
Xero
You can find these plugins on the websites of:
Renée
Cloclo
You can also find this tutorial translated into these
languages:
(Click on the flag)


SCRIPT
Notes:
> Open the material / Duplicate (shift+d) / Close the originals
> Change the blend mode of the layers to match their colors.
> In old versions of PSP Mirror Horizontal=Mirror / Mirror Vertical=Flip
/ Pick tool=deformation
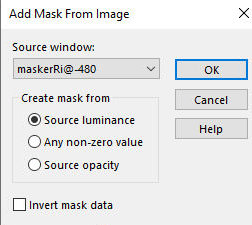
1. Open the mask [maskerRi@-480] on the psp and minimize
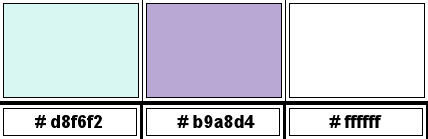
2. Colors: Foreground: #d8f6f2 / Bakcground: #b9a8d4
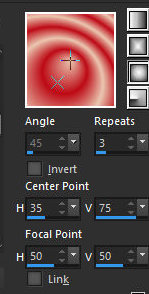
3.Prepare a Sunburst Gradient
4. Open the alpha file [alfa295sue] / Duplicate (shift+d) / Close
the original
5. Paint the image with the gradient
6. Effects / plugins / Mehdi / sorting Tiles
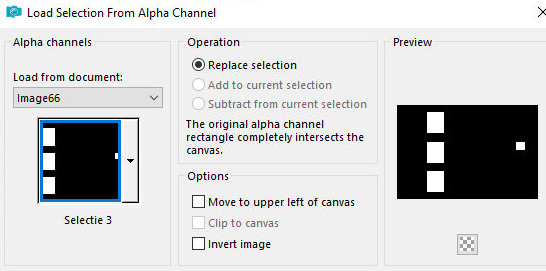
7. Effects / Distortion Effects / pixelate

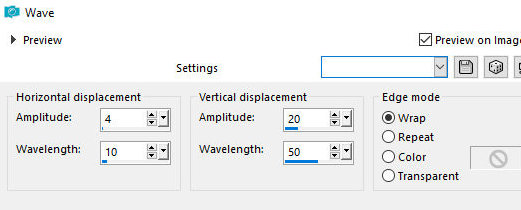
8. Effects/distortion Effects/Wave
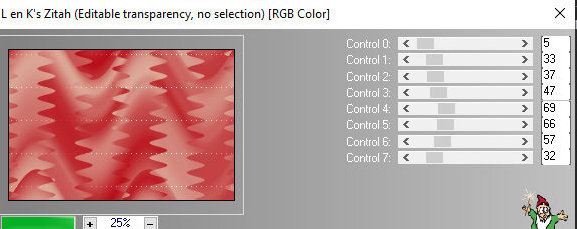
9. Effects / plugins / L& K's / L&K's Zitah
10. Layers / Duplicate
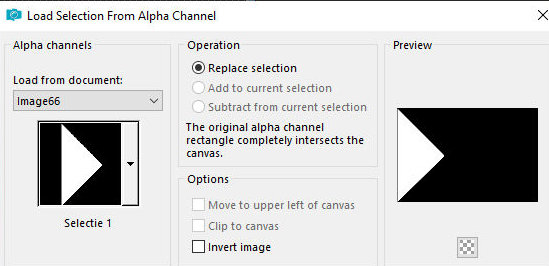
11.Selections / Load selection from alpha channel / Selection #1
12. Selections / Promote selection to layer
13. Select none
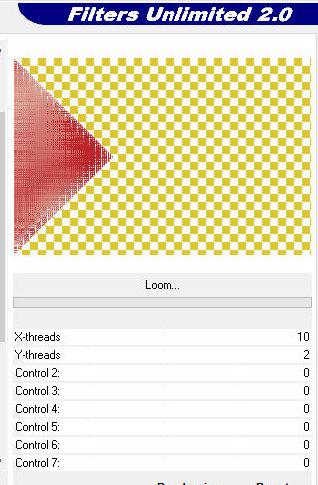
14. Effects / Plugins / Unlimited 2 / FunHouse / Loom
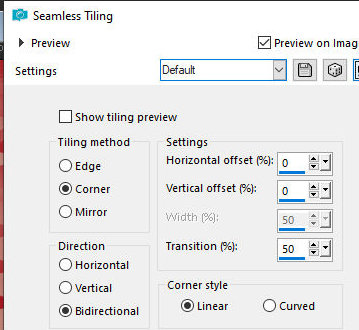
15. Effects / Image Effects / Seamless Tiling - default
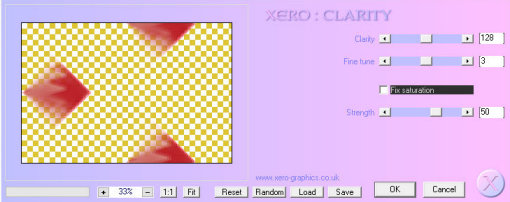
16. Effects / plugins / Xero / clarity - default
17. Copy the tube [deco-1-Ri@] and paste it as a new layer
18. Layers / Duplicate
19. Image / Mirror / Mirror Horizontal
20. Merge down
21. Layers / Properties / Blend mode: Soft Light
22. Add new layer
23. Paint with white color
24. Layers / New mask layer / From Image / Mask [maskerRi@-480]
25. Merge Group
26. Drop Shadow: 10 10 35 15 black
27. Selections / Load selection from alpha channel / Selection #2

28. Press Delete on your keyboard
29. Select none
30. Selections / Load selection from alpha channel / Selection #3
31. Add a new layer
32. Copy the tube [deco-2-Ri@] and paste into the selection
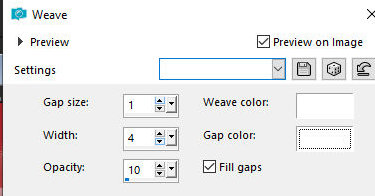
33. Effects / Texture Effects / Weave
34. Add new layer
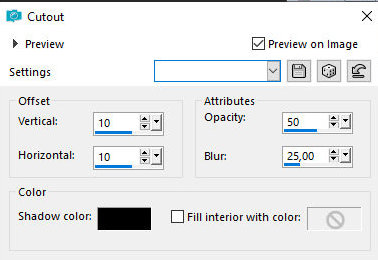
35. Effects / 3D Effects / cutout
36. Select none
37. Copy the tube [deco-3-Ri@] and paste it as a new layer
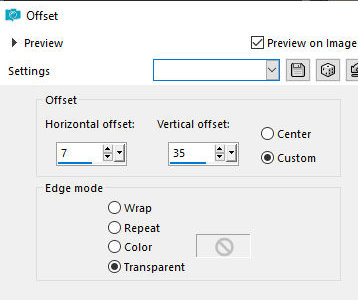
38. Effects / Image Effects / Offset [7/35]
39. Copy the text [tekst-849-Live your dreams-Ri@] and paste it as a
new layer
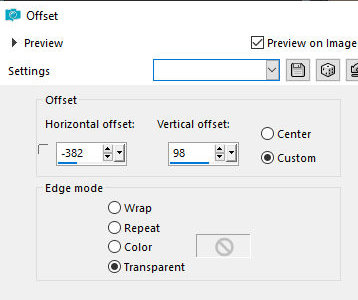
40. Effects / Image Effects / Offset [-382/98]
41. Copy the text [tekst-Sue-Ri@] and paste as a new layer
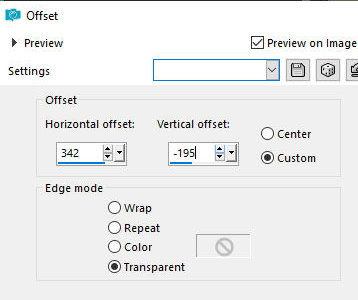
42. Effects / Image Effects / Offset [342/-195]
43. Copy the tube character and paste it as a new layer
44. Position as you prefer
45. Layers / duplicate
46. Activate the layer below
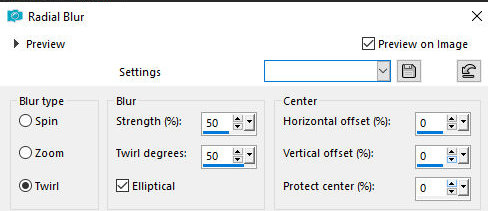
47.Adjust/Blur/Radial Blur
48. Layers / Properties / Blend Mode: Overlay
49. Activate the top layer
50. Drops shadow of your choice
51. Merge all
52. Image / Add borders / Symmetric checked
3px /background color
3px / foreground color
10px / white
2px / foreground color
20px / background color
53. Selections / Select all
54. Image / Add borders / 45px white
55. Drop Shadow: 0 0 60 25 background color
56. Select none
57. Copy the tube [deco-4-Ri@] and paste it as a new layer
58. Do not move
59. Image / Add borders / 1px / background color
60. Place the signatures
61. Merge all
62. Image / Resize: 900px(width) (optional)
63. Save as jpeg
*
Muito obrigado por testar minhas traduções, Irene

|