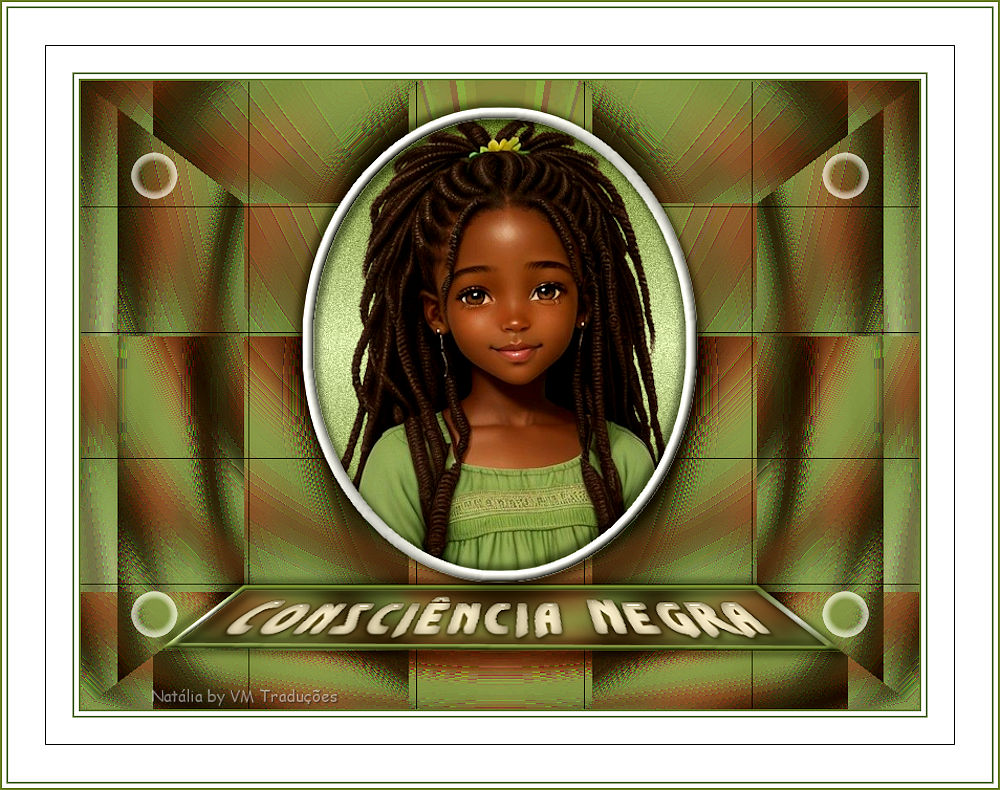
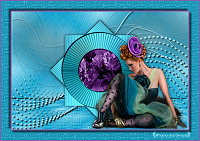
|


This tutorial is from Natália Raposo who I thank for
letting me translate their tutorials.

Original here


Tubes


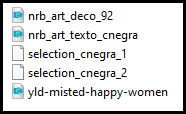
Material

Many thanks to the creators of
these materials


Plugins
AFS Import

You can find these plugins on the websites of:
Renée
Cloclo

You can also find this tutorial translated into these languages:
(Click on the flag)


SCRIPT
Notes:
> Open the material / Duplicate (shift+d) / Close the originals
> Change the blend mode of the layers to match their colors.
> In older versions of PSP, Mirror Horizontal=Mirror / Mirror Vertical=Flip /
Pick tool=deformation
> Open the masks in psp and
minimize
>Adjust the size of the tubes according to your images
*
>>Save the selections in the PSP Selections folder
Choose two colors from your tubes - Put a dark color in the
foreground and a light color in the background
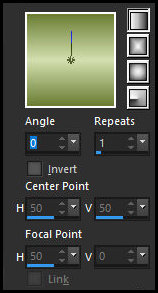
Prepare a Linear gradient

Open a new transparent image measuring 800x600px
Paint with the gradient
Selections - Select all
Copy the main tube and paste it into the selection
Select none
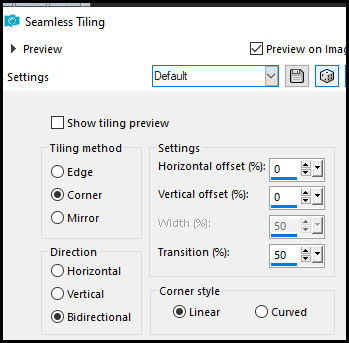
Effects - image effects - Seamless tiling - default

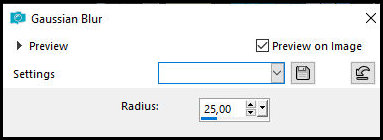
Adjust - Blur - Gaussian Blur: 25

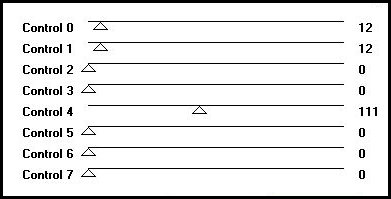
Effects - plugins - Unlimited 2 - AFS Import - Streaker - default

Effects - Edge Effects - Enhance More
Layers - Duplicate
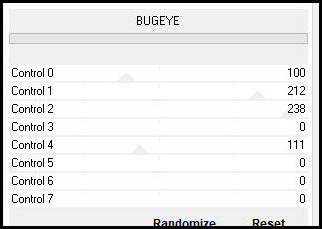
Effects - Plugins - unlimited 2 - AFS Import - BugEye

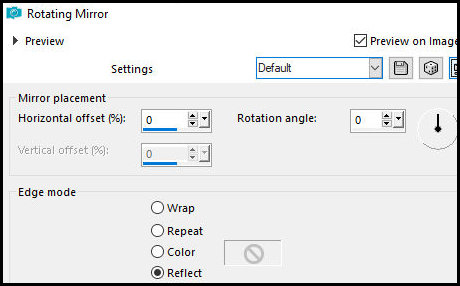
Effects - Reflection Effects - Rotating Mirror - Default

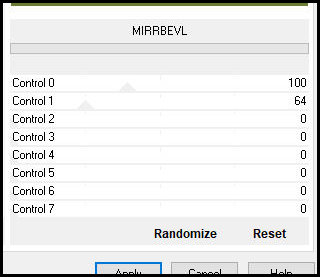
Effects - plugins - Unlimited 2 - AFS Import - MRRBEVL

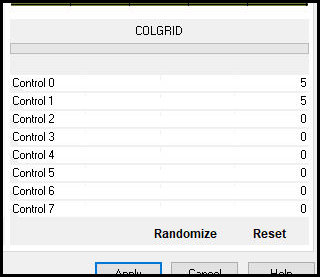
Effects - Plugins - Unlimited 2 - AFS Import - Colgrid - Default

Layers - Properties - blend Mode: Dissolve
Add new layer
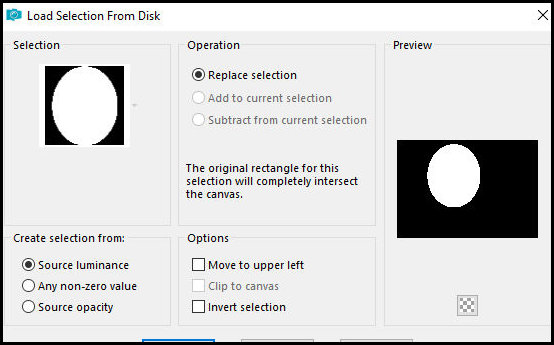
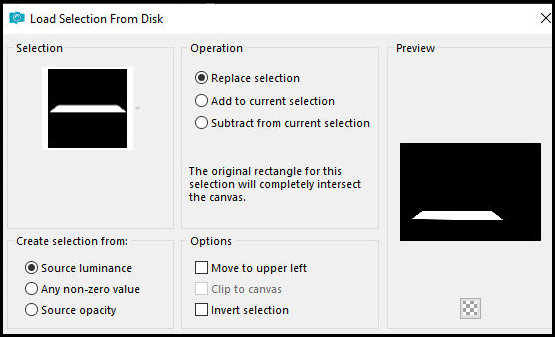
Selections - Load selection from disk - Selection
[selection_cnegra_1]

Paint with gradient
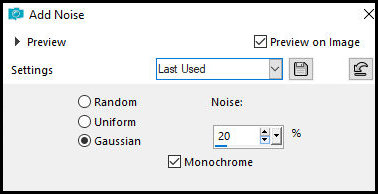
Adjust - Add / Remove Noise - Add Noise

Keep the selection
Copy the main tube and paste as a new layer
Resize if necessary
Use the Move tool, position it on top of the selection
Selections - Invert
Press Delete on the keyboard
Selections - Invert
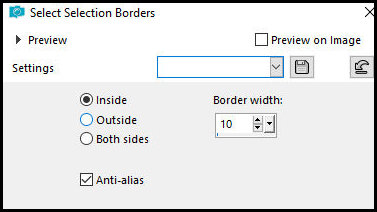
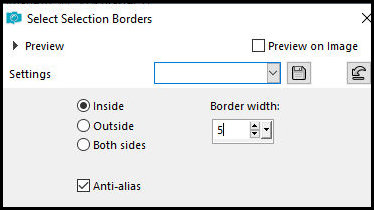
Selections - Modify - Select selection borders

Selections - promote selection to layer
Add new layer
Paint the border white
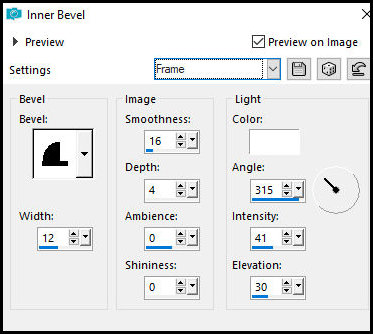
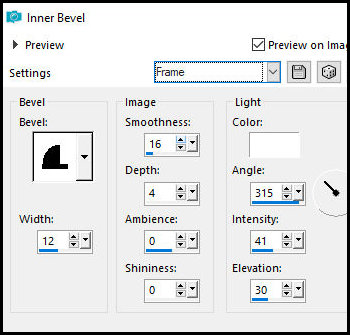
Effects - 3D Effects - Inner Bevel - Preset [Frame]

Drop shadow: 5 5 50 10 black
Repeat the Drop Shadow with negative V and H
Select none
Activate the layer Copy of Raster 1
Selections - Load selection from disk - Selection
[selection_cnegra_2]

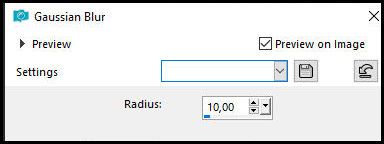
Adjust - Blur - Gaussian Blur: 10

Selections - Modify - Selection select borders

Add new layer
Paint the selection with the gradient
Effects - 3D Effects - Inner Bevel - same as before

Drop shadow: 5 5 50 10 black
Repeat the Drop Shadow with negative V and H
Select none
Copy the text (activate the Raster 4 layer of the tube) and paste it
as a new layer
Layers - Arrange - bring to top
Position according to the model (Colorize if necessary)
Copy the deco tube (activate the Raster 1 layer of the tube) and
paste it as a new layer
Activate the Pick Tool and set: X=48 - Y=68

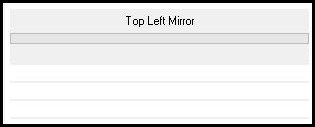
Effects - plugins - Simple - Top Left Mirror

Image - Add borders - 2px - foreground color
Image - Add borders - 4px - white
Image - Add borders - 2px - foreground color
Image - Add borders - 25px - white
Image - Add borders - 1px - black
Image - Add borders - 35px - white
Image - Add borders - 2px - foreground color
Image - Add borders - 4px - white
Image - Add borders - 2px - foreground color
Place signatures
Merge all
Save as jpeg
*


|
