|
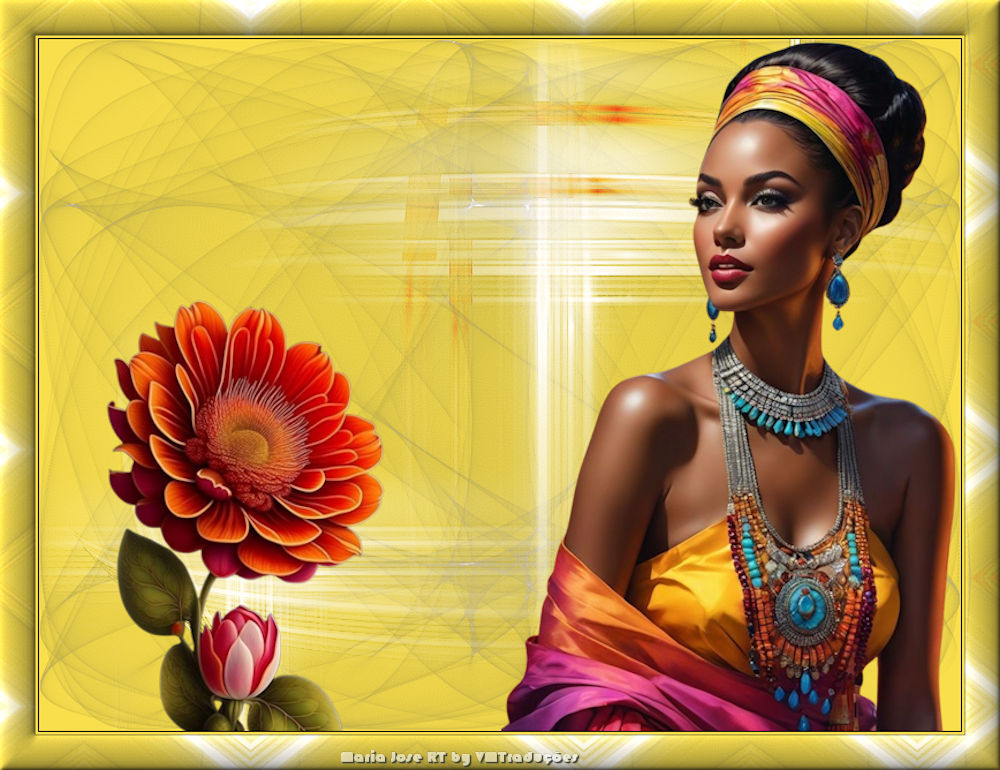
1. You will
need a main tube and a flower (if you want to use my
tubes, download them here
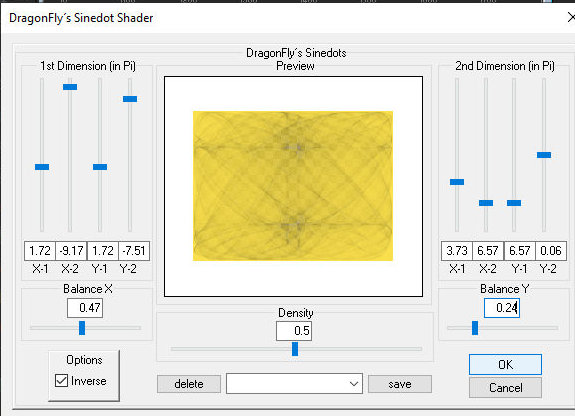
1a. The Dragonfly/Sinedots plugin was made available in
the material
2. Open a new transparent image measuring 800x600
2a. Choose two colors from your tube: a light color for
the foreground and a dark color for the background
3. Paint the image with the foreground color
4. Effects - Plugins - Dragonfly - Sinedots
5. Copy the deco tube
[decor_nmcriacoes_38] and paste it as a new layer
6. Copy your main tube and paste it as a new layer
7. Adjust the size and position as you prefer
8. Copy the flower tube and paste it as a new layer
9. Adjust the size and position as you prefer
10. Image - Add borders - 1px - black
11. Image - Add borders - 2px - foreground color
12. Image - Add borders - 1px - black
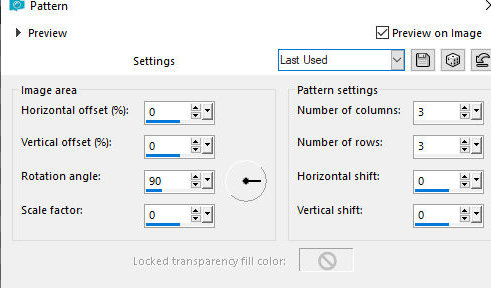
13. Image - Add borders - 30px - foreground color
14. Select this 30px border with the Magic Wand -
Tolerance/feather=0
15. Effects - Reflection Effects -Pattern - Default
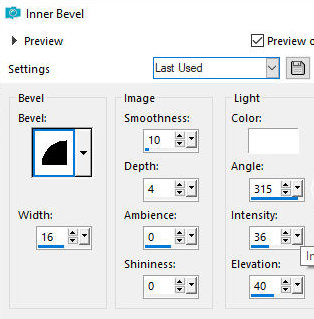
16. Effects - 3D Effects - inner Bevel
17. Select none
18. Place signatures
19. Merge all
20. Save as jpeg |