| 1. Abra o arquivo alpha
channel [2025-Zsófi] - Duplique (shift+d) - Feche o
original
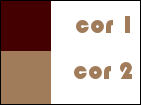
2. Coloque a cor 1 no foreground e a
cor 2 no background
3. Pinte a imagem com a cor 2
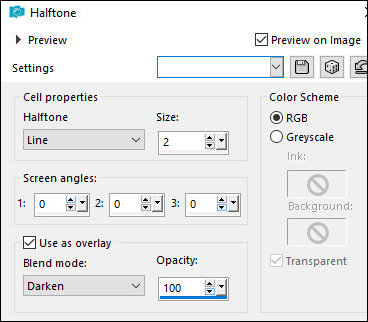
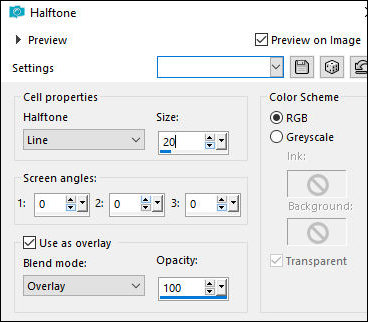
4. Effects - Artistic Effects -
Halftone
5. Adicione uma nova layer
6. Pinte com a cor 2
7. Effects / Artistic Effects /
Halftone
8. Selections / Select all
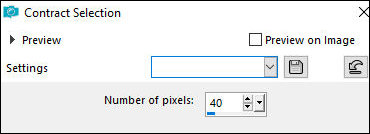
9. Selections / Modify / Contract: 40
10. Pressione Delete
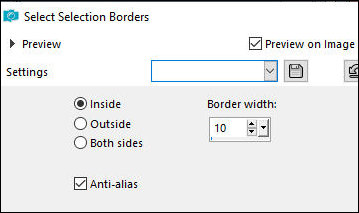
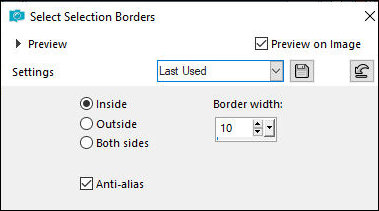
11. Selection / Modify / Select
selection Borders
12. Adicione uma nova layer
13. Pinte com a cor 1
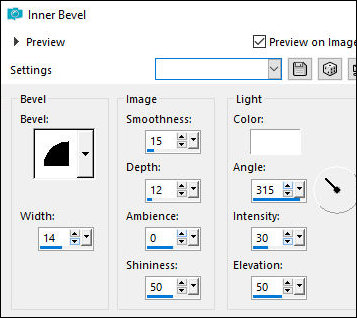
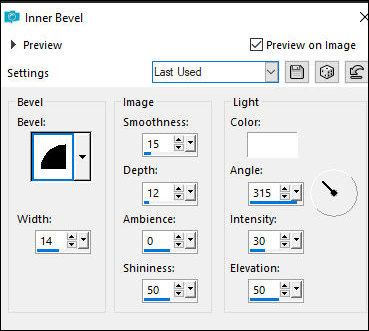
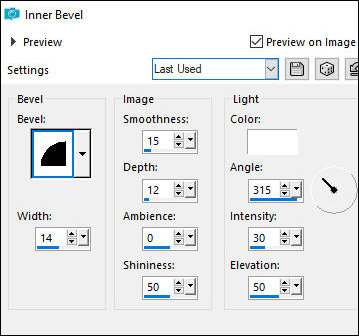
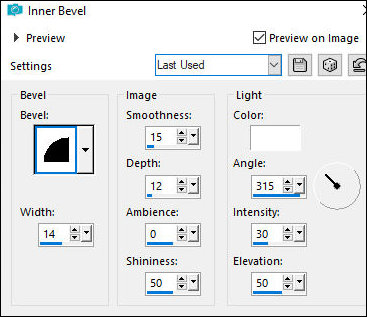
14.Effects / 3D Effects / inner Bevel
15. Select none
16. Merge Down
17. Image / Resize: 80% - all layers
desmarcado
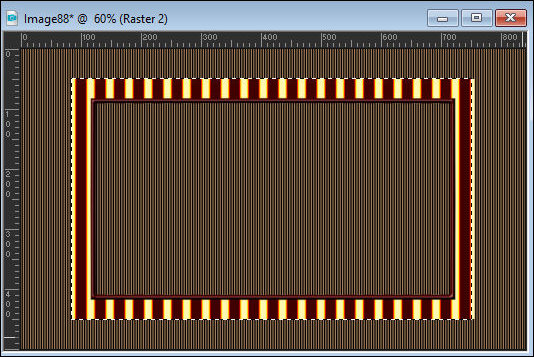
18. Selecione usando a Selection Tool
conforme mostrado no print
19. Selections / Modify / Select
selection borders - igual anterior
20. Adicione uma nova layer
21. Pinte com a cor 1
22. Effects / 3D Effects / Inner Bevel
- igual anterior
23. Select none
24. Merge down
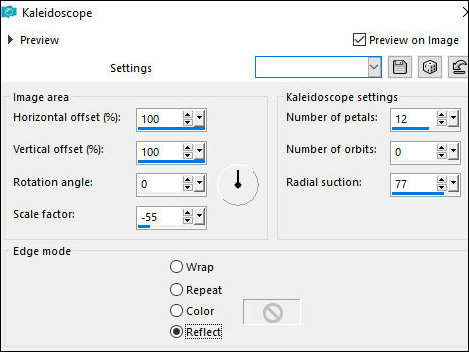
25. Effects / Reflection Effects /
Kaleidoscope
26. Selections / Load selection from
alpha channel / Selection 1
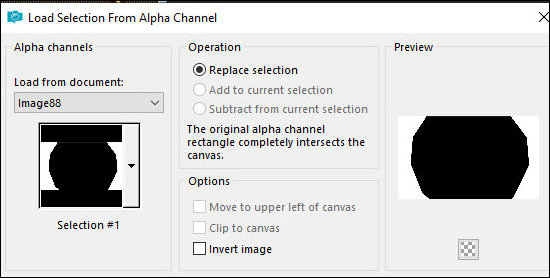
27. Pressione Delete
28. Selections / Load selection from
alpha channel / Selection 2
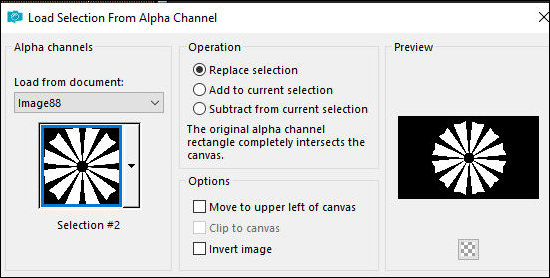
29. Ative a layer de fundo
30. Selections / Promote selection to
layer
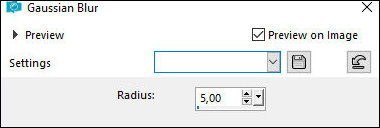
31. Adjust / Blur / Gaussian Blur: 5
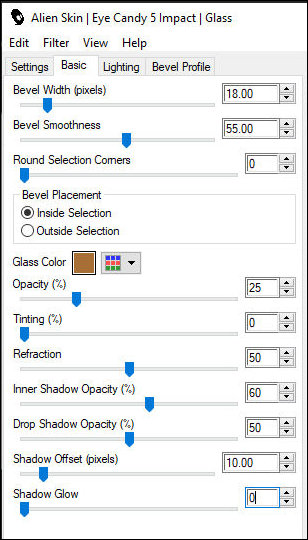
32. Effects / Plugins / Eye Candy 5:
Impact / Glass
33. Select none
34. Ative a layer superior
35. Copie o tube floral
36. Cole como nova layer
37. Não precisa mover
38. Adjust / Sharpness / Sharpen
39. Merge Down
40. Layers / Duplicate
41. Image / Resize: 80% - all layers
desmarcado
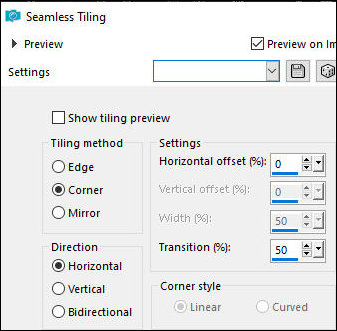
42. Effects / Image Effects / Seamless
Tiling
43. Selections / Load selection from
alpha channel / Selection 3
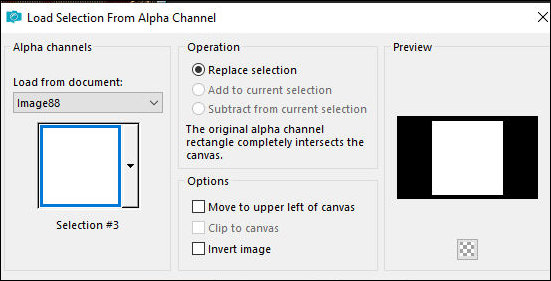
44. Pressione Delete
45. Select none
46. Merge Down
47. Drop Shadow: 0 0 60
30 preto
48. Selections / Select all
49. Image / Add borders / 10px / cor 1
50. Selections / Invert
51. Effects / 3D Effects / Inner Bevel
52. Selections / Select all
53. Image / Add borders / 50px / Cor 2
54. Selections / Invert
55. Effects / Plugins / Graphic Plus /
Cross Shadow

56. Select none
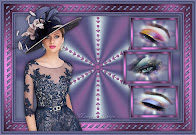
57. Copie o tube principal
58. Cole como nova layer
59. Ajuste o tamanho
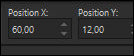
60. Ative a Pick Tool e configure:
X=60 - Y=12 - Pressione M (ou posicione manualmente)
61. Adjust / Sharpness / Sharpen
62. Drop Shadow: igual anterior
63. Selections / Select all
64. Image / Add borders / 10px / cor 1
65. Selections / Invert
66. Effects / 3D Effects / inner Bevel
- igual anterior
67. Select none
68. Copie a frame [keret díszem]
69. Cole como nova layer
70. Objects / Align / Right
71. Image / Add borders / 1px / cor 2
72. Image / Resize: 950x621px
73. Coloque as assinaturas
74. Merge all
75. Salve como jpeg
|