|
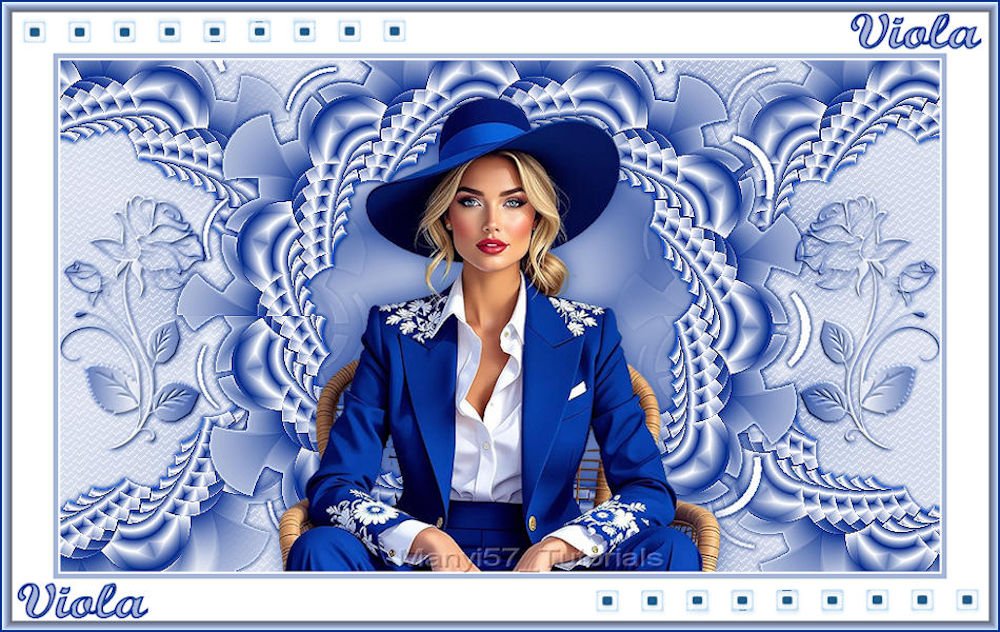
(versão Original de Manyi)
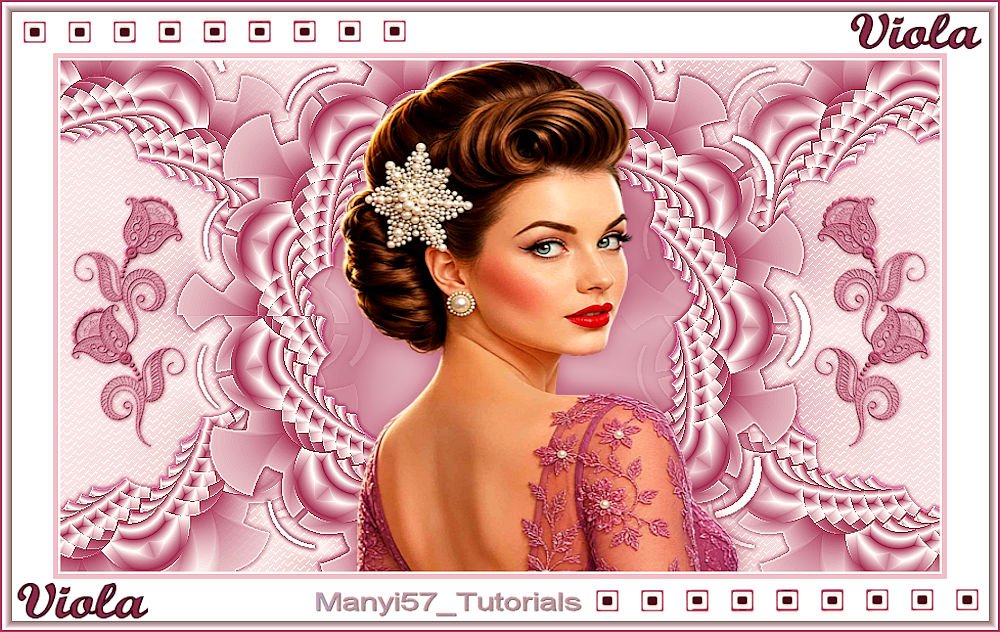
(minha versão)

This tutorial is from Manyi who I thank for
letting me translate their tutorials.

Original aqui
Tubes

Material

Plugins
GMIC - Mehdi - Simple - AP[Lines] -
Mura's Seamless
You can find these plugins on the websites of:
Renée
Cloclo
You can also find this tutorial translated into these languages:
(Click on the flag)


|
Notes:
> Open the material / Duplicate (shift+d) / Close the originals
> Change the blend mode of the layers to match their colors.
> In older versions of PSP, Mirror Horizontal=Mirror / Mirror Vertical=Flip /
Pick tool=deformation
> Open the masks in psp and
minimize
>Adjust the size of the tubes according to your images
|
TUTORIAL
Materials used:
1 female tube
***
1. Open the alpha file [Viola Image PSP file]
Duplicate it (Shift+D) / Close the original
2. Set the foreground color to #082f8e and the background color to #ffffff
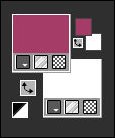
Prepare a rectangular gradient as
shown in the screenshot
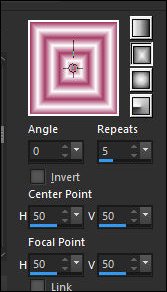
Fill the image with this gradient
3. Effects - Plugins - Mehdi - Sorting Tiles
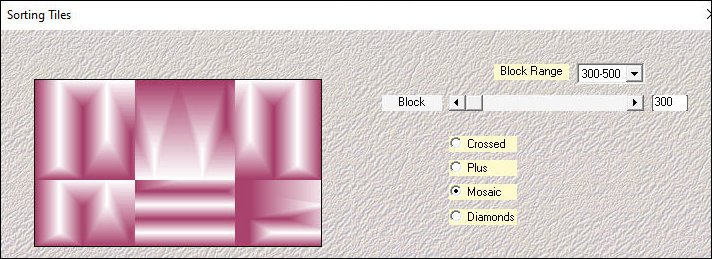
4. Effects - Plugins - Simple - Top Left Mirror
5. Effects - Plugins - MIC_QT - Deformations - Continuous Droste
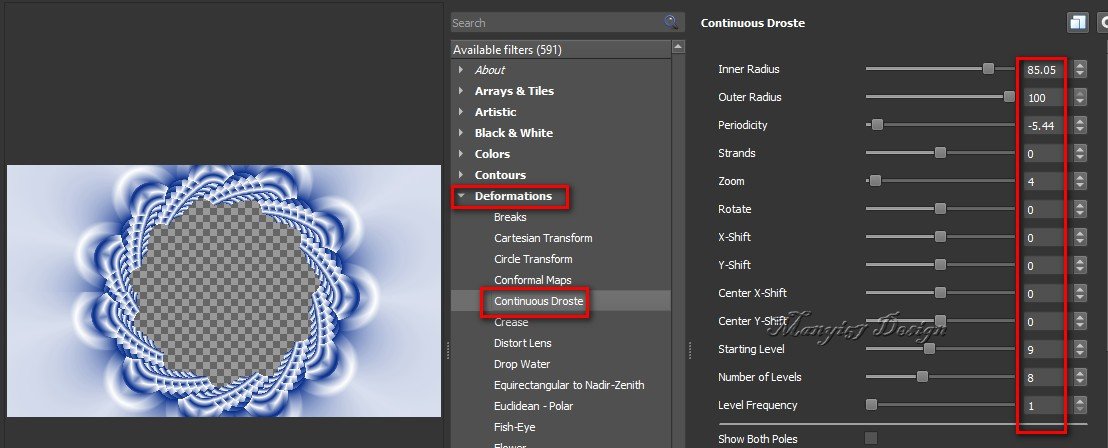
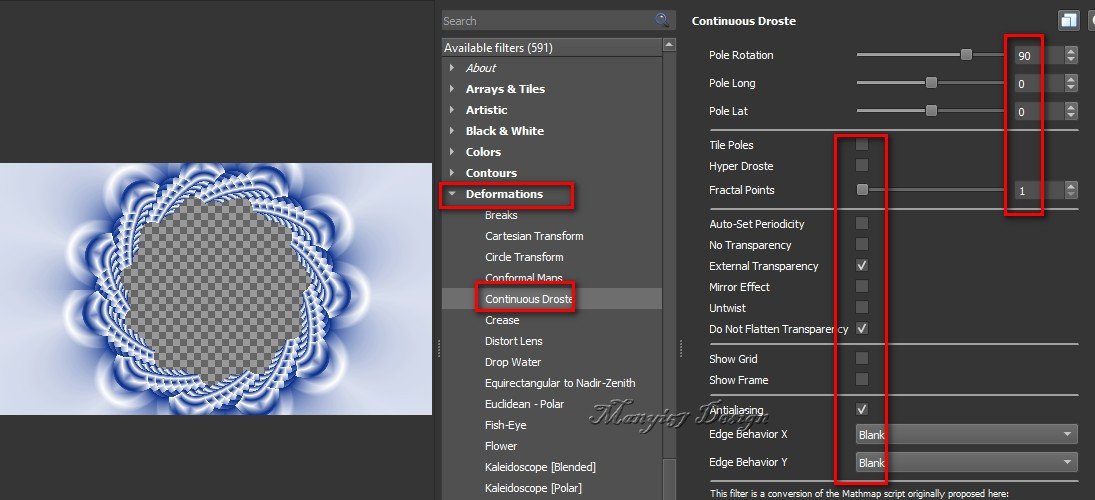
6. Selections - Load selection from alpha channel - Selection 1
7. Selections - Promote selection to layer
8. Effects - Plugins - AP [Lines] - SilverLining
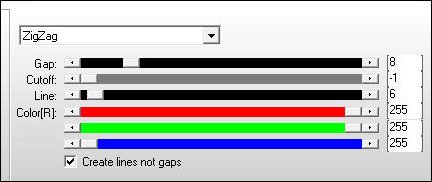
9. Selections - Invert
Activate the background layer
Selections - Promote selection to layer
10. Select None
Effects - Edge Effects - Enhance
11. Layers - Arrange - Bring to Top
12. Drop Shadow: 1 1 85 5 #082f8e
13. Drop Shadow: -1 -1 85 5 #082f8e
14. Add a new layer
Layers - Arrange - Send to Bottom
Selections - Select All
Fill with the gradient
Select None
15. Adjust - Blur - Radial Blur
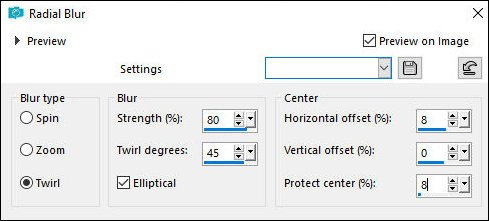
17. Activate the top layer
Layers - Duplicate
18. Activate the layer below (the original)
Effects - Image Effects - Seamless Tiling
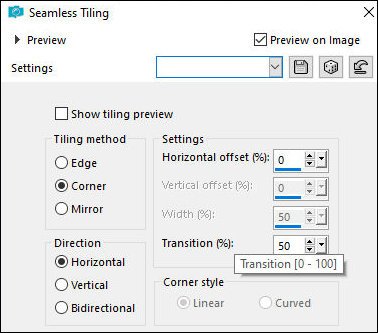
19. Copy the main tube
Activate the top layer
Paste as a new layer
Resize: 433x465px (if using a different tube, adjust the size
accordingly)
Pick Tool (K): X=213 Y=36; press M
20. If using a different tube, apply: Adjust - Sharpness - Sharpen
21. Drop Shadow: 0 0 60 30.00 #082f8e
22. Add a new layer
Activate the Paint Brush and select the [Manyi Brush]
If it doesn't work, open the [Manyi Brush] file in your workspace,
then go to: File - Export - Custom Brush - name it - OK
23. Configure the Paint Brush as shown in the screenshot

24. Stamp using the gradient or a solid blue color, following the
example
Image - Mirror - Mirror Horizontal; then, use the Move tool to shift
it to the right, as shown in the example
25. Effects - Plugins - Mura's Seamless - Emboss at alpha - default
settings
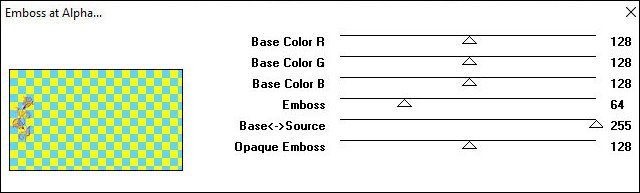
26. Layers - Duplicate
Image - Mirror - Mirror Horizontal
27. Merge down
28. Drop Shadow: 1 1 85 5.00 #082f8e
29. Border - 2px - #ffffff
Border - 5px - #a5b5d6
Border - 50px - #ffffff
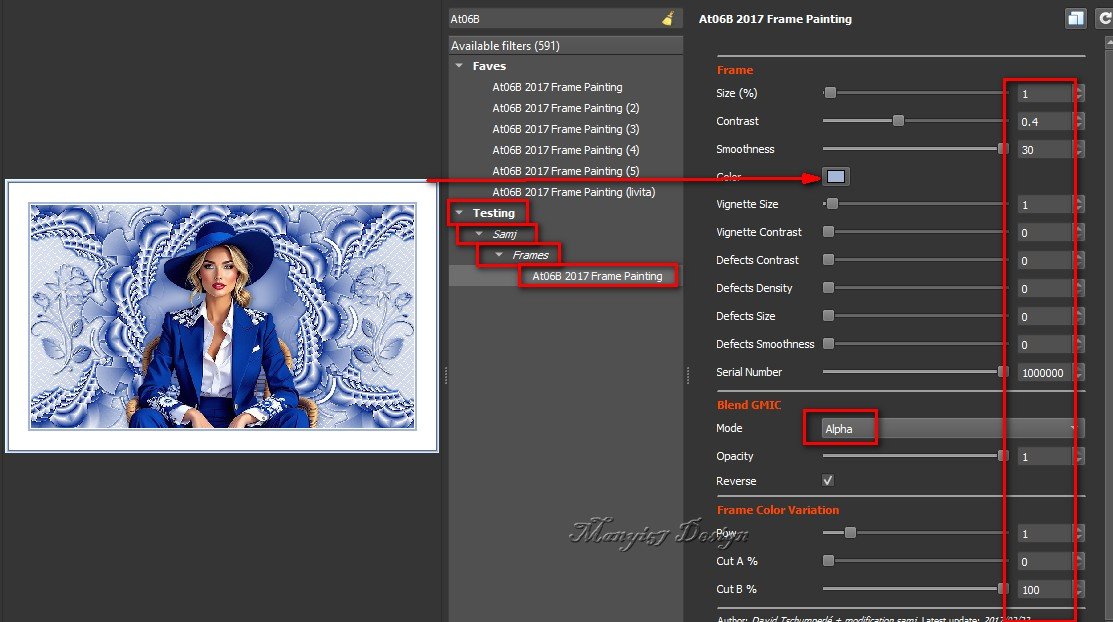
30. Effects - Plugins - GMIC-QT - Testing - Samj - Frames - At06B
2017 Frame Painting - color #a5b5d6
31. Copy [Keret díszem-Manyi 57]
Paste as a new layer
32. Border - 2px - #082f8e
33. Resize: 950x600px - ensure "all layers" is selected
34. Add credits
Merge all
Save as JPEG

|