|
Notes:
> Open the material / Duplicate (shift+d) / Close the originals
> Change the blend mode of the layers to match their colors.
> In older versions of PSP, Mirror Horizontal=Mirror / Mirror Vertical=Flip /
Pick tool=deformation
> Open the masks in psp and
minimize
>Adjust the size of the tubes according to your images
|

SCRIPT
Open the alpha file [Rita PSP IMAGE fáj] /
Duplicate (shift+d) / Close the original
Add a new layer
Activate the background layer
Paint with the color #8233cd
Activate the top layer
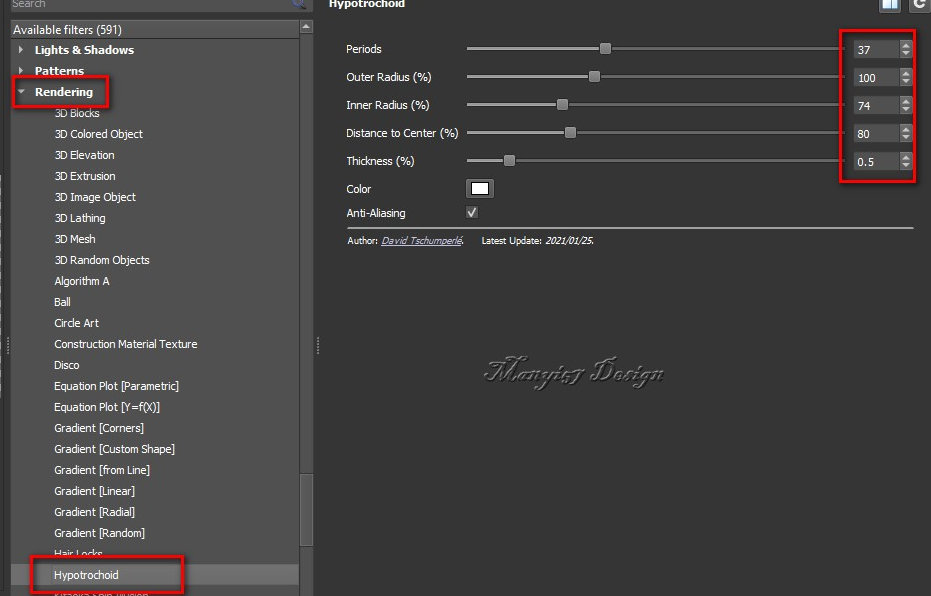
Effects / Plugins / GMIC_QT / Rendering / Hypotrochoid
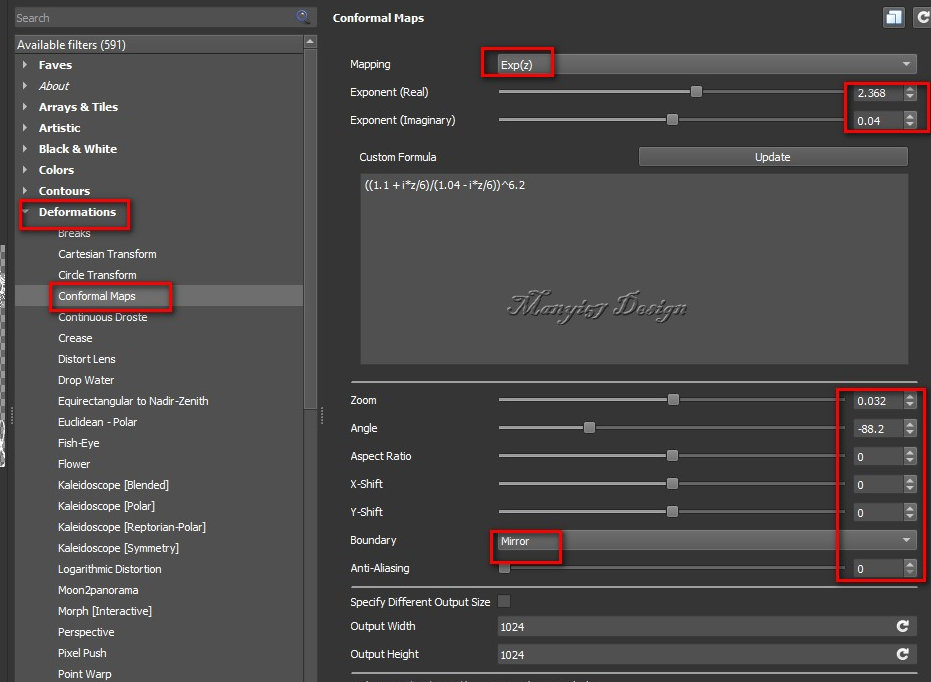
Effects / Plugins / GMIC_QT / Deformations /
Conformal Maps
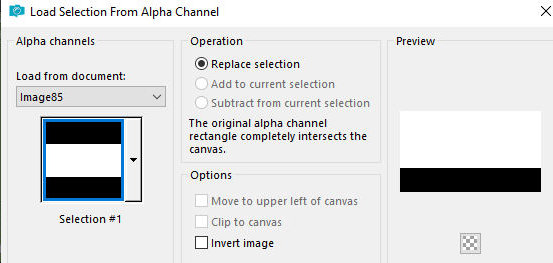
Selections / Load selection from alpha channel
/ Selection 1
Press Delete
Select none
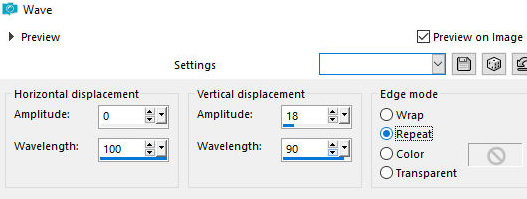
Effects / Distortion Effects / Wave
Layers / Duplicate
Image / Mirror / Mirror Vertical
Merge Down
Selections / Select all
Add a new layer
Copy the landscape tube [tájam]
Paste it into the selection
Layers / Arrange / Move down
Select none
Copy the tube [female]
Paste as a new layer
Adjust the size if necessary
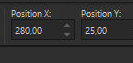
Activate the Pick Tool and configure: X=280 - Y=25 - Press M
If using another tube, position it manually
with the Move Tool
Adjust / Sharpness / Sharpen
Drop Shadow: 0 0 60 30 black
Borders:
1px / white
10px / #8233cd
1px / white
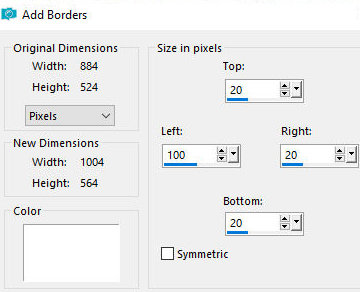
Selections / Select all
Border:
symmetric unchecked / 20 100 20 20 / white
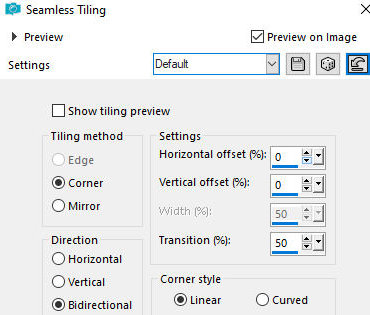
Effects / Image Effects / Seamless Tiling -
default
Selections / Invert
Adjust / Blur / Gaussian Blur: 40
Effects / 3D Effects / Cutout - color: 3e1862
Select none
Copy the tube [Deco]
Paste as a new layer
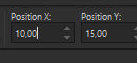
Activate the Pick tool and configure: X=10 - Y=15 - Press M
Copy the title [Rita]
Paste as a new layer
Or choose a font, a size, and type the desired name
After typing the name, convert it to a Raster Layer by
right-clicking on the layer and selecting Convert to raster
layer
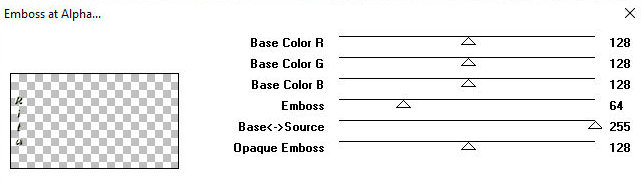
Effects / Plugins / Mura's Seamless / emboss at Alpha
Drop Shadow: 1 1 85 5 white
Borders:
1px / white
10px / #8233cd
1px / white
Image / Resize: 950x543px - all layers checked (optional)
Add the signatures
Merge all
Save as jpeg