|
This tutorial is from Manyi who I thank for letting me translate their tutorials.
Material
Many thanks to the creators of these materials
GMIC - Flaming Pear - Mura's meister - AAA Frames - Mura's Seamless - AP[Lines]
You can find these plugins on the websites of:
You can also find this tutorial translated into these languages:
SCRIPT > Open the masks in psp and
minimize * 1. Open the alpha file [2025-jusztina] -
duplicate (shift+d) - Close the original
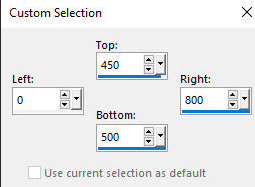
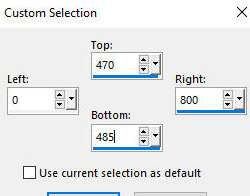
3. Activate the Selection Tool - Custom Selection and set it
according to the print
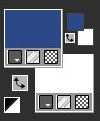
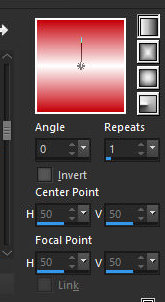
4. Color the selection with this Linear gradient
5. Activate the Selection Tool - Custom Selection and set it
according to the print
6. Add a new layer
7. Color the layer with the foreground color (32c4887) 8. Select none 9. Effects - Plugins - Mura's Seamless - Emboss at Alpha
10. Merge down
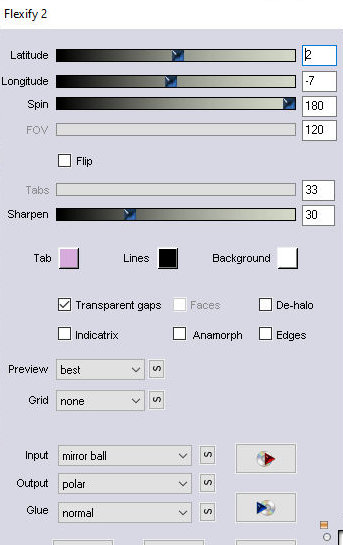
11. Effects - Plugins - Flaming Pear - Flexify 2
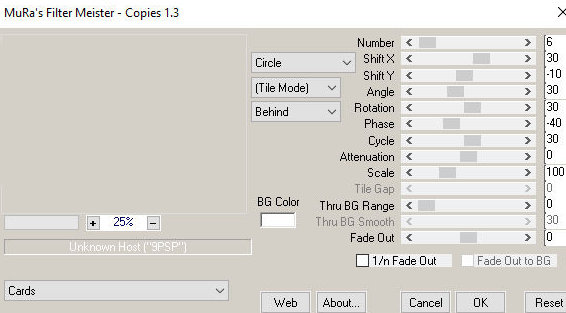
12. Effects - Plugins - Mura's Meister - Copies
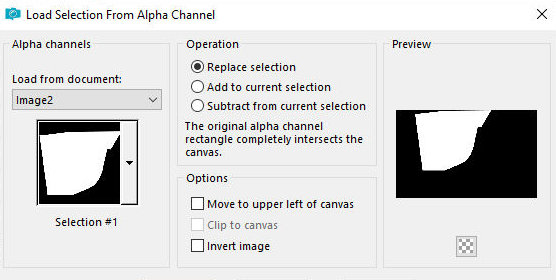
13. Selections - Load selection from alpha channel - Selection
#1
14. Press Delete on the keyboard
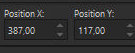
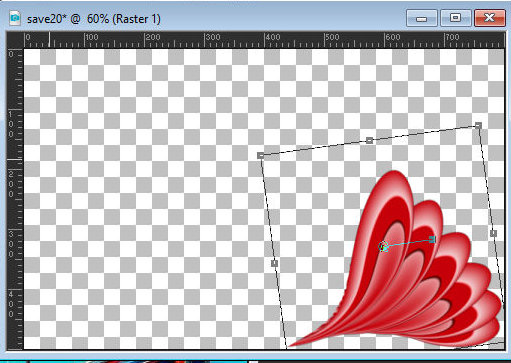
15. Select none 16. Activate the Pick Tool and set: X=387.00 - Y=117.00
16b. With the Pick Tool still activated, move the image further down and to the left and rotate it until the tip is close to the bottom edge, as shown in the print
17. Layers - Duplicate
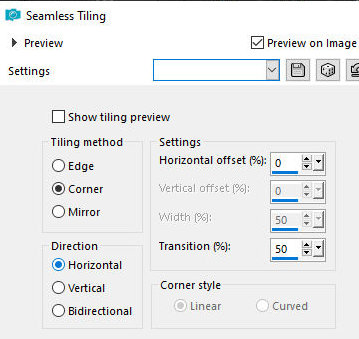
18. Image - Mirror - Mirror Vertical 19. Merge down 20. Layers - Duplicate 21. Image - Mirror - Mirror Horizontal 22. Merge down 23. Layers - Duplicate 24. Effects - Image Effects - Seamless Tiling
25. Add a new layer
26. Paint the layer with the foreground color 27. Layers - Arrange - Send to Bottom 28. Selections - Load selection from alpha channel - Selection #2
28b. Activate the background layer
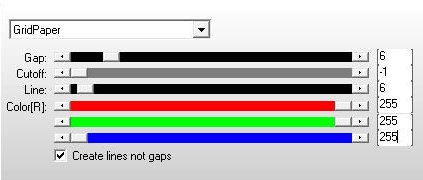
29. Effects - Plugins - Ap [Lines] - Lines-SilverLining
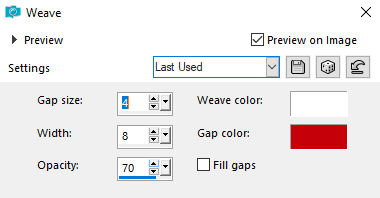
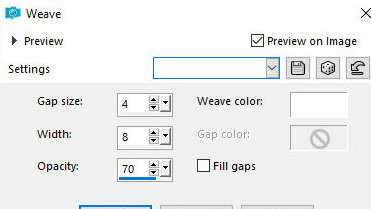
30. Effects - Texture Effets - Weave
31. Selections - Invert
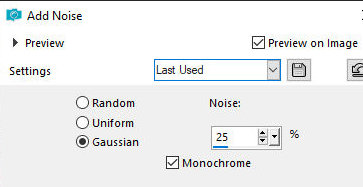
32. Adjust - Add/Remove Noise - Add Noise
33. Activate the background layer
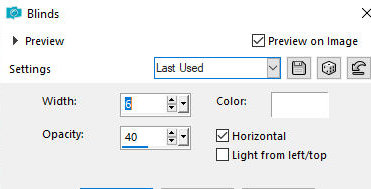
34. Copy the landscape and paste into the selection 35. Select none 36. Image - Add borders - 2px - white 37. Image - Add borders - 10px - #2c4887 38. Image - Add borders - 2px - white 39. Selections - Select all 40. Image - Add borders - 50px - foreground color 41. Drop shadow:0 0 60 30 #032524 42. Selections - Invert 43. Effects - Texture Effects - Blinds
44. Effects - Texture Effects - Weave
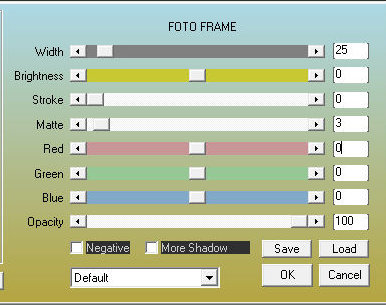
45. Effects - Plugins - AAA Frames - foto Frame
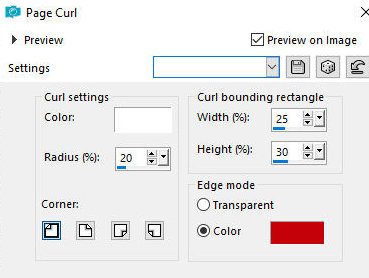
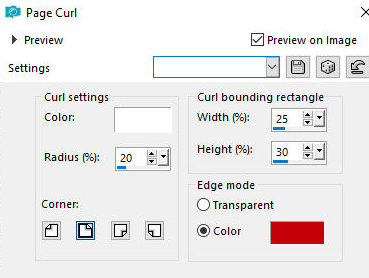
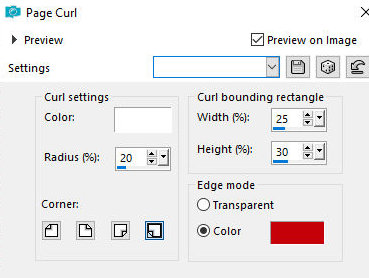
46. Effects - Image Effects - Page Curl (Apply this effect 4 times, alternating the corners so that the effect is applied to all 4 corners)
47. Select none
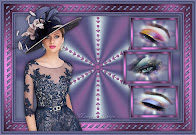
48. Copy [diszem] and paste as a new layer 48b. No need to move 49. Copy [diszem1] and paste as a new layer 49b. No need to move 49c. Colorize according to your colors 50. Copy the female tube and paste it as a new layer 51. Position the model to the left (adjust the size if necessary) 52. Adjust - Sharpness - Sharpen 53. Drop shadow of your choice 54. Merge all 55. Effects - Plugins - GMIC-QT - Testing - Samj - Frames - At06B 2017 Frame Painting
56. Image - Resize: 900-x609px (Optional) *
|