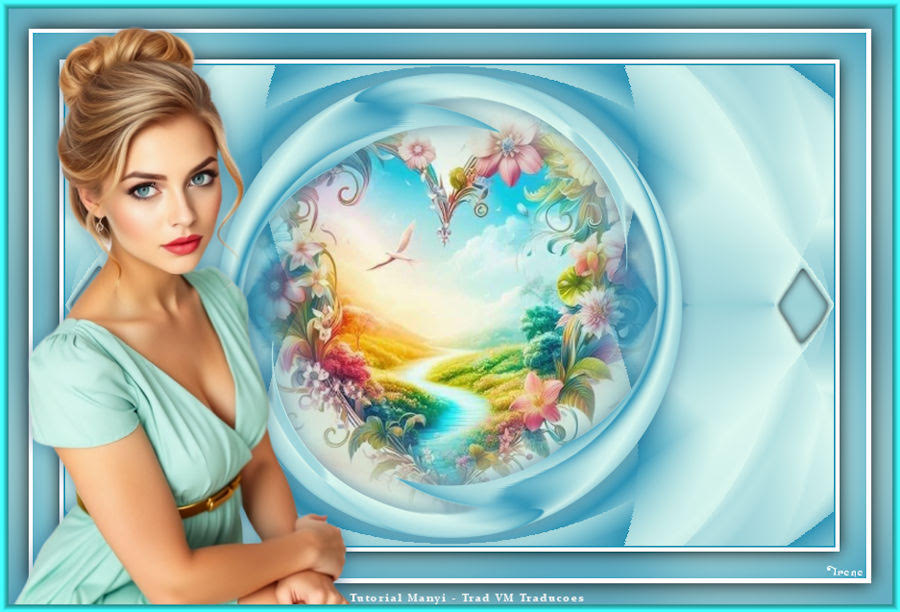
|

This tutorial is from Manyi who I thank for
letting me translate their tutorials.

Original here
Tubes

Material

Many thanks to the creators of
these materials

Plugins
GMIC
Mehdi
Scribe
Flaming Pear
Eye Candy 5: Impact
You can find these plugins on the websites of:
Renée
Cloclo
You can also find this tutorial translated into these languages:
(Click on the flag)


SCRIPT
Notes:
> Open the material / Duplicate (shift+d) / Close the originals
> Change the blend mode of the layers to match their colors.
> In older versions of PSP, Mirror Horizontal=Mirror / Mirror Vertical=Flip /
Pick tool=deformation
> Open the masks in psp and
minimize
>Adjust the size of the tubes according to your images
*
1
>>Save the selection in the Selections folder on the psp
>>Open a folder and name it: flora-gmic
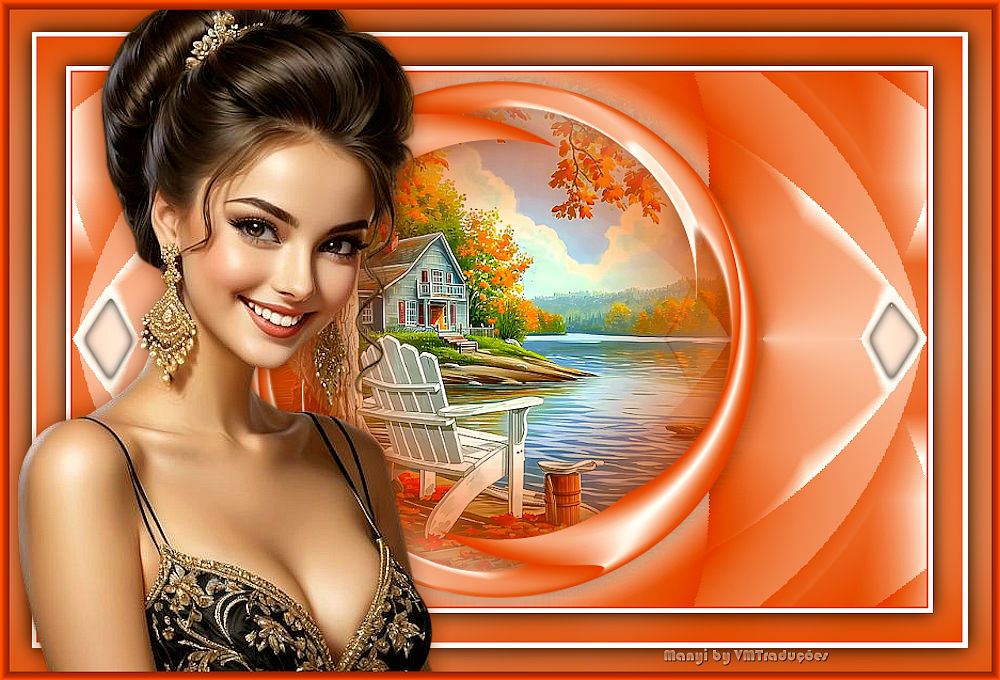
Open a new image measuring 800x500px
Colors: Foreground: #5e7dab - Background: #ffffff

Prepare a Radial gradient

Paint the image with this gradient
2
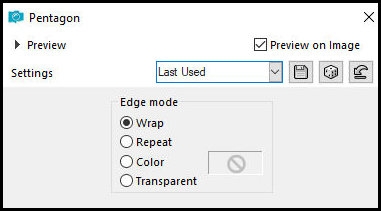
Effects - Geometric Effects - pentagon
3
Effects - plugins - Mehdi - Sorting Tiles

4
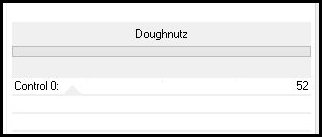
Effects - plugins - unlimited 2 - Scribe - Doughnutz
5
Image - Rotate Right
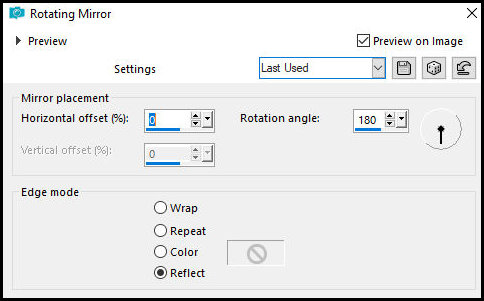
6
Effects - Reflection Effects - Rotating mirror
7
Image - Rotate - Left
8
Selections - Load disc selection - Selection [2024-Flora Selections]

9
Selections - Promote selection to layer
10
Select none
11
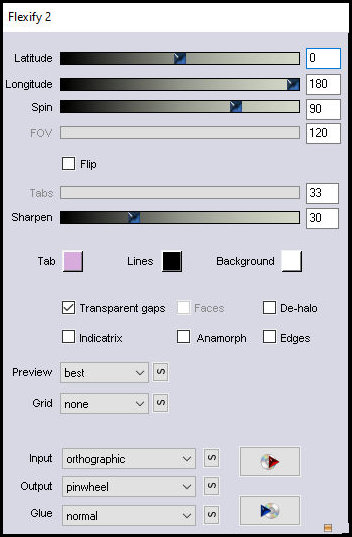
The top layer will be activated
Effects - plugins - Flaming pear - Flexify 2
12
Dro's Shadow: 0 0 60 30 #202b3c
13
Activate the background layer
Copy the tube mixed landscape and paste as a new layer
Use Resize and Pick Tool to reduce the image to fit inside the
circle
Erase the parts outside the circle with the Eraser Tool
14
Activate the background layer
Select the two side diamonds as shown in the print.
I used Freehand Selection - Selection type=point to point to select

15.
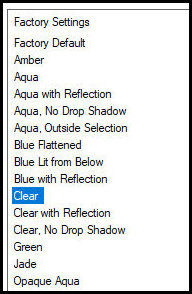
Effects - plugins - Eye Candy 5: Impact - Glass - Preset [Clear]
Select none
16
Image - Add borders - 2px - foreground color
17
Effects - plugins - GMIC_QT - Frames- Frame (blur)

Return to PSP
Save the image in the gmic-flora folder and name it: 1
18
Reserve the image you have been working on to delete later
Open image 1 saved in the gmic folder and continue working on it
Effects - Plugins - GMIC_QT - Frames - Frame (blur) again

Return to the psp and save the image in the gmic folder, renaming it
to 2
19
Reserve the image you are working on to delete later
Open image 2 saved in the gmic folder and continue working on it
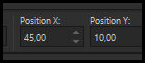
Copy the main tube and paste it as a new layer
Activate the Pick tool and configure: X=45 - Y=10 (or position your
image manually)
20
Adjustment - Sharpness - Sharpen
21
Drop shadow: 0 0 60 30 #202b3c
22
Merge all
23
Note the foreground color code: #5e7dab
Effects - Plugins - GMIC_QT - Testing - Samj - Frame s- At06B 2017
Frame Painting
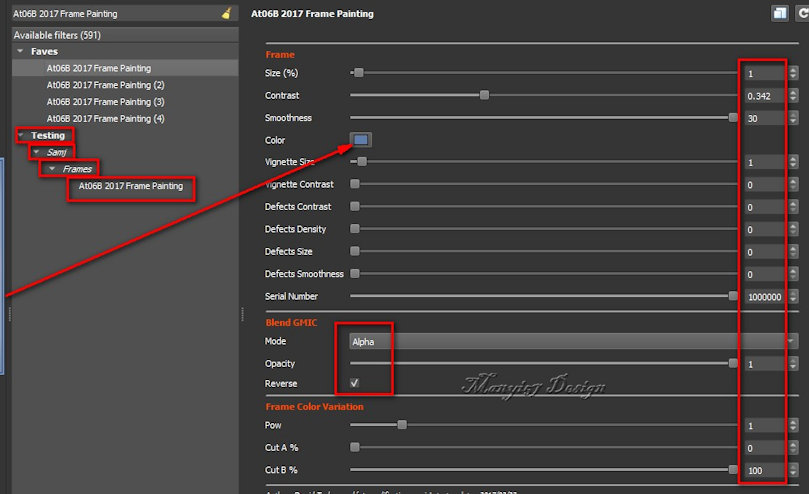
Configure by entering the color code in the field
24
Image - Resize: 900x612px (optional)
Put signatures
Merge all
Save as jpeg
*
Thank you Irene for testing my translations


|