|


This tutorial is from Manyi who I thank for letting me translate her tutorials.

Original HERE
Tubes

Material

Many thanks to the creators of these materials

Plugins
Mehdi-Sorting Tiles
AP Lines –Silverlining
FM Tile Tools-Saturion Emboss
Simple-Top Botton Wrap
AAA Frames - Foto Frame
You can find these plugins on the websites of:
Renée
Cloclo
You can also find this tutorial translated into these languages:
(Click on the flag)


SCRIPT
Notes:
> Open the material / Duplicate (shift+d) / Close the originals
> Change the blend mode of the layers to match their colors.
> In older versions of the PSP Mirror Horizontal=Mirror / Mirror Vertical=Flip /
Pick tool=deformation
1. Open the alpha file [2024-Ellabella] / Duplicate (shift + d) / close the
original
2. Colors: ForegRound: #59799f / Background: #ffffff
1

3. Prepare a Sunburst gradient 2

4. Paint the image with this gradient
5. Effects / plugins / Mehdi / Sorting Tiles
3

6.Effects / Reflection Effects / Rotating mirror
4

7. Image / Rotate Right
8. Effects / reflection effects / Rotating mirror - same as above
5
9. Image / rotate Left
10. Effects / plugins / AP [Lines] / SilverLining
6

11. Effects / Texture Effects / Weaves
7

12. Effects / Plugins / FM Tile Tools / Saturation Emboss
8

13. Selections / Load selection from alpha channel / Selection #1
9

14. Selections / Promote selection to layer
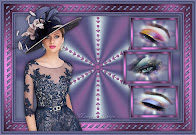
15. Effects / Artistic Effects / halftone
10

16. Selections / Modify / Contract=30
11

17. Selections / promote selection to layer
18. Adjust / Blur / Gaussian Blur=20
12

19. Effects / plugins / Simple / Top Bottom Wrap
13

20. Adjust / Add/Remove noise/ Add noise
14

21. Drop shadow: 0 0 60 30 #263342
22. Select none
23. Activate the middle layer - Promoted selection
24. Drop shadow: same as above
25. Activate the background layer
26. Effects / Image Effects / Seamless Tiling
15

27. Selections / Load selection from alpha channel / Selection #2
16

28. Selections / Promote selection to layer
29. Adjust / blur / Gaussian Blur=20
17
30. Adjust / Add/Remove Noise / Add Noise - same as above
18

31. Select none
32. Drop shadow: same as above with color #263342
33. Activate the layer(promoted selection) the second from top to
bottom
34. Effects / Image Effects / Seamless Tiling
19

35. Image / Add borders / 2px / #59799f
36. Image / Add borders / 5px / #ffffff
37. Image / Add borders / 2px / #59799f
38. Selections / Select all
39. Image / Add borders / 50px / #ffffff
40. Drop shadow: 0 0 70 40 black
41. Selections / Invert
42. Effects / Texture Effects / Mosaic antique
20

43. Effects / Plugins / AAA Frames/ Foto Frame
21

44. Repeat Foto Frame with this other configuration

45. Select none
46. Copy the flower (there are several options in the material,
choose the one that matches your image) and paste as a new layer.
47. You don't need to move
48. Copy the main tube and paste it as a new layer
49. Position according to the model
50. Adjust / Sharpness / Sharpen
51. Drop shadow de sua escolha
52. Image / Add borders / 1px / #000000
53. Image / Resize: 950x614px (opcional)
54. Add signatures
55. Merge all
56. Save as jpeg
*
Versão de Irene que testa minhas traduções e a quem eu
agradeço


|