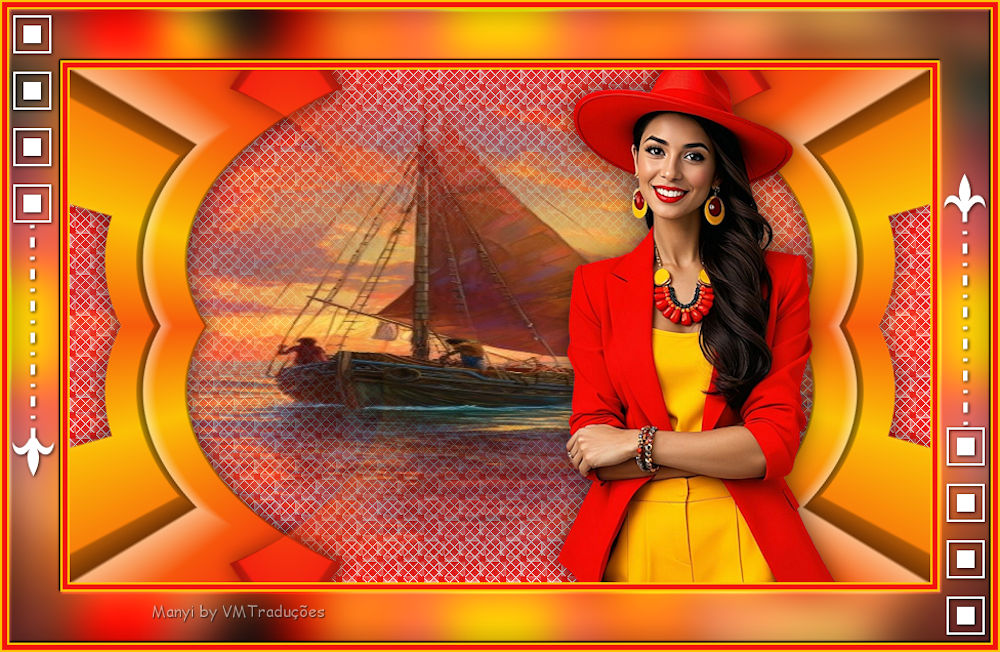
|


This tutorial is from Manyi who I thank for
letting me translate their tutorials.

Original here


Tubes


Material

Many thanks to the creators of
these materials


Plugins
Tramages - Simple - AP [Lines]

You can find these plugins on the websites of:
Renée
Cloclo

You can also find this tutorial translated into these languages:
(Click on the flag)


SCRIPT
|
Notes:
> Open the material / Duplicate (shift+d) / Close the
originals
> Change the blend mode of the layers to match their
colors.
> In older versions of PSP, Mirror Horizontal=Mirror /
Mirror Vertical=Flip / Pick tool=deformation
> Open the masks in psp and
minimize
>Adjust the size of the tubes according to your images
|
*
1. Open a new image measuring 840x500px
2. Activate the Selection Tool / Custom Selection and set:
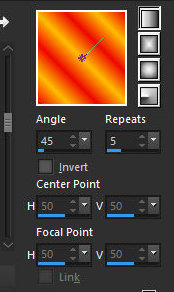
3. Prepare a Linear gradient
4. Paint the selection with this gradient
5. Select none
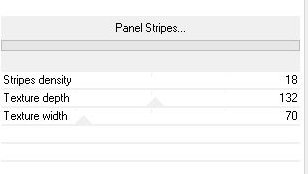
6. Effects - Plugins - Unlimited 2 - Plots - Panel
Stripes
7. Effects - Geometric Effects - Skew
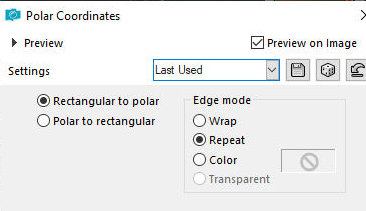
8. Effects - Distortion Effects - Polar
Coordinates - Rectangular to polar - repeat
9. Effects - Plugins - Simple - Top Left Mirror
10. Drop Shadow: 0 0 60 30 black
11. Layers - Duplicate
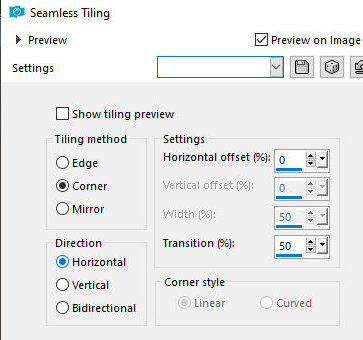
12. Effects - Image Effects - Seamless Tiling
13. Add a new layer
14. Paint with the color #26507A
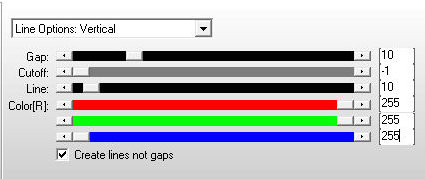
15. Effects - Plugins - A [Lines] - SilverLining
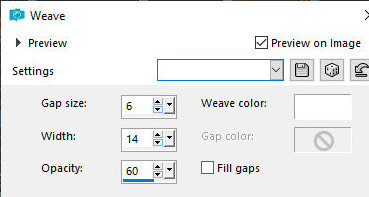
16. Effects - Texture Effects - Weave
17. Layers - Arrange - Send to Bottom
18. Copy the landscape [tájam] and paste it as a new layer
19. Activate the top layer
19b. Copy the main tube [Lánykám] and paste it as a new layer
20. Activate the Pick Tool and set: X=436 - Y=32 - Press M
21.Adjust - Sharpness - Sharpen
22. Drop Shadow: 0 0 60 36 black
23. Image - Add borders - 2px - #FOCAD5
24. Image - Add borders - 5px - 26507A
25. Image - Add borders - 2px - FOCAD5
26. Selections - Select all
27. Image - Add borders - 50px - #FOCAD5
28. Effects - Image Effects - Seamles Tiling - Default
29. Selections - Invert
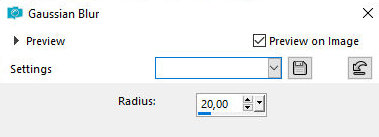
30. Adjust - Blur - Gaussian: 20
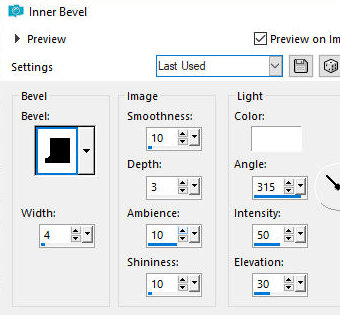
31. Effects - 3D Effects - Inner Bevel
32. Selections - Select all
33. Image - Add border - 2px - FOCAD5
34. Image - Add borders - 5px - #26507A
35. Image - Add borders - 2px - #FOCAD5
36. Selections - Invert
37. Drop Shadow: 0 0 60 36 black
38. Select none
39. Copy the tube [Keret díszem] and paste as a new layer
40. Merge all
41. Image - Resize: 950x619 (optional)
42. Place the signatures
43. Merge all
44. Save as jpeg
*


|
