|
For this
tutorial, you will need:
1 Main Tube
1 Floral Tube
1 JPEG image for the base
I linked the images I used in my version above in the
materials section.
*
Open a folder and name it gmic-daniella
*
Open the JPEG image [alapom] (duplicate/close the
original).
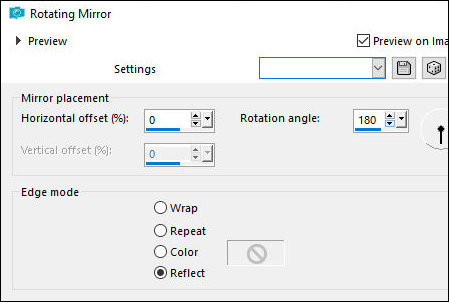
Effects / Reflection Effects / Rotating Mirror
p1
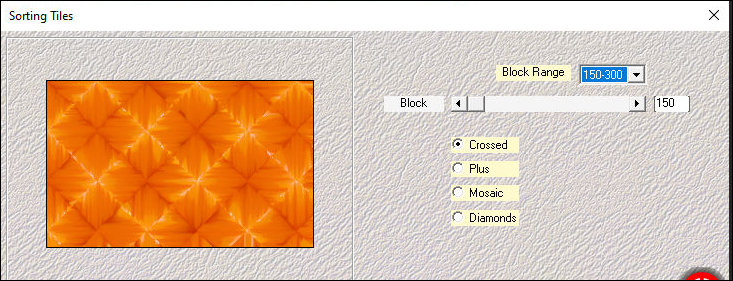
Effects / Plugins / Mehdi / Sorting Tiles
p2
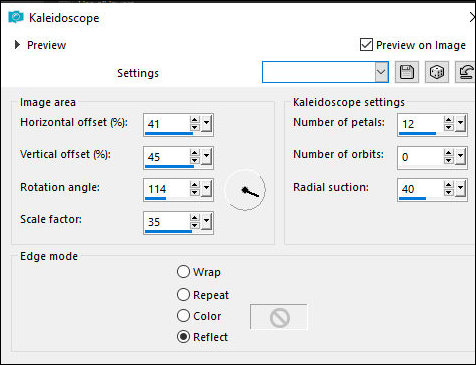
Effects / Reflection Effects / Kaleidoscope
p3
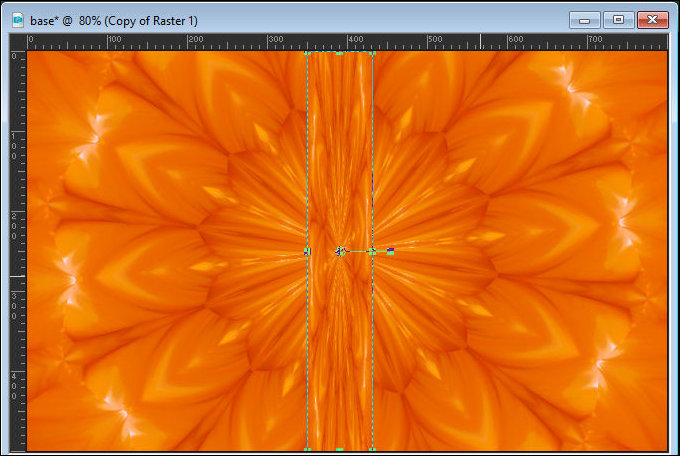
Layers / Duplicate
Activate the Pick Tool / Drag the left side to a height
of 350 px and the right side to a height of 430 px, as
shown in the screenshot.
p4
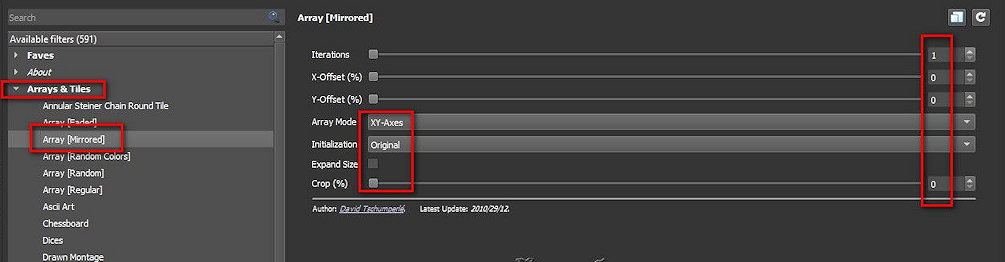
Effects / Plugins / GMIC_QT / Arrays and Tiles / Array (mirrored)
p5
Effects / Plugins / GMIC_QT / Deformations / Circle
Transform
p6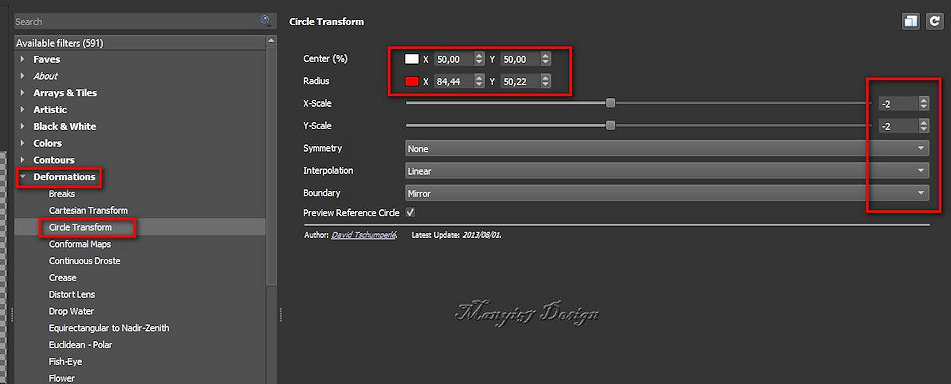
Layers / Duplicate
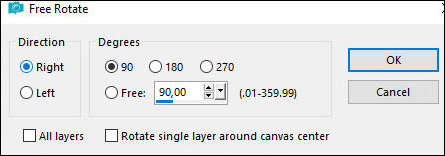
Image / Resize: 65% - all layers unchecked
Image / Free Rotate [right/90]
p7
Merge Down
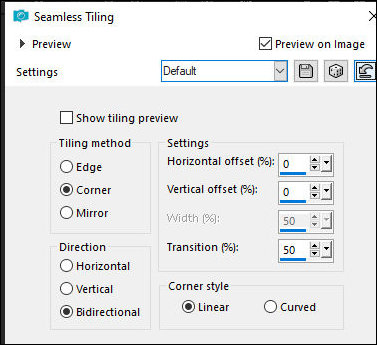
Activate the background layer
Effects / Image Effects / Seamless Tiling
p8
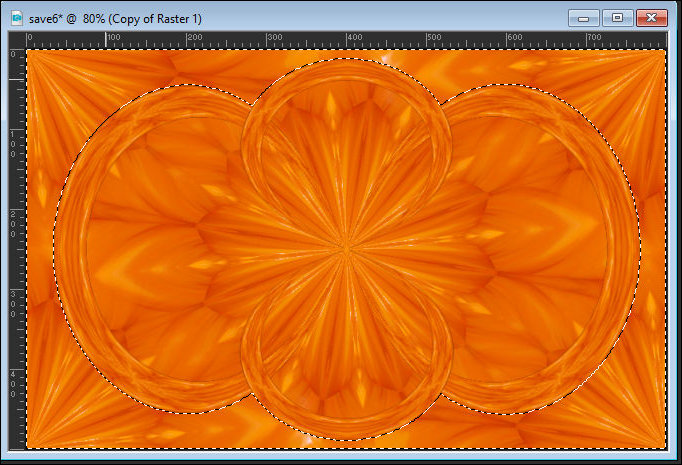
Activate the top layer
Select the background of the image with the Magic Wand
as shown in the print
p9
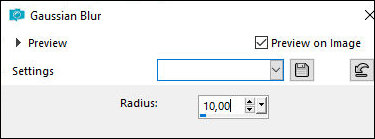
Activate the bottom layer
Selections / Promote selection to layer
Adjust / Blur / Gaussian Blur
p10
Effects / Plugins / AP (Lines) / SilverLining
p11

Select none
Effects / Edge Effects / Enhance
Activate the top layer
Drop Shadow: 0 0 60 30 #220b3f (or another color that
matches your image)
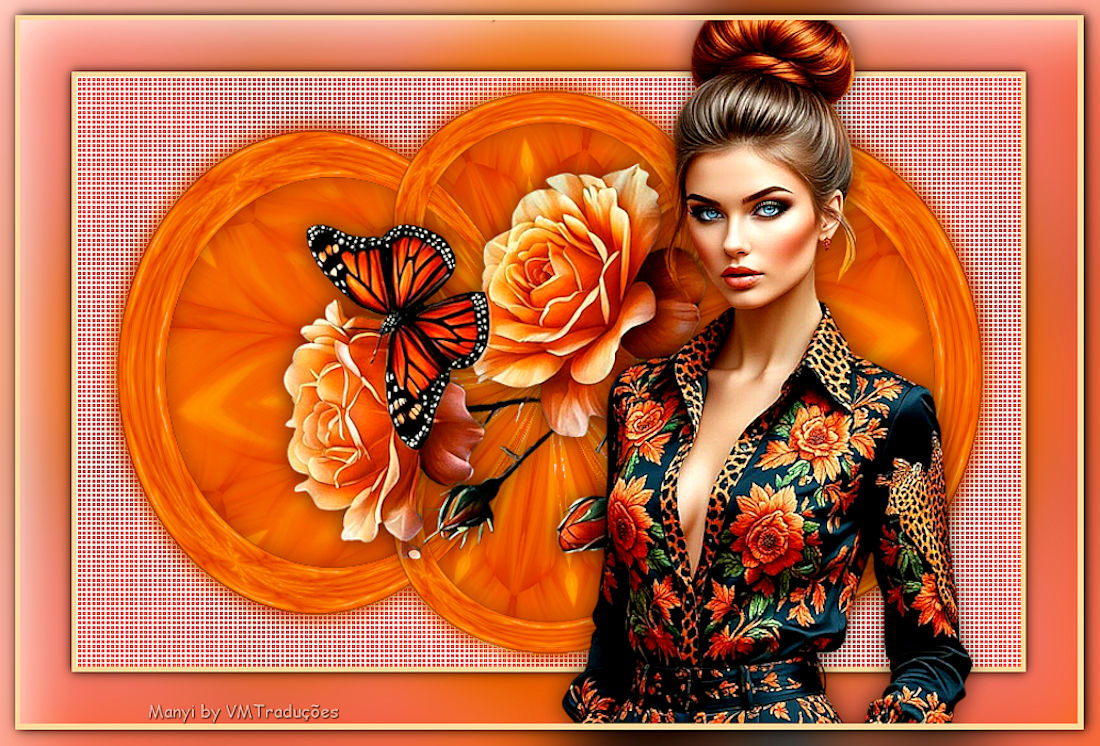
Copy the floral tube [virago]
Paste as a new layer
Position in the center of the image as shown
Drop Shadow as above with black color
Merge Visible
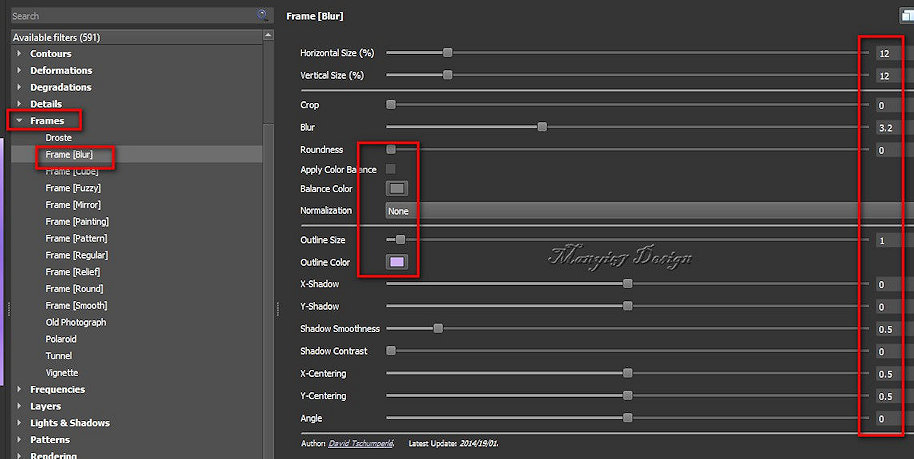
Effects / Plugins / GMIC_QT / Frames / Frame (blur)
color #cdaff2 (light color)
p12
Return to PSP
Save the image in the gmic-daniella folder with the
number 1
Reserve the image that was being edited to delete later
Open image 1 and continue working on it
Copy the main tube
Paste as a new layer
Adjust the size
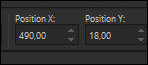
Activate the Pick Tool and set: X=490 - Y=18 - Press M
p13
Or position manually according to the model
Adjust / Sharpness / Sharpen
Drop Shadow same as before
Merge all
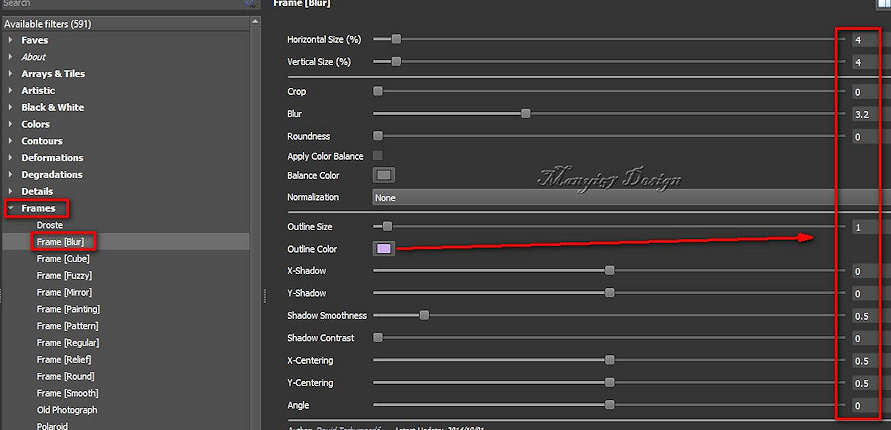
Effects / Plugins / GMIC-QT / Frames / Frame (blur) -
light color
p14
Return to PSP
Save the image in the gmic-daniella folder with the
number 2
Reserve the image that was being edited
Open image 2
Image / Resize: 900x610px
Insert signatures
Merge all
Save as jpeg
Delete reserved images |