|
Este tutorial é de Manyi a quem agradeço por me deixar traduzir seus tutoriais.
Material
GMIC - Mehdi - Simple - Flaming Pear - AP [Lines] - Eye Candy 5: Impact
ROTEIRO
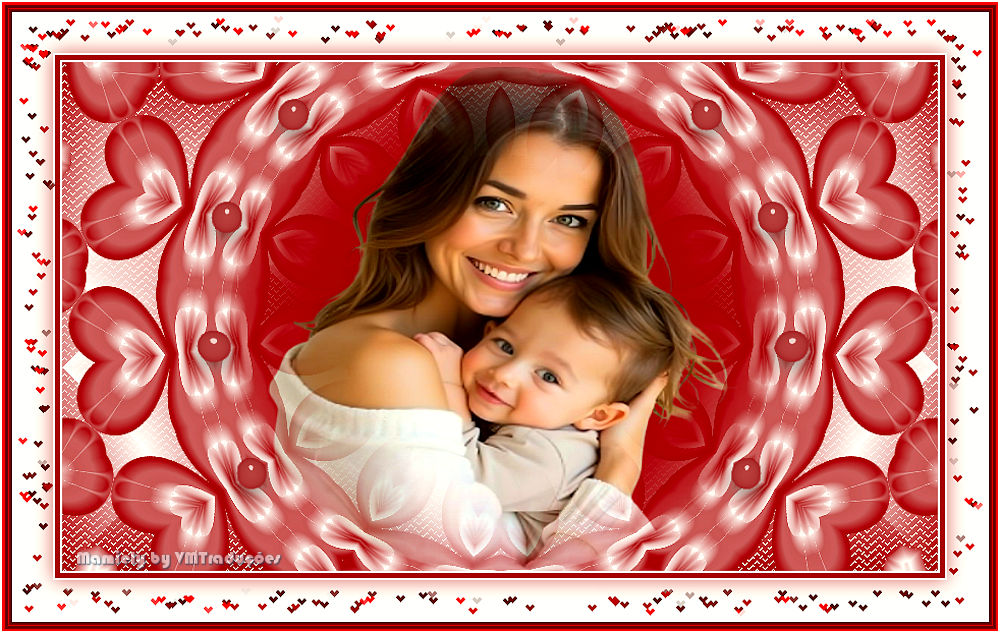
Imagens: 1 tube de mãe e bebê * Material
* * 1. Abra o arquivo alpha channel [Anyák napján] Duplique (shift+d) / Feche o original 2 Coloque a cor #9a0b16 no foreground e a cor #ffffff no background Prepare um gradiente Sunburst
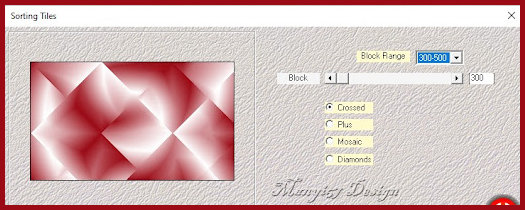
Pinte a imagem com este gradiente 3. Effects / Plugins / Mehdi / Sorting tiles
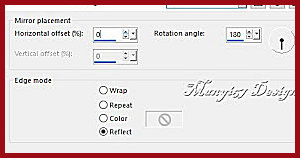
4 Effects / Plugins / Simple / Pizza Slice Mirror 5 Effects / Reflection Effects / Rotating Mirror
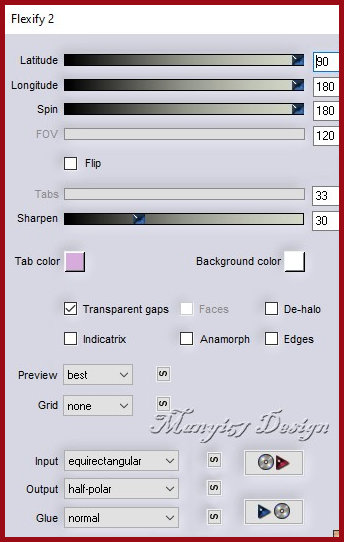
6 Layers / Duplicate Effects / Plugins / Flaming Pear / Flexify 2
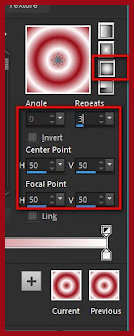
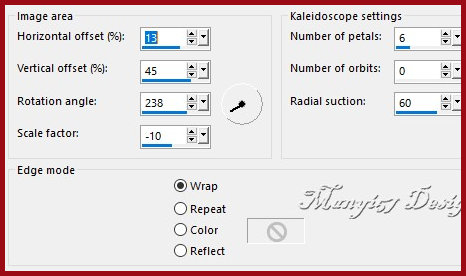
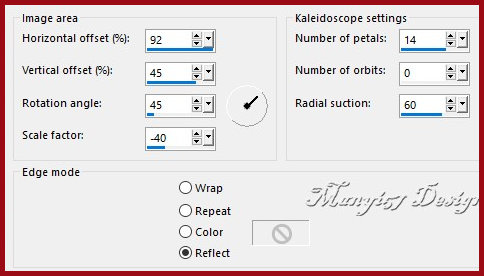
7 Ative a Pick Tool e configure: X=0 Y=0 - Pressione M 8 Effects / Reflection Effects / Kaleidoscope
9 Repita o Kaleidoscope com essa outra configuração:
10 Effects / Reflection Effects / Rotating Mirror - igual anterior
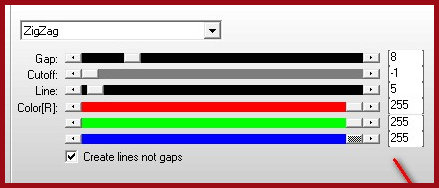
11 Ative a layer inferior Effects / Plugins / AP [Line] / Silverlining
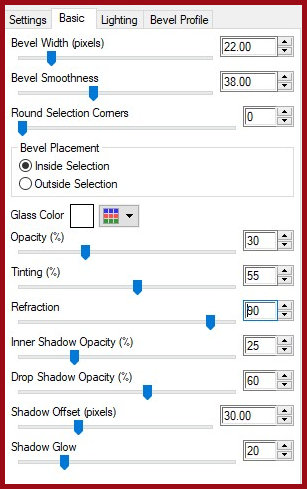
12 Ative a layer superior Copie o tube principal Cole como nova layer Não mova Ajuste o tamanho 13 Selections / Load selection from alpha channel / Selection 1 14 Pinte a seleção com a cor do foreground Effects / Plugins / Eye Candy 5: Impact / Glass
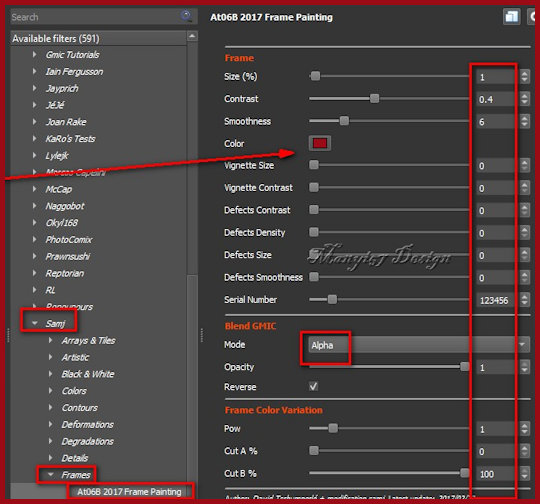
15 Select none Image / Add borders / 2px / branco Image / Add borders / 5px /#9a0b16 Image / Add borders / 2px / branco 16 Selections / Select all Image / Add borders / 50px / branco. 17 Drop shadow: 0 0 60 30 cor #6a080e 18 Select none 19 Adicione uma nova layer 20 Effects / Plugins / GMIC-QT / Testing/ Samj / Frames At06B 2017 Frame Painting - cor #a40710
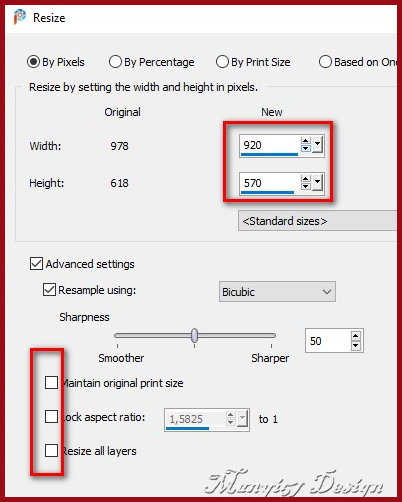
21 Layers / Duplicate Ative a layer abaixo (original) Image / Resize: 920x570 - Lock aspect ratio e all layers desmarcado
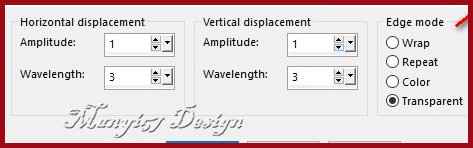
22 Effects / Distortion Effects / Wave
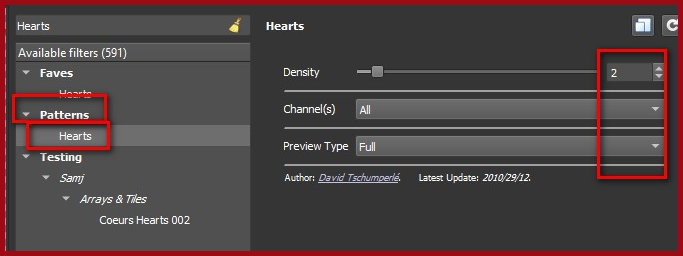
23 Effects / Plugins / GMIC-QT / Patterns / Hearts
24 Image / Add borders / 2px / branco 25 Image / Resize: 950x602px all layers marcado Coloque os créditos Merge all Salve como jpeg
|