|

This tutorial is from Mamiely who I thank for
letting me translate their tutorials.

Original here
Tubes

Material

My images: Here
Plugins
Mehdi - L & K's - Noise Filters -
Simple - VanDerLee - Carolaine and Sensibility
Eye Candy 5: Impact - FF Gallery A
- AAa Frames
You can find these plugins on the websites of:
Renée
Cloclo
You can also find this tutorial translated into these languages:
(Click on the flag)


|
Notes:
> Open the material / Duplicate (shift+d) / Close the originals
> Change the blend mode of the layers to match their colors.
> In older versions of PSP, Mirror Horizontal=Mirror / Mirror Vertical=Flip /
Pick tool=deformation
> Open the masks in psp and
minimize
>Adjust the size of the tubes according to your images
|
SCRIPT
Required Images:
1 female tube
1 decorative tube
1 landscape
*
Place the selections in the PSP
Selections folder
*
Colors:
*
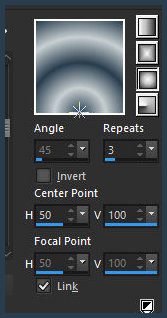
1. Prepare a Sunburst
gradient
2. Open a new transparent image with 950x600px
3. Paint with the gradient
4. Layers / Duplicate
5. image / Mirror / Mirror Vertical
6. Blend Mode: Overlay
7. Merge down
8. Layers / Duplicate
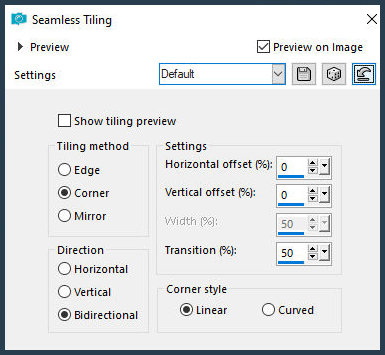
9. Effects / Image Effects / Seamless Tiling - default
10. Image / Resize: 90% - all layers unchecked
11. Activate the bottom layer
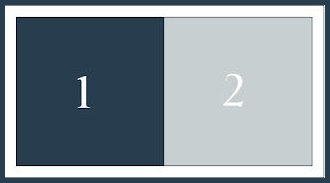
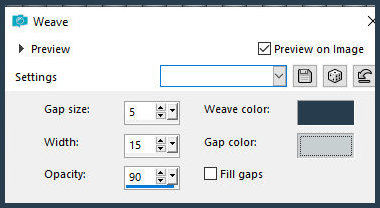
12. Effects / Texture Effects / Weave - colors: 1 and 2
13. Effects / Edge Effects / Enhance
14. Activate the top layer
15. Effects / Plugins / Mehdi / Sorting Tiles

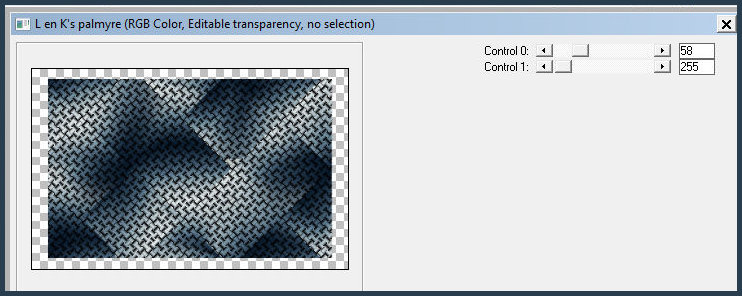
16. Effects / Plugins / L&K's / L&K's Palmire
17. Merge all
18. Selections Select all
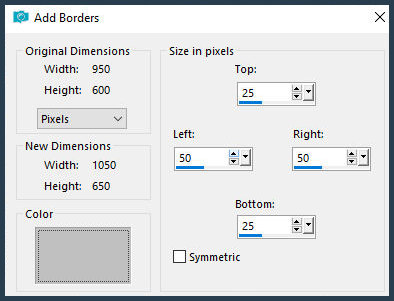
19. Image / Add borders / SYMMETRIC UNCHECKED / 25 50 50 25 / gray
20. Selections / invert
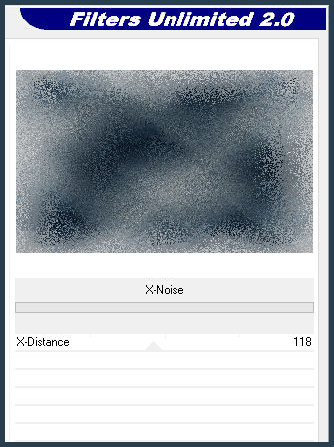
21. Effects / Plugins / Unlimited 2 / Noise Filters / X-Noise
22. Selections / Promote selection to layer
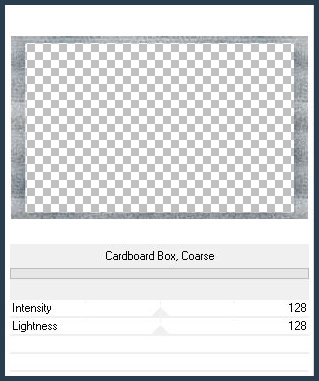
23. Effects / plugins / Unlimited 2 / paper Texture / Cardboard Box,
Coarse
24.Adjust/Sharpness/Sharpen
25. Merge Down
Select none
26. Layers/Duplicate
27. Image / Resize: 95% - all layers unchecked
28. Activate the layer below
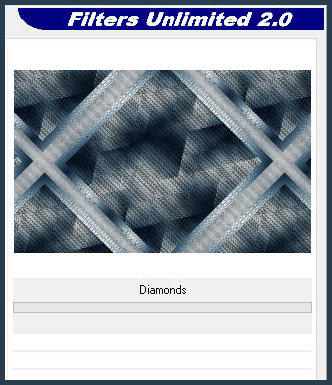
29. Effects / plugins / Simple / Diamonds
30.Adjust/Sharpness/Sharpen
31. Merge visible
32. Add new layer
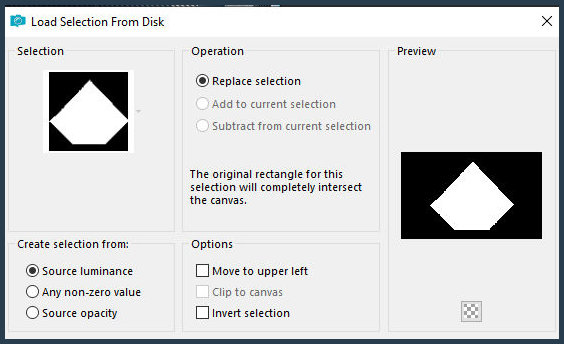
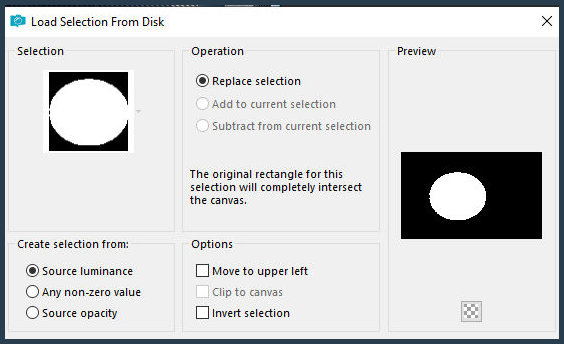
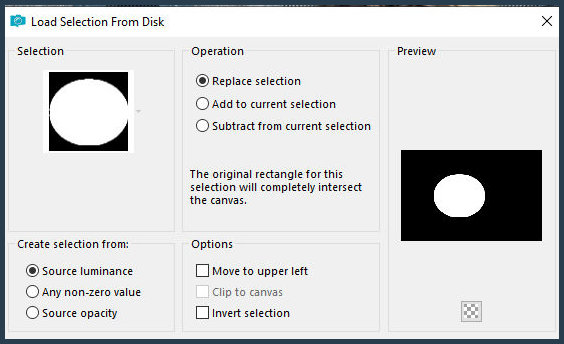
33. Selections / Load selections from disk / Selections
[29.11.2025-01-ML]
34. Paint the selection with the gradient
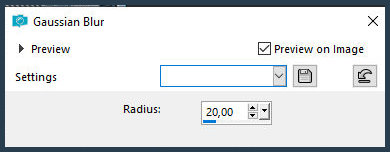
35. Adjust / Blur / Gaussian Blur: 20
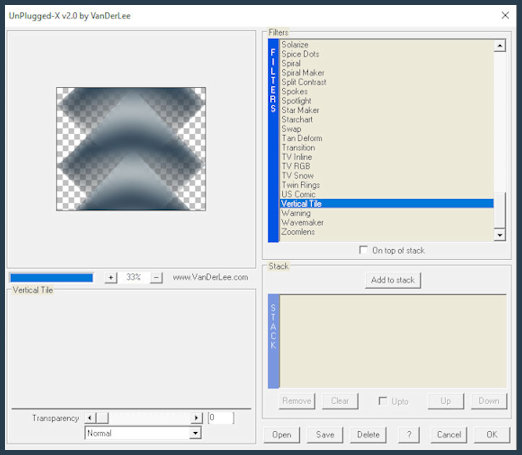
36. Effects / Plugins / VanDerLee / Unplugged-X / Vertical Tile
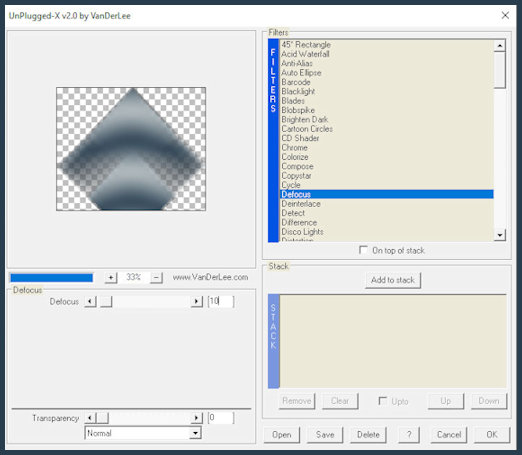
37. Effects / Plugins / VanDerLee / Unplugged-X / Defocus
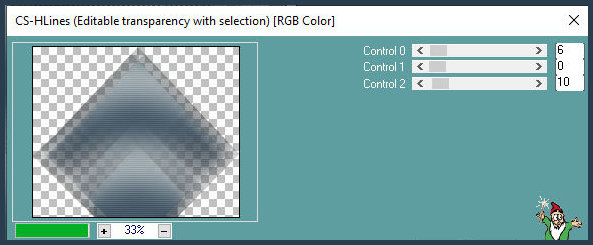
38. Effects / Plugins / Carolaine and Sensitivity / CS_HLines
39. Select none
40. Copy the tube [Deco-01-ML]
41. Paste as a new layer
42. Selections / Load selection from disk / Selection
[29.11.2025-02-mL]
43. Add a new layer
44. Paint with the gradient
45. Adjust / Blur / Gaussian Blur: 20
46. Effects / Texture Effects / Blinds - color: dark
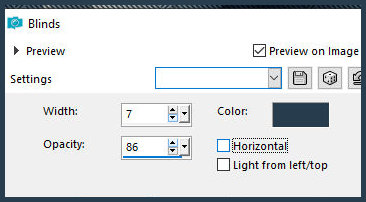
47. Add a new layer
48. Copy the misted landscape tube [Paysage]
49. Paste as a new layer
50. Position as desired
51. Selections / Invert
52. Press Delete
53. Merge down
54. Selections / Invert
55. Add a new layer
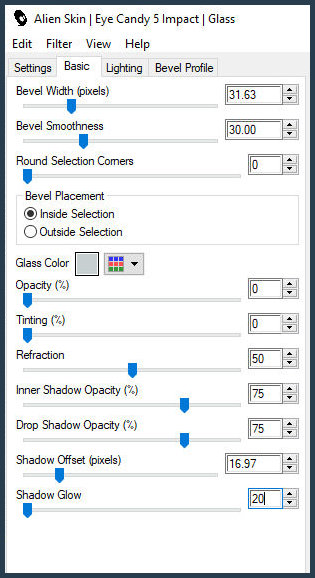
56. Effects / Plugins / Eye Candy 5: Impact / Glass
57. Select none
58. Copy the tube [cadre-ML]
59. Paste as a new layer
60. Activate the Pick Tool and configure: X=146 - Y=93 - Press M
61. Merge down
62. Layers:
63. Activate the bottom layer
64. Copy (will be in memory)
65. Remain on the bottom layer
66. Selections / Select all
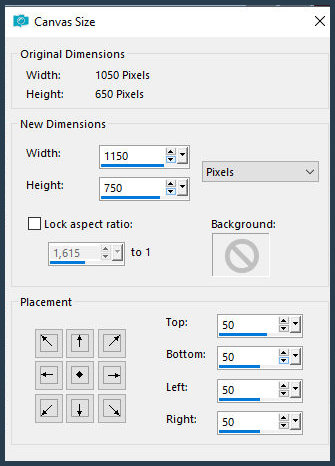
67. Image / Canvas Size
68. Selections / Invert
69. Paste the image from memory into the selection
70. Adjust / Blur / Gaussian Blur: 20
71. Effects / Plugins / Unlimited 2 / Noise filters / X-Noise
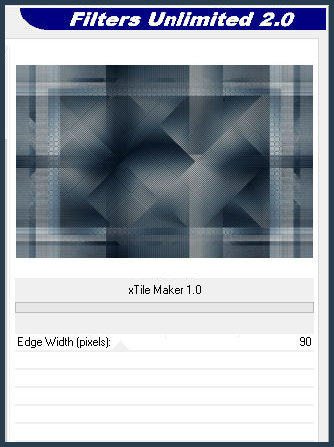
72. Effects / Plugins / BKG Kaleidoscope / XTile Maker 1.0
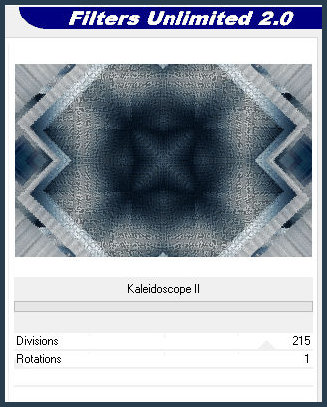
73. Effects / Plugins / Unlimited 2 / FF Gallery A / Kaleidoscope 2
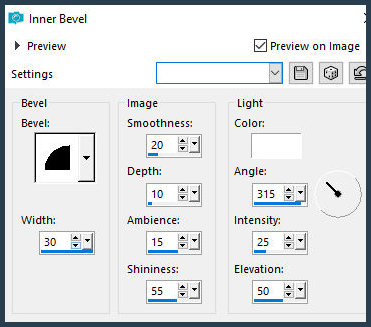
74. Effects / 3D Effects / Inner Bevel
75. Select none
76. Effects / Plugins / AAA Frames / Photo Frame
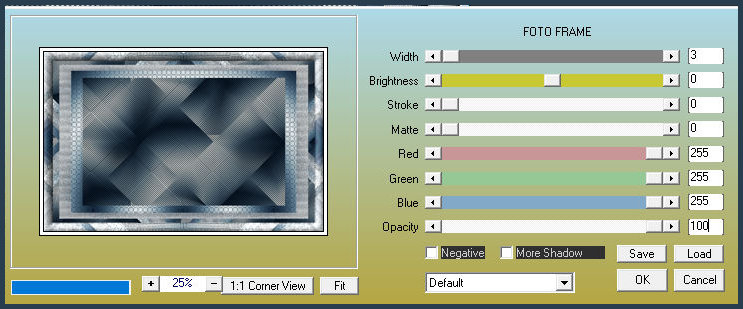
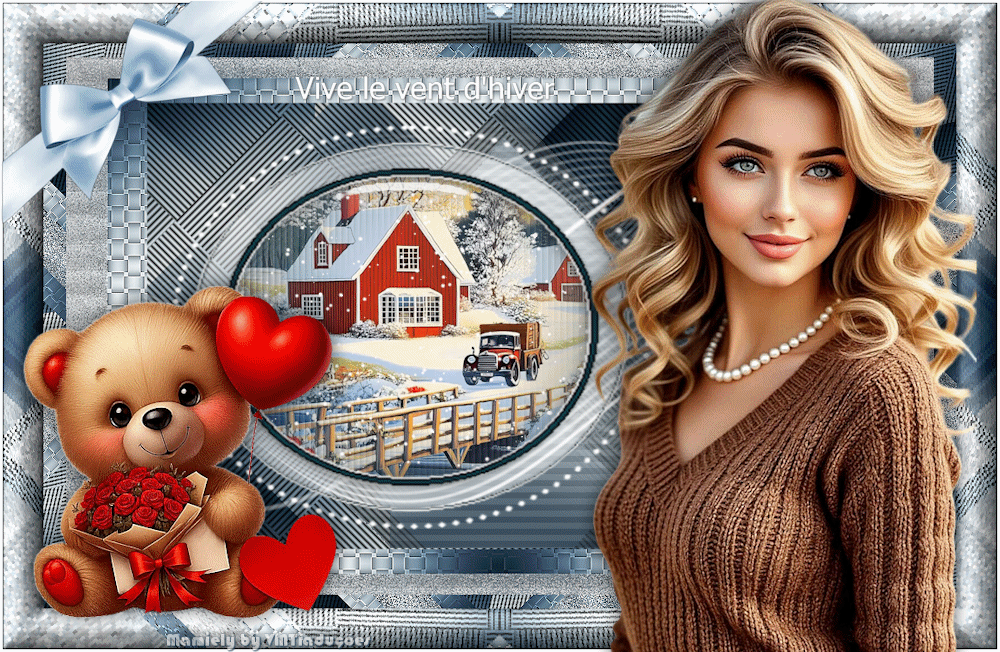
Activate the top layer.
Copy [Enfant-hiver-ML].
Paste as a new layer.
Drop shadow of your choice.
Copy the tube [Neige-ML].
Paste as a new layer.
Position as per model.
Copy the tube [Neud].
Paste as a new layer.
Position as per model.
Copy / Paste as a new layer /
Position other tubes of your choice (optional).
Copy the text [vive le vent d'hiver] (there are two options in the
(material)
Position as per model
Add signatures
Image / Resize: 1000px (width) - all layers checked
TO CREATE THE ANIMATION
Activate the landscape layer
Layers / Duplicate - 2 times
Starting from the bottom, rename the landscape layers as landscape
1, landscape 2, and landscape 3
Close the landscape 2 and landscape 3 layers by clicking the eye
icon
Activate the landscape 1 layer
Selections / Load selection from disk / Selection [29.11.2025-03-ML]
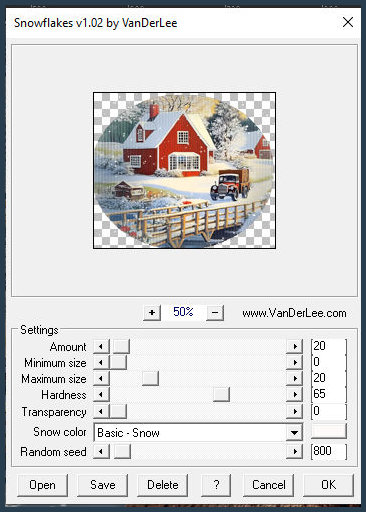
Effects / Plugins / VanDerLee / Snowflakes - Random Seed=275

Close the Landscape 1 layer
Activate and open the landscape 2 layer
Effects / Plugins / VanDerLee / Snowflakes - Random Seed=800
Close the landscape 2 layer
Activate and open the landscape 3 layer
Effects / Plugins / VanDerLee / Snowflakes - Random Seed=1600

Select none
Close the landscape 2 and landscape 3 layers
Open the landscape 1 layer
Edit / Copy Special / Copy Merged
In Animation Shop:
Edit / Paste / As new animation
In PSP: Close the landscape 1 layer
Open landscape 2 layer
Edit / Copy Special / Copy Merged
In AS:
Edit / Paste / After current frame
In PSP: Close the landscape 2 layer
Open the landscape 3 layer
Edit / Copy Special / Copy Merged
In AS: Edit / paste / after current frame
Edit / Select all
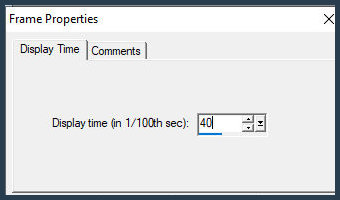
Animation / Frame Properties / Display time=40
File / Save as / Locate the folder where you will save it / Name it
/ Save / click Next 3 times

|