|
Save the
selections in the PSP Selections folder.
*
For this tutorial you will need:
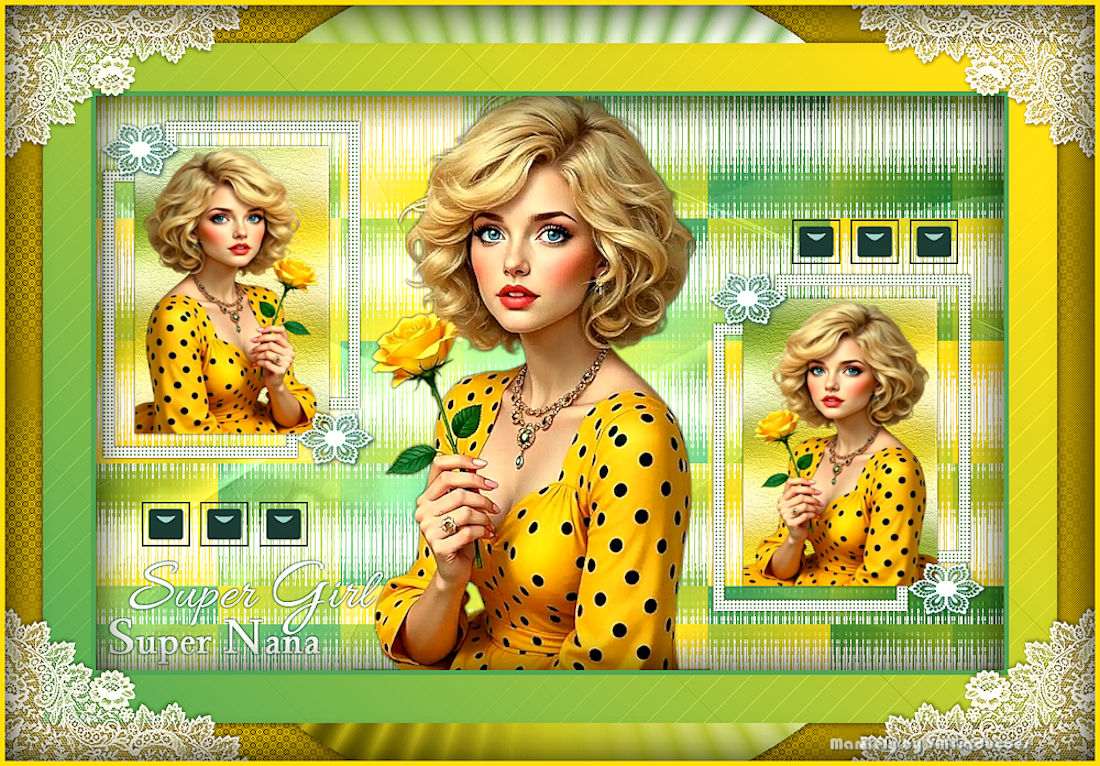
1 female tube
The material I used is available in the material area
above.
*
Original colors:
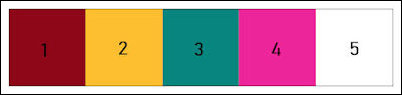
Place color 1 in the foreground and color 2 in the
background.
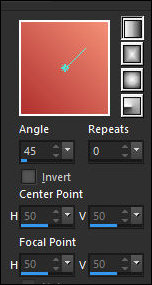
Prepare a linear gradient.

Open a new transparent image measuring 950x600px.
Paint with the gradient.
Add a new layer.
Place color 3 in the foreground and color 4 in the
background.
Prepare a linear gradient.
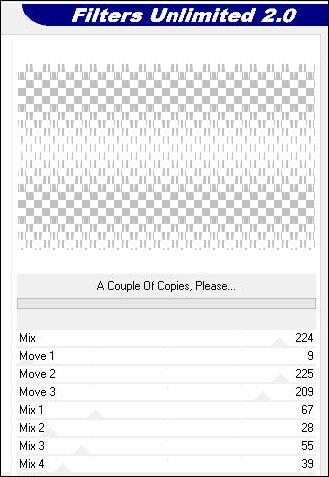
Effects / Plugins / Unlimited 2 / Andrew's Filters 29 /
A Couple of Copies, please.
Adjust / Sharpness / Sharpen.
Merge all.
Layers / Duplicate.
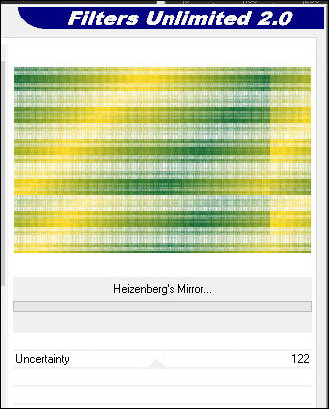
Effects / Plugins / Unlimited 2 / FunHouse / Heizenberg's
Mirror.
Copy the tube [deco-ML-01]
Paste as a new layer.
Layers / Properties / Luminance (L) / Opacity=95%
Activate the background layer
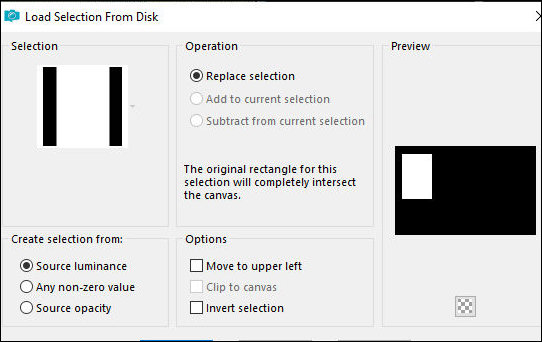
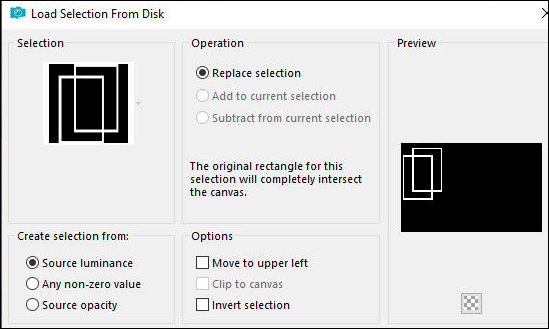
Selections / Load selection from disk / Selection
[03.06.2025.ML.01]
Layers / Properties / Blend Mode: soft light (or other
depending on your colors)
Selections / Promote selection to layer
Layers / Arrange / Bring to top
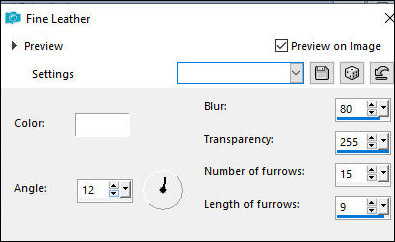
Effects / Texture Effects / Fine Leather
Copy the tube [Woman-ML-00]
Paste into selection
Select none
Add new layer
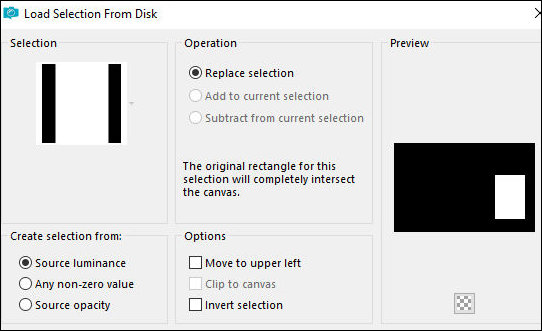
Selections / Load selection from disk / Selection
[03.0.2025.ML.02]
Paint with white color
Layers / Arrange / Move Down
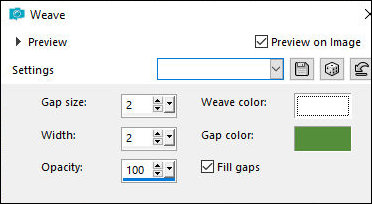
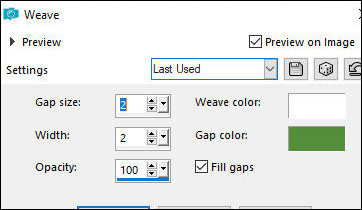
Effects / Texture Effects / Weave - color 1 and white
Select none
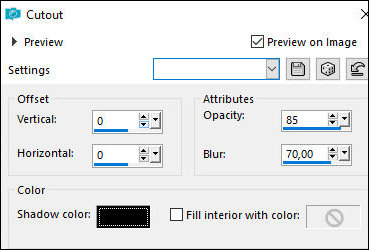
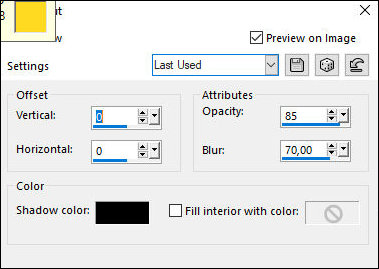
Drop Shadow: 0 0 85 4 black
Activate the layer above (from the female tube) and
repeat the Drop Shadow
Merge down
Activate the background layer
Selections / Load selection from disk / Selection
[03.0.2025.ML.03]
Selections / Promote selection to layer
Layers / Arrange / Bring to top
Effects / Texture Effects / Fine Leather - same as above

Open the tube [woman-ML-00]
Image / Mirror / Mirror Horizontal
Copy and paste into the selection
Select none
Add a new layer
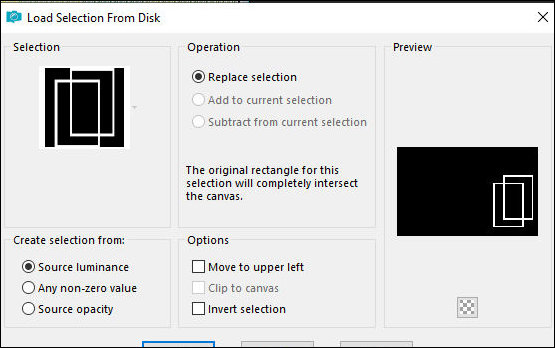
Selections / Load selection from disk / Selection
[03.06.2028.ML.04]
Paint with white
Layers / Arrange / Move down
Effects / Texture Effects / Weave - same as above
Select none
Drop Shadow: 0 0 85 4 black
Activate the layer above (with the female tube) and
repeat the Drop Shadow
Merge Down
Copy the tube [Woman_ML_00]
Paste as a new layer
Adjust the size
Position according to the model
Drop Shadow: 0 0 85 4 black (or another of your choice)
Copy the tube [Deco-ML-02]
Paste as a new layer
No need to move
Copy the tube [text Super Nana]
Paste as a new layer
Position according to the model
Copy the tube [Deco-ML-03]
Paste as a new layer
Position according to the model
Move it up a bit
Merge all
Selections / Select all
Border: 5px / color 1
Effects / Effects / Cutout
Selections / Select all
Border: 50px / white
Selections / Invert
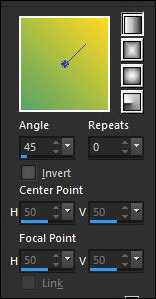
Paint with this linear gradient with color 1 in the
foreground and color 2 in the background
Effects / L & K's / L & K's Paris

Selections / Select all
Border: 40px / white
Selections / Invert
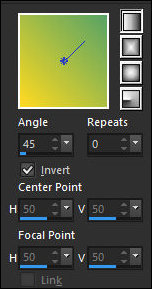
Paint with the same gradient but with invert checked
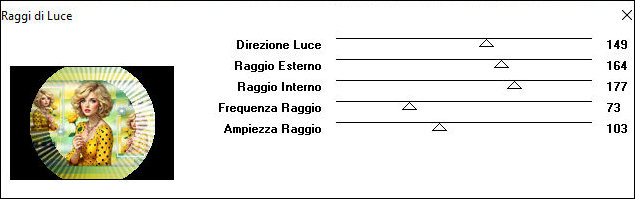
Effects / It@alian Edtors Effects / Raggi di Luce
Select none
Selections / Load selections from disk / Selections
[03.06.2025.ML.05]

Add new layer
Paint with color 2
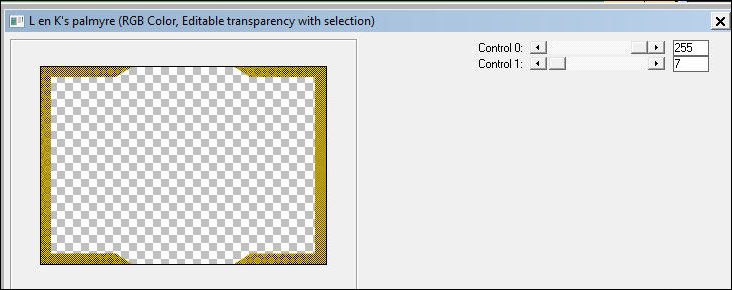
ffects / Plugins / L&K's / L&K's Palmyre
Selections/Invert
Drop Shadow: 0 0 75 15 black
Select none
Copy the tube [coin-Dentelle-ML]
Paste as new layer
Merge all
Selections / Select all
Border: 5px / color 2
Effects / 3D Effects / Cutout
Select none
Image/Resize: 950px (width)
Effects / Plugins / AAA Filters / Custom / Landscape
Put signatures
Merge all
Save as jpeg |