|

This tutorial is by Mabel who I thank for letting me
translate her tutorials.

Original here

Tubes

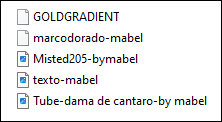
Material

Many thanks to the creators of these materials
Plugins
Muras Meister
AAAFrame
You can find these plugins on the websites of:
Renée
Cloclo
You can also find this tutorial translated into these languages:
(Click on the flag)


ROAD MAP
Notes:
> Open the material / Duplicate (shift+d) / Close the originals
> Change the blend mode of the layers to match their colors.
> In older versions of the PSP Mirror Horizontal=Mirror / Mirror Vertical=Flip /
Pick tool=deformation
1. Place the gradient in the Gradients folder of the PSP
2. Place the selection in the Selections folder of the psp
3. Open a new transparent image with 900x700px
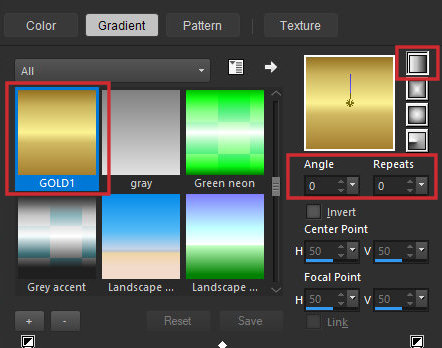
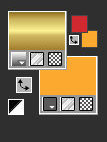
4. In the foreground, locate the Gold gradient and configure it according to the
print
5. Put the color #6798ad in the background
6. Paint the image with the gradient
7. Selections / Select all
8. Copy the main tube and paste into the selection
9. Select none
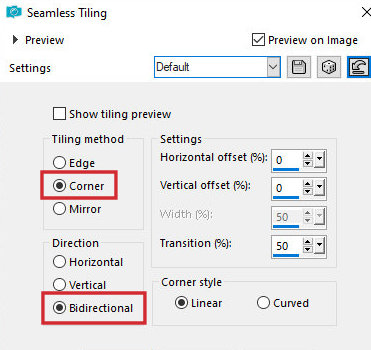
10. Effects / Image Effects / Seamless Tiling - default
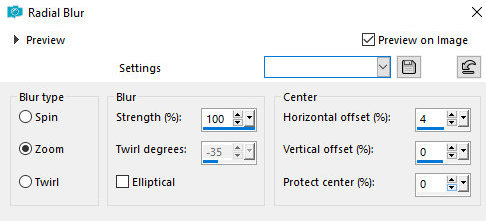
11.Adjust/blur/Radial Blur
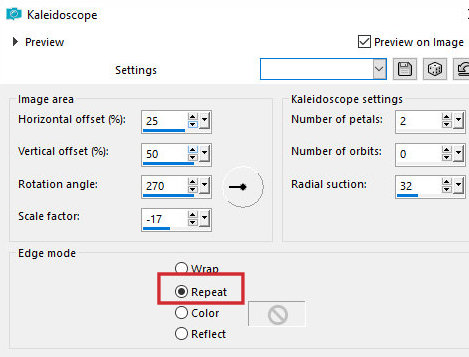
12. Effects / Reflection Effects / kaleidoscope
13. Effects / Edge Effects / Enhance more
14. Layers / Duplicate - 2 times (you will have 3 identical layers)
15. Close the Copy(2) of Raster 1 layer
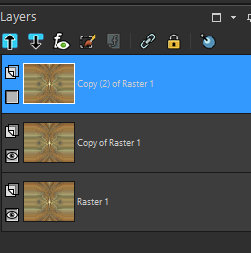
16. Activate the layer below - Copy of Raster 1
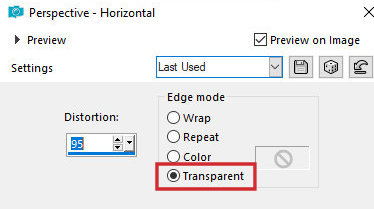
17. Effects / Geometric Effects / Horizontal Perspective
18. Image / Mirror / Mirror Horizontal
19. Effects / Geometric Effects / Horizontal Perspective
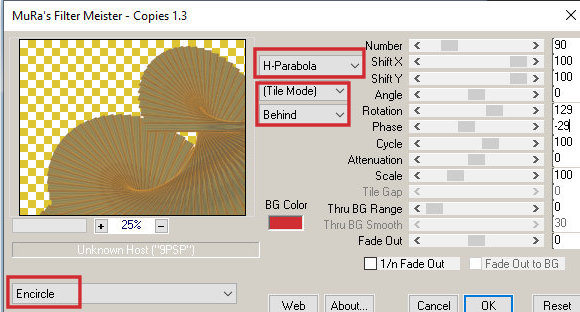
20. Effects / Plugins / Mura's meister / Copies
21. Adjust / Sharpness / Sharpen More
22. Activate and open the Copy(2) of Raster 1 layer
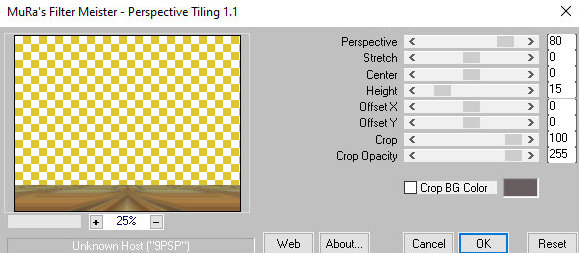
23. Effects / plugins / Mura's meister / Perspective tiling
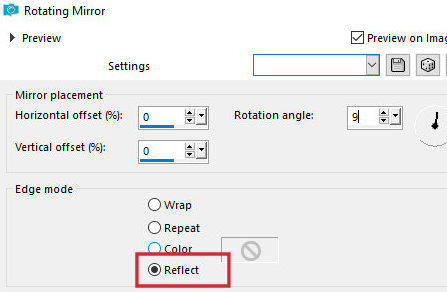
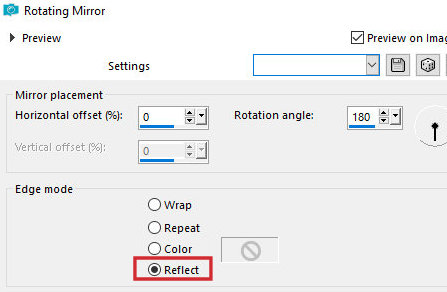
24. Effects / Reflection Effects / Rotating Mirror
25. Layers / Duplicate
26. Image / Mirror / Mirror horizontal
27. Merge down
28. effects / Edge Effects / Enhance
29. Effects / Reflection Effects / Rotating Mirror
30. Select the transparent part of the layer with the Magic Wand (tolerance=0
and Feather=60)

31. Press Delete on the keyboard 5 to 6 times
32. Select none
33. Copy the landscape misted tube and paste it as a new layer
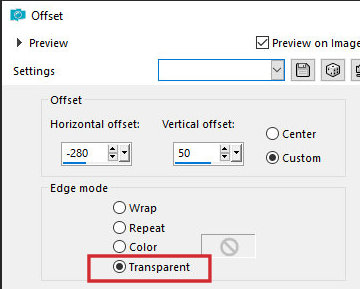
34. Effects / Image Effects / offset [-280/50]
35. Layers / Arrange / Move down - 2 times
35b. Activate the top layer
36. Copy the main tube and paste it as a new layer
37. Adjust the size
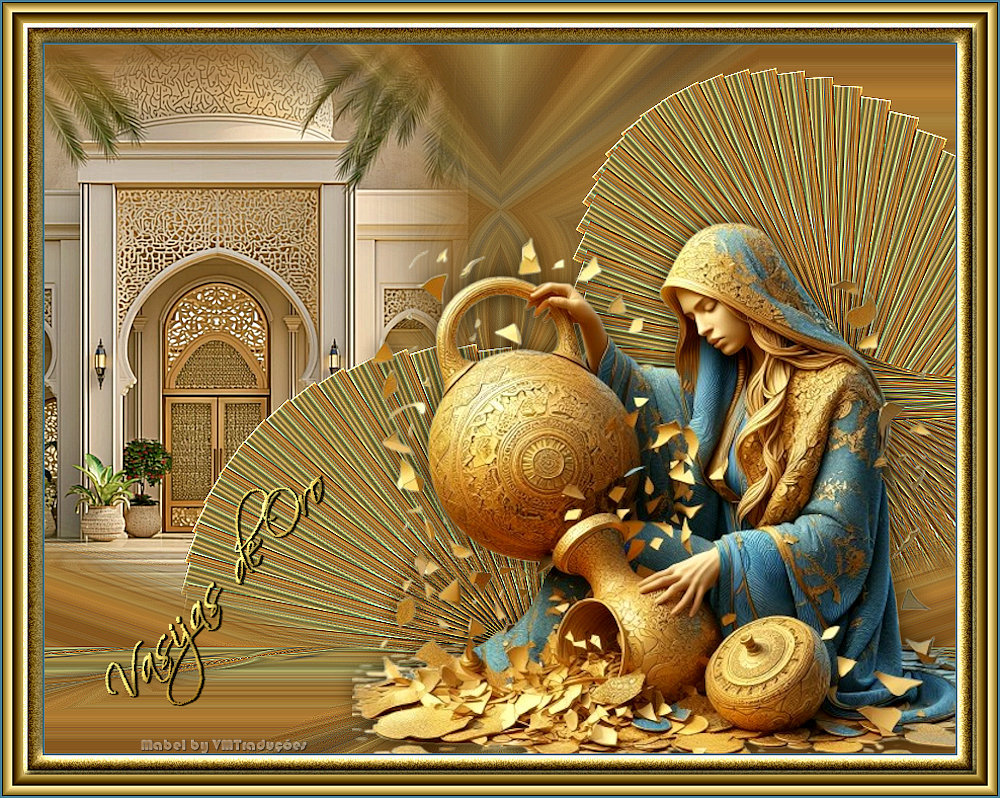
38. Position according to the model
39. Drop shadow: 0 0 60 30 black
40. Image / Add borders / 2px / #4c7d9e
41. Image / Add borders / 40px / any color
42. Select this 40px border
43. Paint the selection with the gradient
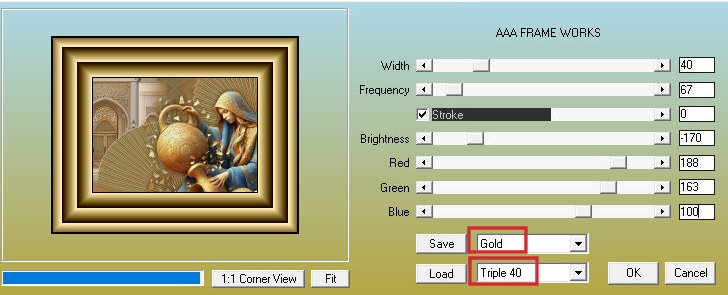
44. Effects / plugins / AAA Frame / Frame works
45. Select none
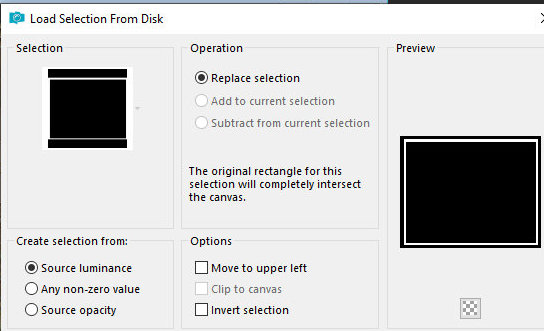
46. Selections / Load selection from disk / Selection [marcodorado-mabel]
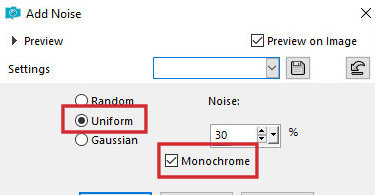
47. Adjust / Add/Remove / Add Noise
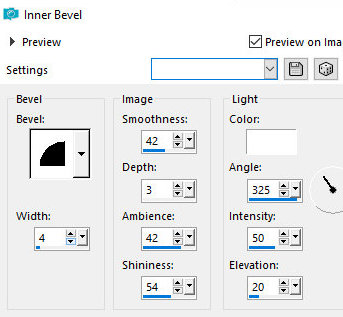
48. Effects / 3D Effects / inner Bevel
49. Select none
50. Image / Add borders / 2px / #4c7d9e
51. Copy the text and paste it as a new layer
52. Position according to the model
53. Place the signatures
54. Merge all
55. Save as jpeg
*
Thank you Irene, for testing my translations


|