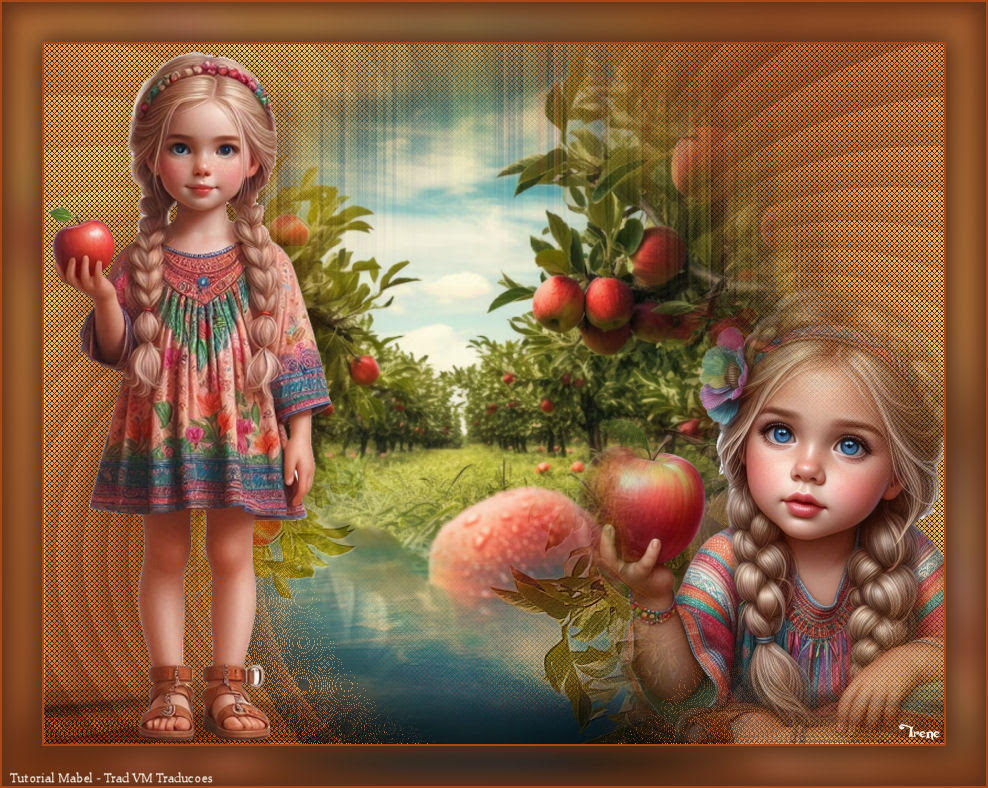
|

This tutorial is by Mabel, who I thank for letting me translate her tutorials

Original here

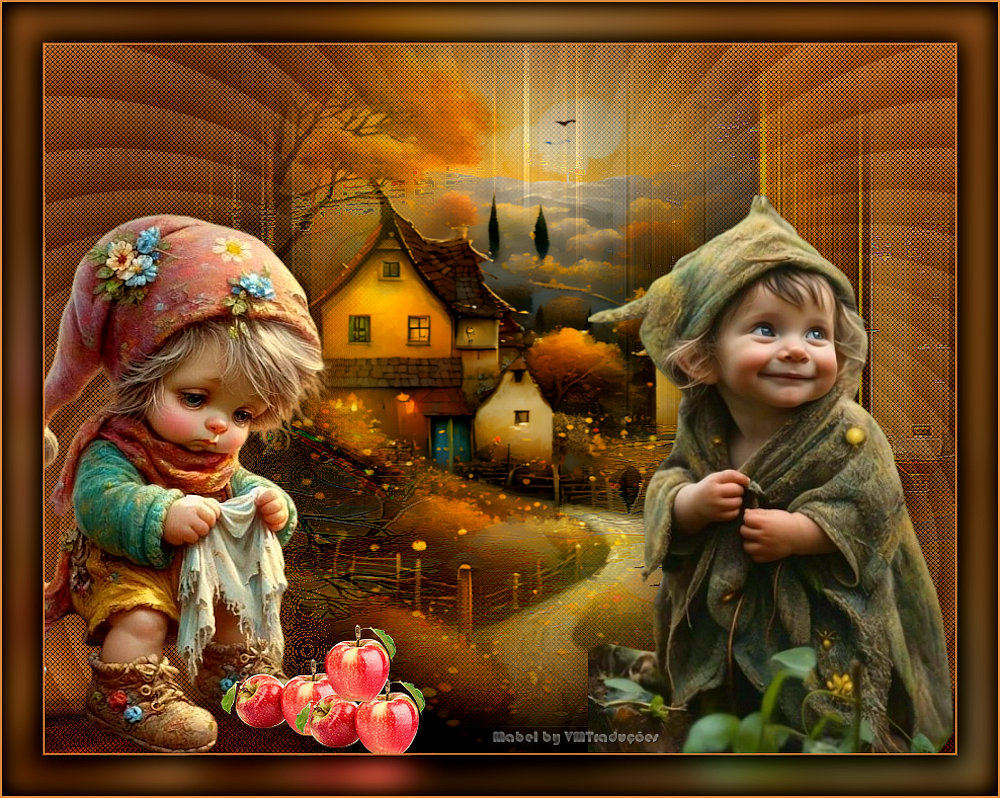
Tubes

Material

Many thanks to the creators of these materials
Plugins
Factory Gallery Q
Muras Meister
FM Tile Tools
You can find these plugins on the websites of:
Renée
Cloclo
You can also find this tutorial translated into these
languages:
(Click on the flag)


SCRIPT
Notes:
> Open the material / Duplicate (shift+d) / Close the originals
> Change the blend mode of the layers to match their colors. > In
older versions of PSP Mirror Horizontal=Mirror / Mirror Vertical=Flip
/ Pick tool=deformation
1. Open a new transparent image with 900x700px
2. Colors: #da8a43 / Background: #966244
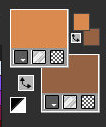
3. Prepare a Linear
gradient
4. Paint the image with
this gradient
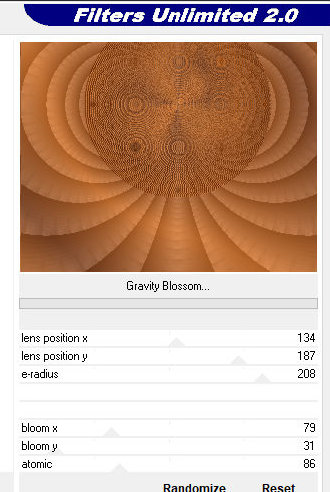
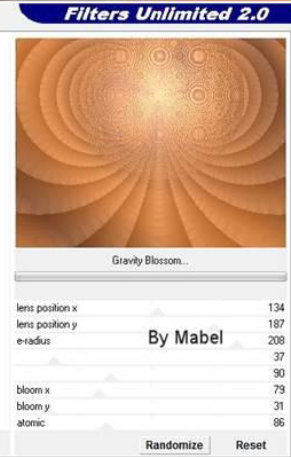
5. Effects / Plugins/ Unlimited 2 / FF Gallery Q / Gravity Blossom
Note: PSP versions are different, causing
different settings, so I put the two prints, so you can choose the
option that suits your PSP
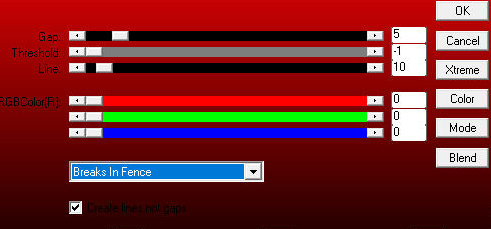
6. Effects / Plugins /
AP 01[Innovations] / LInes-SilverLining
7. Image / Mirror /
Mirror Vertical
8. Layers / duplicate
9. Effects / Plugins /
Mura's Meister / Perspective Tiling

10. Layers / Properties
/ blend mode: Multiply
11. Select the transparent part with the Magic Wand (tolerance=0/Feather=60)
12. Press Delete 5 times
13. Select none
14. Copy the misted landscape tube and paste it as a new layer
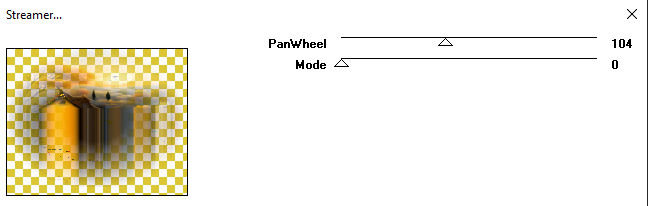
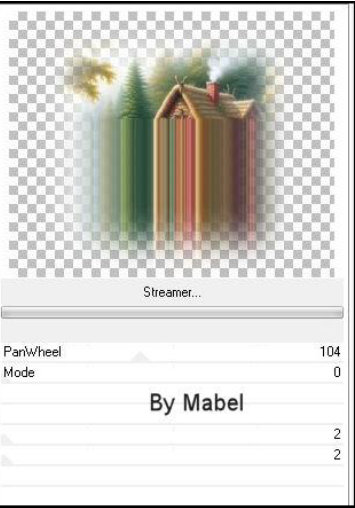
15. Effects / Plugins / Unlimited 2 / FF Gallery Q / Streamer
Note:My and the author's versions of this plugin
differ, so I'll post here the print I used and the author's so you
can use the configuration that matches the plugin you have.
16. Image
/ Mirror / Mirror Vertical
17.
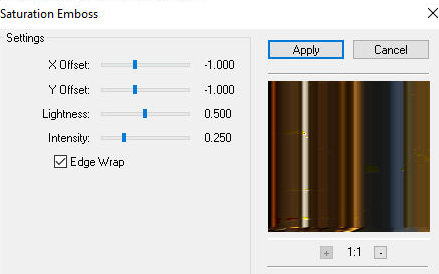
Effects / Plugins / FM Tile Tools / Saturation Emboss
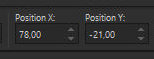
18. Activate the Pick
Tool and set: X=78 / Y=-21
19. Effects / Edge
Effects / Enhance More
20. Copy the misted landscape tube and paste it as a new layer
21. Image / Resize: 90%
22. Position according to the model
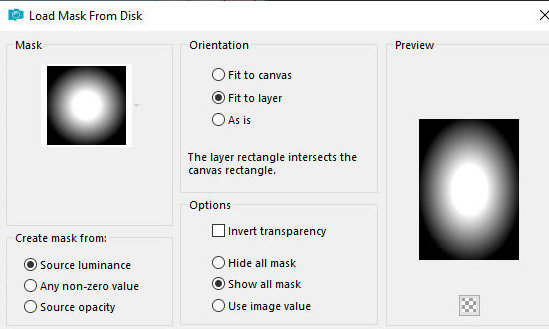
23. Open the tube [wieskes tube 2712]
23b. Layers / Load mask from disk / Mask [20 20]
24. Merge group
25. Image / Resize: 70%
26. Image / Mirror / Mirror Horizontal
27. Copy and paste into your working image as a new layer
Note: Items 23 to 26 refer to the tube provided in the material, if
you use other tubes, these procedures may not be necessary
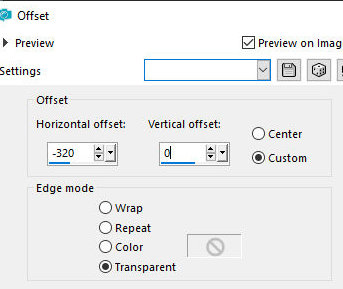
28. Effects / Image Effects / Offset [-320/0]
29. Adjust / Sharpness /
Sharpen
30. Copy the tube [wieskes Tube 2711] and paste as a new layer
31. Image / Resize: 70%
32. Position according to the model
33. Adjust / Sharpness / Sharpen
34. Copy the tube [Apples] and paste as a new layer
35. Position according to the model
36. Drop shadow: 0 0 35 50 black
37. Image / Add borders / 2px / #da8a4e
38. Copy the layer (it will stay in memory)
39. Image / Add borders / 40px / any color
40. Select this 40px border with the Magic Wand (tolerance/feather=0)
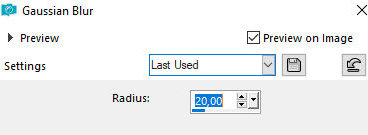
41. Paste the image that is in memory into the selection
42. Adjust / Blur / Gaussian=20
43. Effects / 3D Effects
/ Cutout
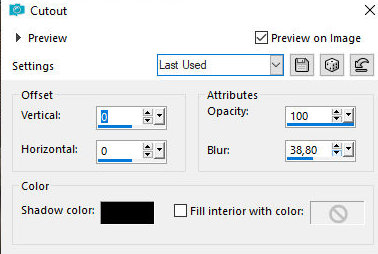
44. Repeat the Cutout
45. Image / Add borders / 2px / #da8a4e
46. Select none
47. Place the signatures
48. Merge all
49. Save as jpeg
*
Muito obrigado por testar minhas traduções, Irene

|