|


This tutorial is from Lay Valella who I thank for
letting me translate their tutorials.

Original here

Tubes

Lady Valella
Material

Many thanks to the creators of
these materials

Plugins
Mura's Meister - Graphic Plus
You can find these plugins on the websites of:
Renée
Cloclo
You can also find this tutorial translated into these languages:
(Click on the flag)


SCRIPT
Notes:
> Open the material / Duplicate (shift+d) / Close the originals
> Change the blend mode of the layers to match their colors.
> In older versions of PSP, Mirror Horizontal=Mirror / Mirror Vertical=Flip /
Pick tool=deformation
> Open the masks in psp and
minimize
>Adjust the size of the tubes according to your images
*
>>Save the textures (25-cmv) and (asphalt) in the
PSP Textures folder
>>Save the gradient (argento2) in the PSP Gradients folder
1. Open a new transparent image measuring 850x550px
2. Colors: Foreground: #1a117b - Background: #000000
3. Selections - Select all
4. Selections - Modify - Contract: 95
5. Paint the selection with the foreground color
6. Selections - Modify - Contract: 2
7. Paint the selection with black
8. Selections - Modify - Contract: 2px
9. Paint with this gradient:
10. Keep the selection
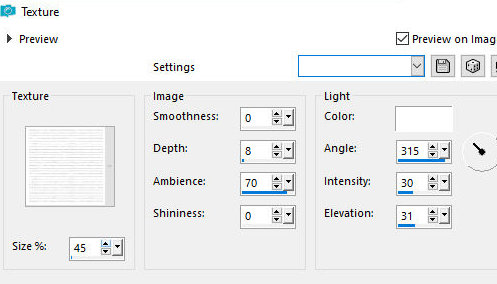
11. Effects - Texture Effects - Texture - [texture 25-cmv texture]
12. Effects - Edge Effects - Enhance
13. Select none
14. Add new layer
15. Copy the misted [Misted83_LV] and paste it as a new layer
16. Activate the pick Tool and configure: X=96 - Y=129 - Press M
17.Adjust - Sharpness - Sharpen
18. Layers - Properties - Opacity=80
19. Merge visible
20. Layers - Duplicate
21. Activate the Merged layer
22. Effects - Plugins - Mura's meister - Copies
23. Activate the Copy of Merged layer
24. Add new layer
25. Paint with black color
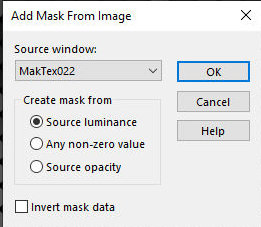
26. Layers - New mask layer - From Image - Mask [maktex022]
27. Merge Group
28. Drop Shadow of your choice
29. Effects - Texture Effects - Texture - Texture[Asphalt]
30. Layers - Properties - Blend Mode: Hard Light -
Opacity:80
31. Layers - Arrange - Move Down
32. Activate the top layer
33. Copy the tube [SVcuori2] and paste it as a new layer
34. Colorize according to the colors you use
35. Activate the pick Tool and configure: X=129 - Y=129 - Press M
36. Effects - Plugins - Mura's meister - Copies -
same as above
37. Effects - Edge Effects - Enhance More
38. Adjust - Sharpnes - sharpen
39. Layers - Arrange - Move down
39b. The layers will be like this:
40. Activate the Raster 1 layer
41. Copy the tube [cuoricini] and paste it as a new layer
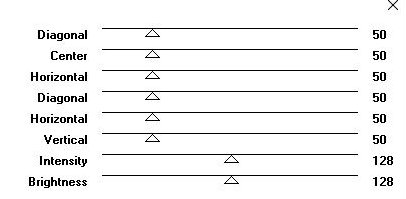
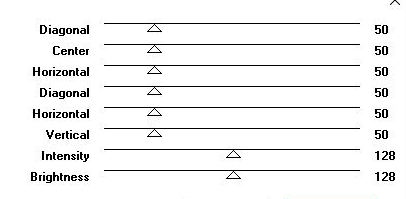
42. Effects - Texture Effects - Mosaic glass
43. Effects - Image Effects - Seamless Tiling -
default
44. Layers - Properties - Blend Mode: Dissolve -
Opacity=32
45. Activate the top layer
46. Copy the tube [griglia] and paste it as a new layer
47. Layers - Properties - Opacity=70
48. Copy the tube [decoroSV1] and paste it as a new layer
49. Don't move it
50. Colorize it if you think it's necessary
51. Copy the tube [2161-2tco(LValella24)] and paste it as a new
layer
52. Image - Resize: 90% - all layers unchecked
53. Drop shadow: 1 1 80 15 black
54. Position it on the bottom right as per the model
55. Copy the tube [title] and paste it as a new layer
56. Position it on the left as per the model
57. Copy the tube [hearts] and paste it as a new layer
58. Position it below the text as per the image or as you prefer
59. Selections - Select all
60. Image - Add borders - 2px - any color
61. Selections - invert
62. Color the selection with the gradient [Argento 2] (in the
material)
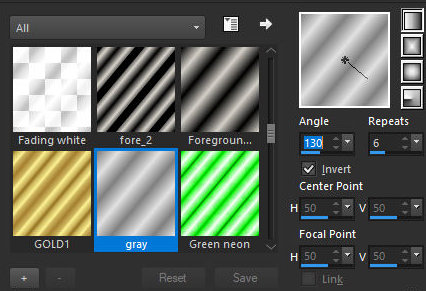
Translator's note: This gradient [Argento] didn't work on my PSP, so
I chose another one with a similar tone and used this configuration
(print)
63. Selections - Select all
64. Image - Add borders - 5px - #1a117b
65. Selections - Invert
66. Effects - Plugins - Graphic Plus - Cross Shadow - default
67. Selections - Select all
68. Image - Add borders - 2px - any color
69. Selections - Invert
70. Paint the selection with the silver gradient from item 62
71. Selections - Select all
72. Image - Add borders - 20px - #1a117b
73. Selections - Invert
74. Effects - Plugins - Graphic Plus - Cross Shadow - Default
75. Effects - Texture Effects - Texture [25-cmv]
76. Adjust - Sharpness - Sharpen
77. Select all
78. Image - Add borders - 2px - any color
79. Selections - Invert
80. Paint with the gradient [argento2] as above
81. Selections - Select all
82. Image - Add borders - 5px - foreground color
83. Selections - Select all
84. Image - Add borders - 2px - any color
85. Selections - Invert
86. Paint with the Argento gradient
87. Select none
88. Copy the tube [decoroSV2] and paste as a new layer
89. Position it on the top left edge (see the model)
90. Layers - Duplicate
91. Position it on the bottom right edge
92. Place the signatures
93. Merge All
94. Save as jpeg
*

|