|
For this
tutorial, you will need:
1 main tube
1 JPG image according to the tutorial theme
Transform this image into a misted image, using mask [20
20]
*
Original colors
Open the alpha channel [Alphac] / Duplicate (shift=d) /
Close the original
Selections / Select all
Copy your JPEG image
Paste into the selection
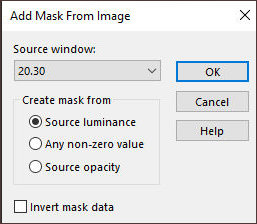
Layers / New mask layer / From image / Mask [20 30]
Merge Group
Select none
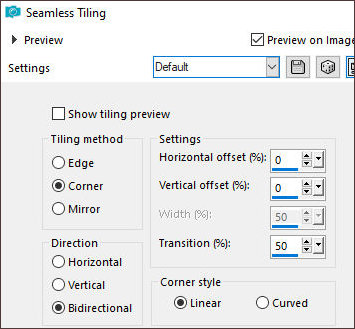
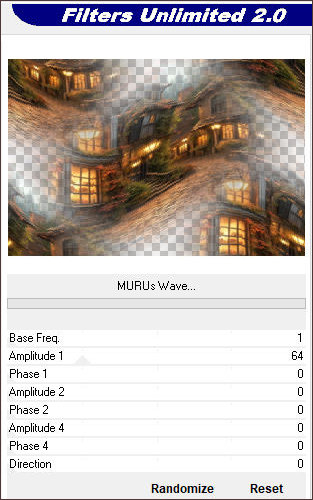
Effects / Image Effects / Seamless Tiling - default
Effects / Plugins / Unlimited 2 / BKG Designers sf10 II
/ MURU's Wave
Layers / Duplicate
Image / Mirror / Vertical Mirror
Layers / Properties / Blend Mode: Hard Light
Merge all
Layers / Promote Background Layer
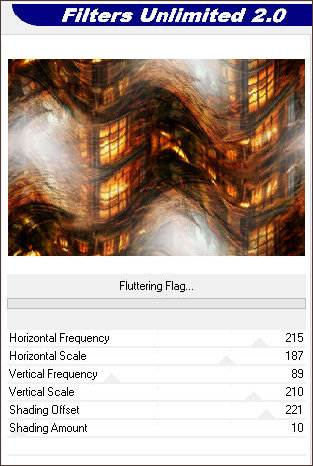
Effects / Plugins / Unlimited 2 / Deformation /
Fluttering Flag
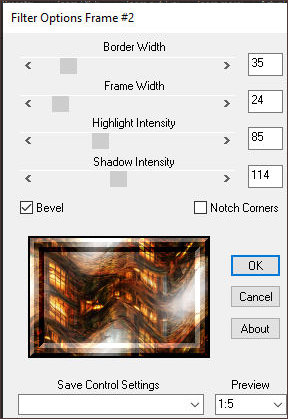
Effects / Pluins / Bordermania / Frame#2
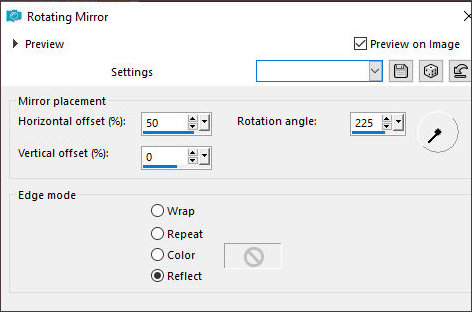
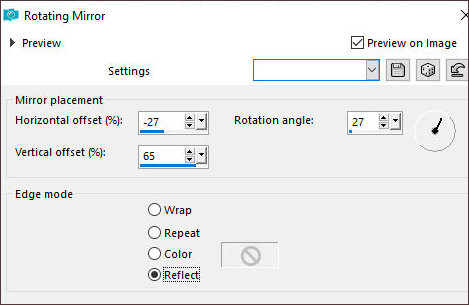
Effects / Reflection Effects / Rotating Mirror
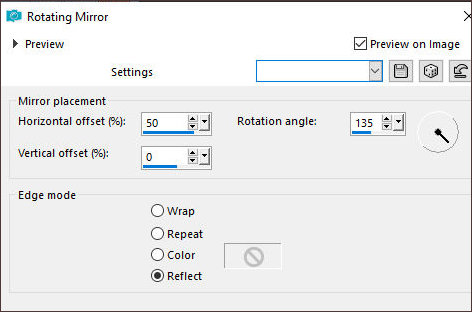
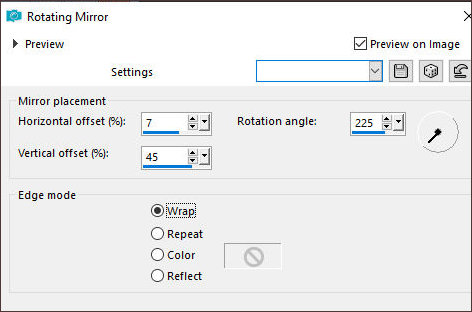
Effects / Reflection Effects / Rotating Mirror with this
other setting
Layers/Duplicate
Image / MIrror / Mirror Vertical
Layers/Properties/Opacity: 37%
Adjust/Sharpness/Sharpen
Merge Down
Effects / Reflection Effects / Rotating Mirror
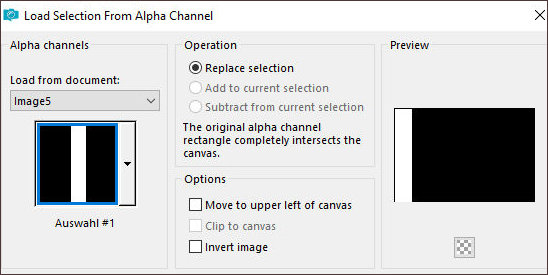
Selections / Load selection from alpha channel/
Selection 1
Selections / Promoted selection to layer
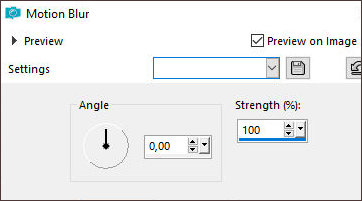
Adjust/Blur/Motion Blur
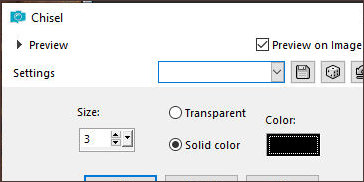
Effects / 3D Effects / Chisel
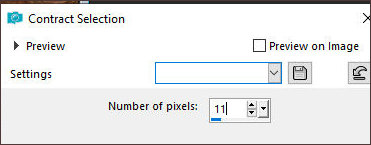
Selections/Modify/Contract: 11px
Paint with the foreground color
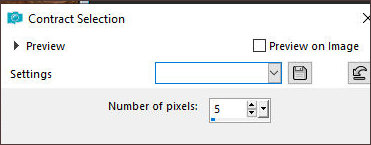
Selections/Modify/Contract: 5px
Press Delete
Copy the image [AIBGKniri](the image menr)
Paste into selection
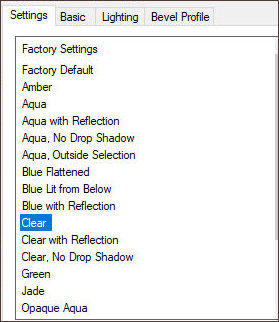
Effects / Plugins / Eye Candy 5: Impact / Glass - preset
[Clear]
Select none
Image / Resize: 50% - all layers unchecked
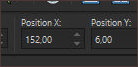
Activate the Pick Tool and configure: X=152 - Y=6 -
Press M
Layers/Duplicate
Image/Resize: 80%
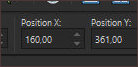
Activate the Pick Tool and configure: X=160 - Y=361 -
Press M
Merge Down
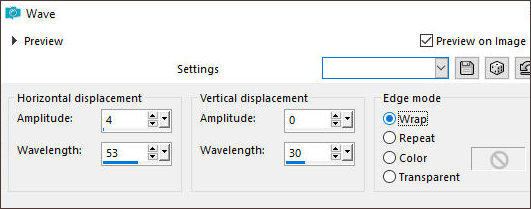
Effects / Distortion Effects / Wave
Drop Shadow: 0 0 75 30 black
Objects/Align/Left
Activate the bottom layer
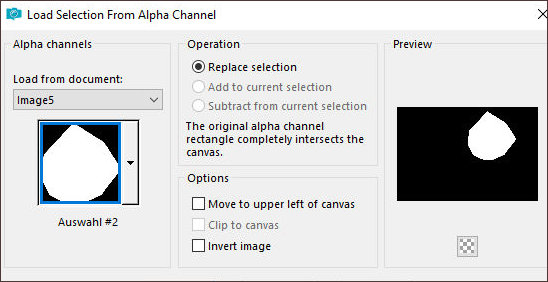
Selections / Load selection from alpha channel /
Selection #2
Copy your mixed tube
Add new layer
Paste into selection
Select none
Activate the background layer
Add new layer
Paint with white color
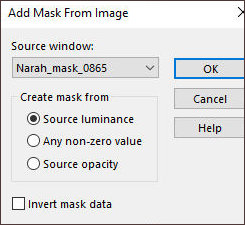
Layers/New Mask Layer / From Image / Mask [Narah-mask-0865]
Merge Group
Image / Mirror / Vertical Mirror
Effects / Edge Effects / Enhance More
Effects / Edge Effects / Enhance
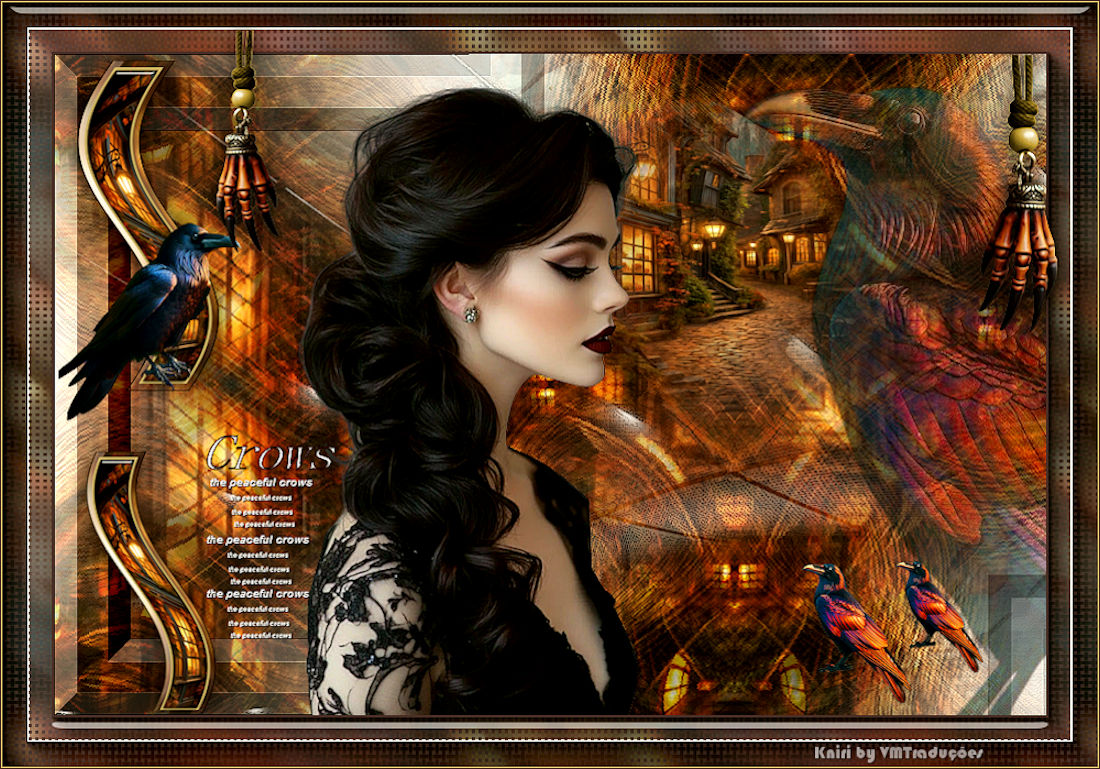
Activate the Top Layer
Copy your main tube
Paste as a new layer
Adjust the size
Position according to the model
Copy the tube [bigc]
Paste as a new layer
Position to the right according to the model
Copy the tube [c1]
Paste as a new layer
Position to the left according to the model
Copy the tube [text]
Paste as a new layer
Position according to the model
Copy the tube [c2]
Paste as a new layer
Position according to the model
Border: 2px / background color
Selections / Select all
Copy (will remain in memory)
Border: 45px / foreground color
Selections / Invert
Paste the image that is in memory into the selection
Effects / Reflection Effects / Rotating Mirror
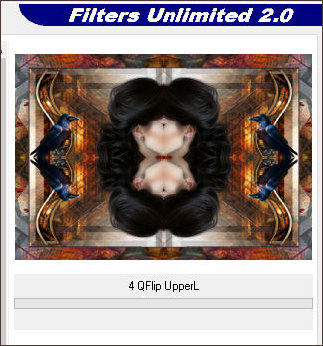
Effects / Plugins / Unlimited 2 / BKG Kaleidoscope / 4
QFlipUpperL
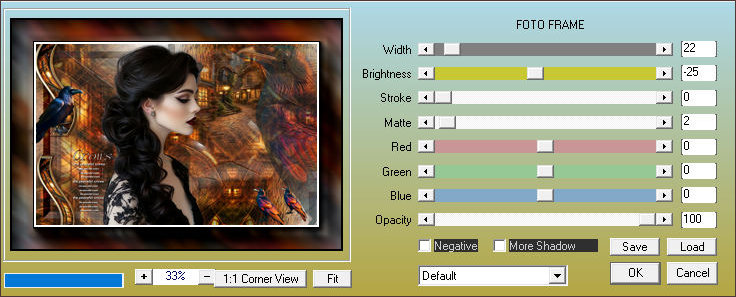
Effects / Plugins / AAA Frames / Foto Frame
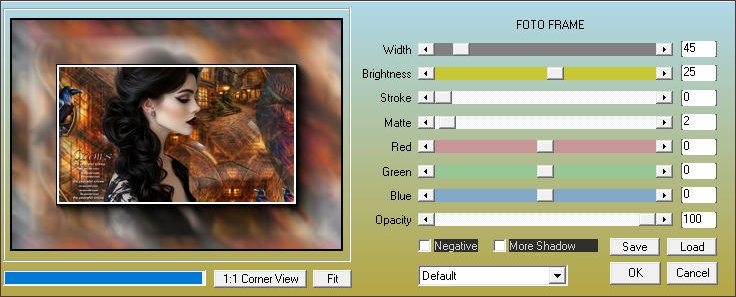
Effects / Plugins / AAA Frames / Foto Frame with this
other configuration
Selections / Promote selection to layer
Add new layer
Copy the tube [Rahmen]
Paste into selection
Layers / Properties / Opacity: 75%
Select none
Merge Visible
Copy the tube [kf]
Paste as new layer
Position according to the model
Border: 1px / foreground color
1/px background color
Merge visible
Image / Resize: 900px
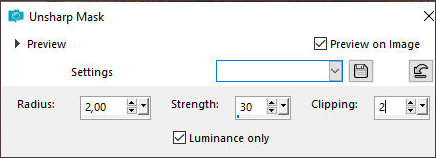
Adjust / Sharpness / Unsharp Mask
Place signatures
Merge all
Save as jpeg |