|
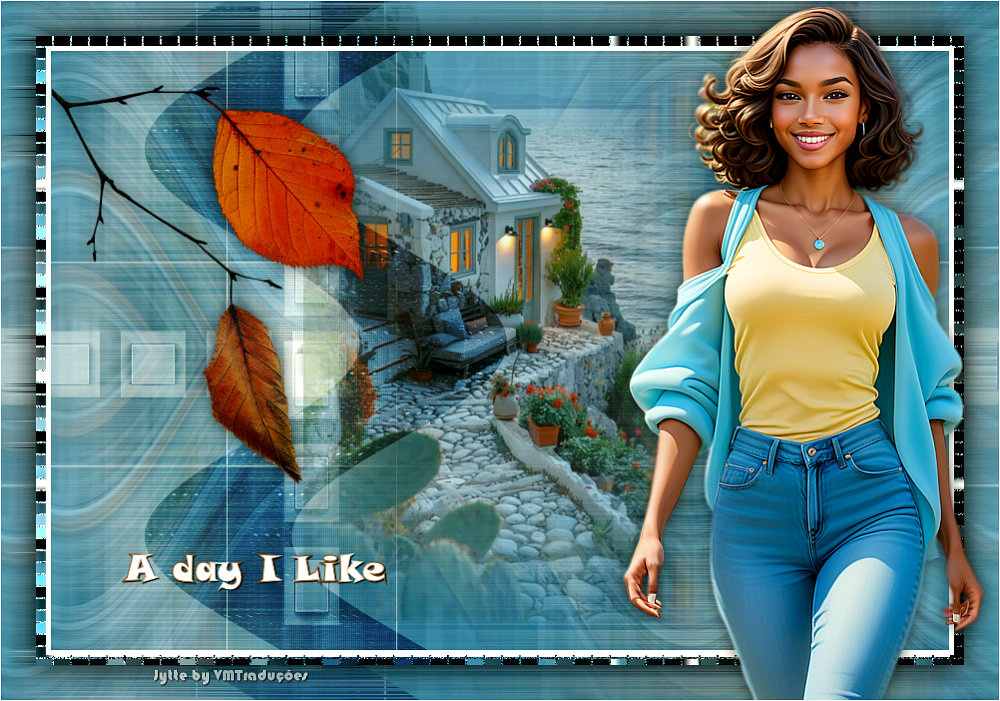

This tutorial is by Jytte who I thank for letting me translate
her tutorials.

Original here
.jpg)

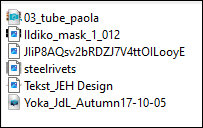
Tubes



Material

Many thanks to the creators of these materials

Plugins
Toadies - Weaver
Italian Editor Effect - Effetto Fantasma
DSB Flux – Blast
°V° Kiwi's Oelfilter, - Setzboard

You can find these plugins on the websites of:
Renée
Cloclo

You can also find this tutorial translated into these languages:
(Click on the flag)


SCRIPT
Notes:
> Open the material / Duplicate (shift+d) / Close the originals
> Change the blend mode of the layers to match their colors.
> In older versions of the PSP Mirror Horizontal=Mirror / Mirror Vertical=Flip /
Pick tool=deformation
1. Place the [steelrivets] texture in the PSP Textures folder
2. Open the mask and minimize
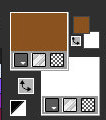
3. Colors: Foreground: #895220 / Background: #white
4. Open a new transparent image with 900x600px
5. Paint with foreground color
6. Selections / Select all
7. Copy the tube [03_tube_paola] and paste it into the selection
8. Select none
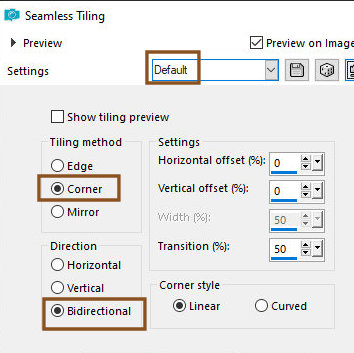
9. Effects / Image Effects / Seamless Tiling - default
10. Effects/plugins/Toadies/Weaver

11. Effects / plugins / Italian Editors Effects / Effetto Fantasma

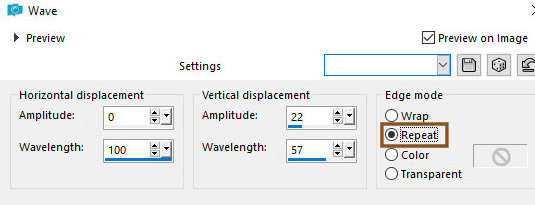
12. Effects / Distortion Effects / Wave
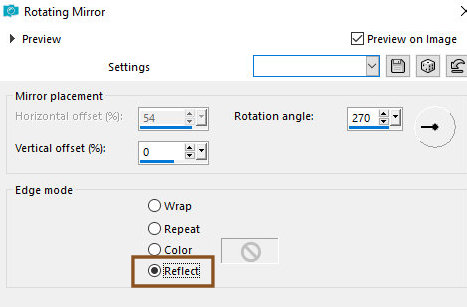
13. Effects / Reflection Effects / Rotating Mirror
14. Drop shadow: 1 1 100 0 black
15. Repeat Drop Shadow
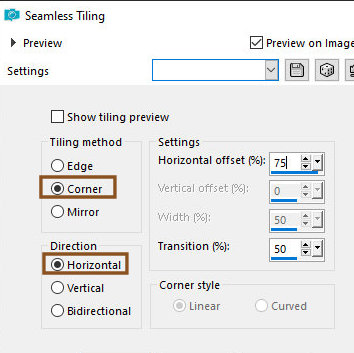
16. Effects / Image Effects / Seamless Tiling
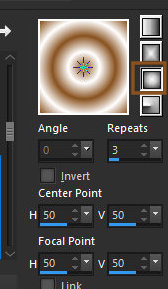
17. Prepare a gradient
18. Add new layer
19. Paint with the gradient
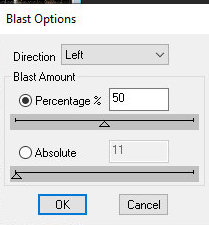
20. Effects/DSB Flux/Blast
21. Layers / Properties / Blend Mode: soft Light
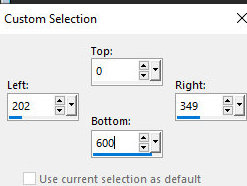
22. Activate the Selection Tool / custom Selection and configure
23. Selections / promote selection to layer
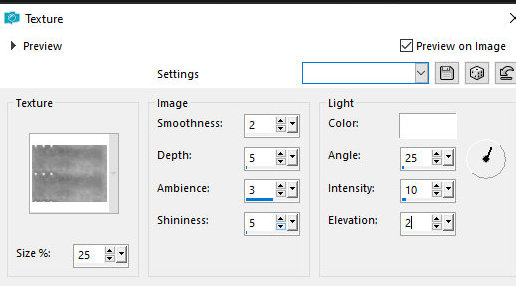
24. Effects / Texture Effects / Texture - [Steel Rivets]
25. Effects / Edge Effects / Enhance More
26. Layers / Properties / Blend Mode / Overlay
27. Select none
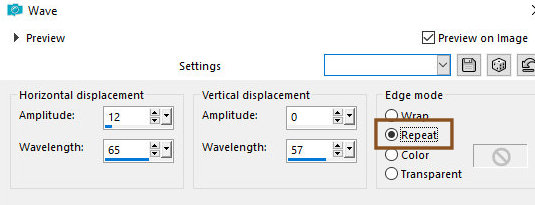
28. Effects / Distortion Effects / Wave
29. Layers / Properties / opacity=55%
30. Activate the Raster 2 layer
31. Add new layer
32. Paint with the background color
33. Layers / New mask layer / From Image / mask [ildiko_mask_1_012]
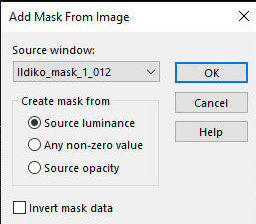
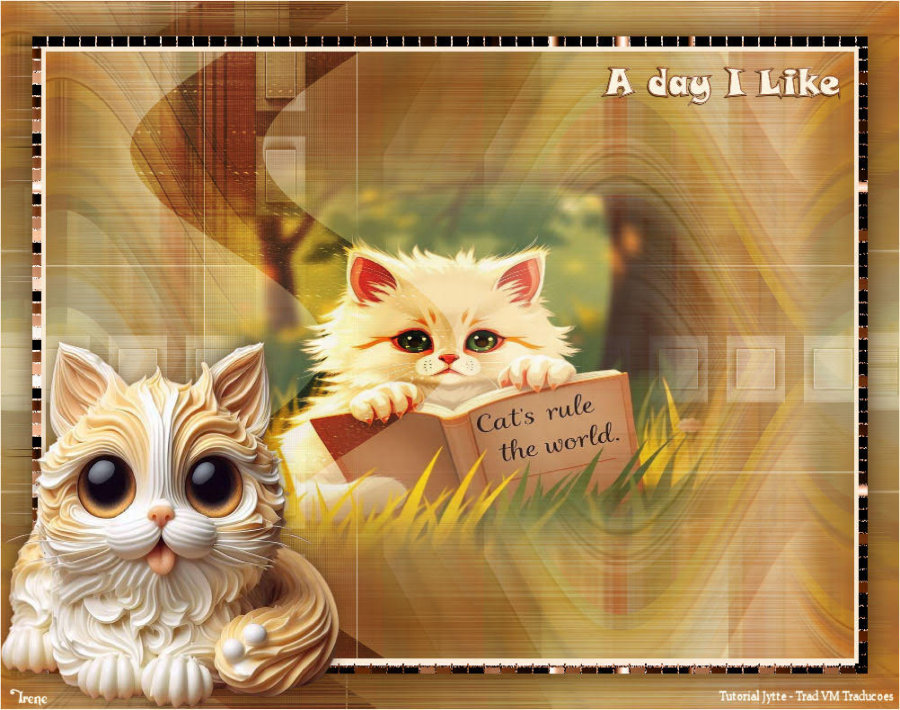
34. Merge group
35. Copy the tube [03_tube_paola] and paste it as a new layer
36. Layers / Properties / Opacity=90%
37. Activate the top layer
38. Merge Visible
39. Copy (it will stay in your memory)
40. Image / Add borders / 5px / white
41. Selections / Select all
42. Image / Add borders / 10px / white
43. Selections / Invert
44. Paste the image that is in memory into the selection
45. Effects / Plugins / Kiwi's Oelfilter / Setzboard

46. Effects / Texture Effects / Mosaic Antique
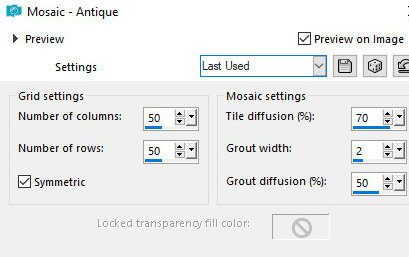
47. Selections / Select all
48. Image / Add borders / 35px / white
49. Selections / Invert
50. Paste the image that is in memory back into the selection
51. Effects / Plugins / DSB Flux / Blast - same as above

52. Selections / invert
53. Drop Shadow: 0 0 100 50 black
54. Select none
55. Copy [JIiP8AQsv2bRDZJ7V4ttOILooyE] and paste as new layer
56. Image / Resize: 75% - all layers unchecked
57. Position according to the model
58. Drop Shadow: 0 0 60 24 black
59. Copy [Yoka_JdL_Autumn17-10-05] and paste as a new layer
60. Image / Resize: 65% - all layers unchecked
61. Image / Mirror / Mirror Horizontal
62. Position according to the model
63. Drop Shadow same as above
64. Copy the text [Tekst_JEH Design] and paste it as a new layer
65. Position according to the model
66. Drop shadow of your choice
67. Place the signatures
68. image / Add borders / 1px / white
69. Save as jpeg
*
Agradeço a Irene que gentilmente testa minhas traduções.


|