| 1. Open the [base] image /
Duplicate (shift+d) / Close the original
2. Set the color #d9e8f6 to the foreground and the color
#0d2a53 to the background
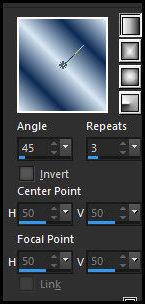
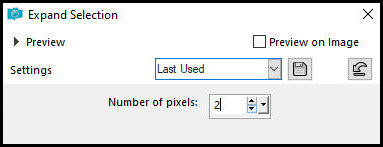
3. Prepare this linear gradient
4. Selections / Select All
5. Selections / Float / Selection Float
6. Paint with the gradient
7. Select none
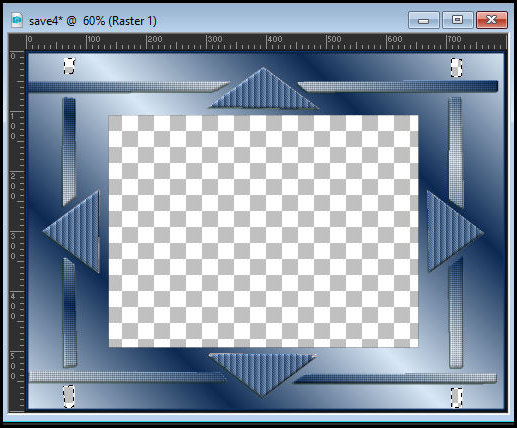
8. Click on the 4 large triangles with the Magic Wand (tolerance/feather=0)
9. Add a new layer
10. Paint with the background color
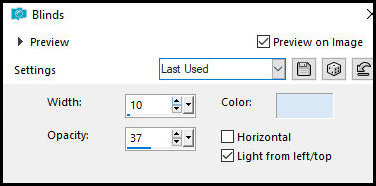
11. Effects / Texture Effects / Blinds
12. Keep the selection
13. Effects / plugins / Penta.com / Jeans - default
14. Select none
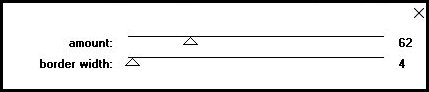
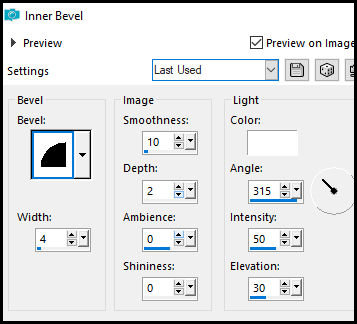
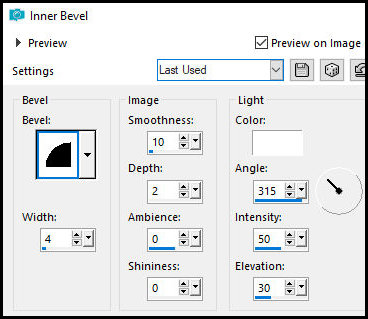
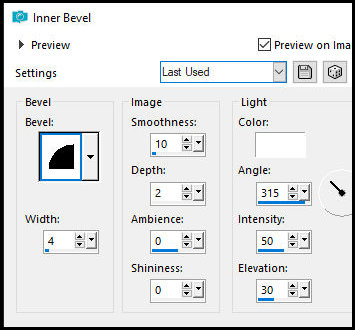
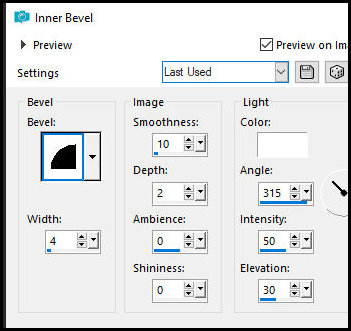
15. Effects / 3D Effects / Inner Bevel
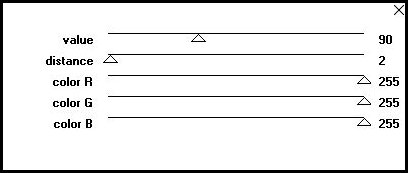
16. Drop shadow: 2 -2 50 0 black
17. Selections / Select all
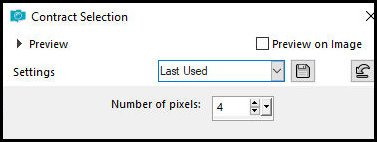
18. Selections / Modify / Contract: 4
19. Selections / Invert
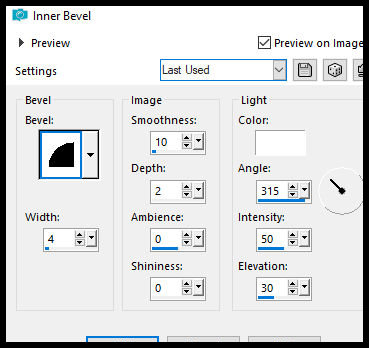
20. Paint with the background color
21. Repeat the Inner Bevel
22. Select none
23. Activate the Raster 1 layer
24. Select the stripes with the Magic Wand
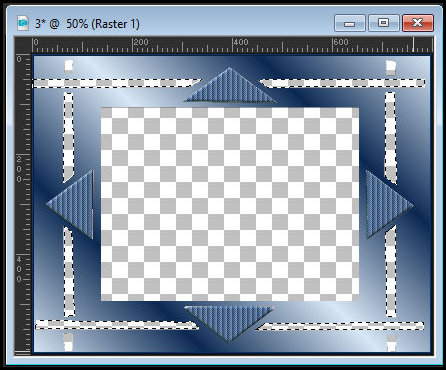
25. Add a new layer
26. Selections / Modify / Expand: 2
27. Prepare this Linear gradient and paint the selection
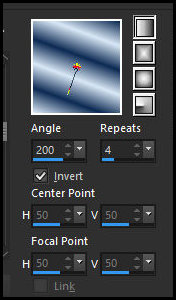
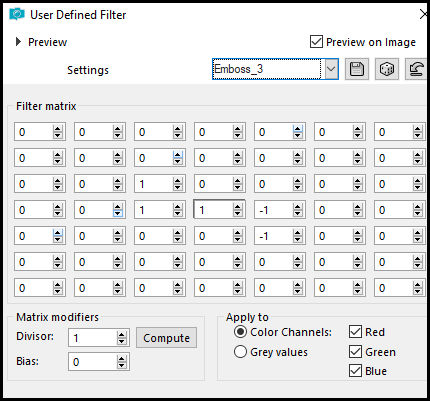
28. Effects / Texture Effects / Texture - texture [grid]
29. Effects / User Defined Filter / Emboss 3
30. Repeat the Inner Bevel
31. Drop Shadow as before
32. Select none
32B. Activate the Raster 1 layer
33. Select the small rectangles with the Magic Wand
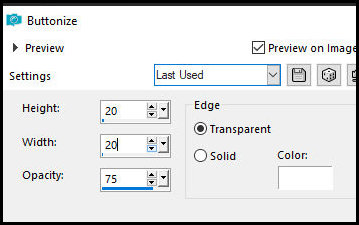
34. Add a new layer
35. Paint with the background color
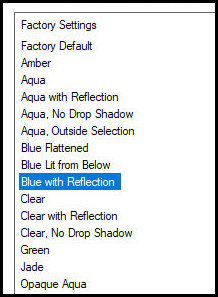
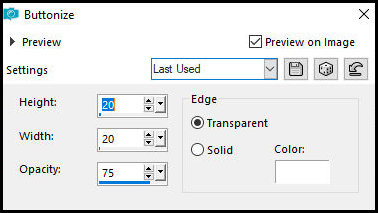
36. Effects / 3D Effects / Buttonize
37. Drop shadow as before
38. Effects / Plugins / Eye Candy 5: Impact / Glass -
Preset [blue with reflection]
39. Select none
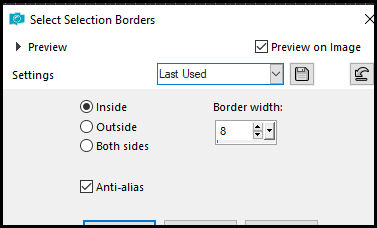
39b. Activate the Raster 1 layer
40. Select the interior of the base with the Magic Wand
41. Add a new layer
42. Paint with the background color
43. Selections / Modify / Select selection borders
44. Repeat the inner bevel
45. Effects / Plugins / Penta.com / Color Dot - default
46. Select none
47. Select the interior with the Magic Wand
48. Copy
[tumblr_static_bxgaxbphgqgwgswk0o48kgcs0_640_v2]
49. Paste into selection
50. Add a new layer
51. Copy the main tube
52. Paste into selection
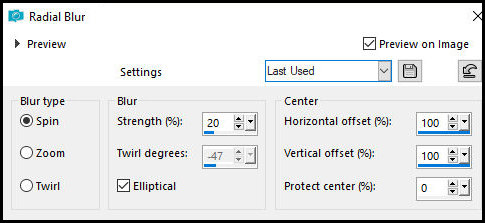
53. Adjust / blur / Radial blur
54. Select none
55. Copy the main tube
55b. Activate the top layer
56. Paste as a new layer
57. Resize if necessary
58. Selections / Select all
59. Selections / Float / Selections / Defloat
60. Effects / 3D Effects / Buttonize - default
61. Drop Shadow as before
62. Select none
63. Activate the background layer of the central square
(raster 5)
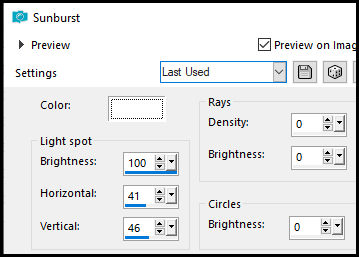
65. Effects / Illumination Effects / Sunburst
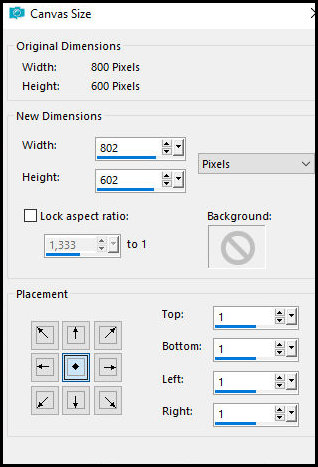
65. Image / Canvas Size - 802x602 1 1 1
1
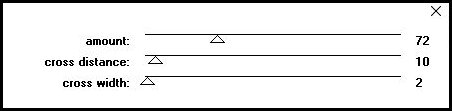
66. Add a new layer
67. Layers / Arrange / Send to bottom
68. Paint with the background color
69. Add a new layer
70. Selections / Select all
71. Image / Canvas Size - 822x622 10 10 10 10
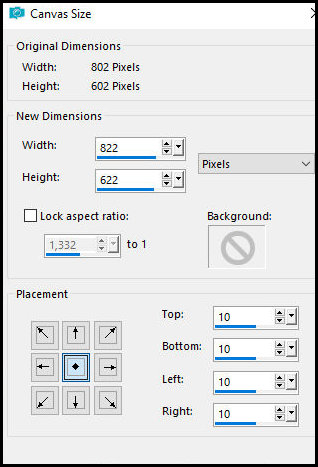
72. Selections / Invert
73. Paint the selection with the Linear gradient
74. Effects / Plugins / Penta.com / Dot and Cross -
Default
75. Effects / 3D Effects / Inner Bevel
75b. Select none
76. (Optional) Add some decorative tubes
77. Add signatures
78. Merge all
79. Save as a jpeg
|