|

This tutorial is from Grafica Pergioco who I thank for
letting me translate their tutorials.

Original here

Tubes

Anna.br
KTs
Aura
Material

Many thanks to the creators of
these materials
Plugins
VDL Adrenaline - Snowflakes
You can find these plugins on the websites of:
Renée
Cloclo
You can also find this tutorial translated into these languages:
(Click on the flag)


SCRIPT
Notes:
> Open the material / Duplicate (shift+d) / Close the originals
> Change the blend mode of the layers to match their colors.
> In older versions of PSP, Mirror Horizontal=Mirror / Mirror Vertical=Flip /
Pick tool=deformation
> Open the masks in psp and
minimize
>Adjust the size of the tubes according to your images
*
Step 1
Open a new transparent image measuring 800x600px
Paint with the color #000040 (according to your tubes)
Selections - Select all
Add new layer
Copy the tube [Snow_flake_Paper]
Paste into selection
Select none
Step 2
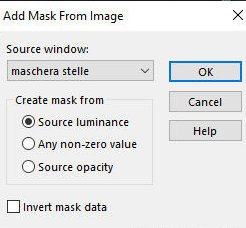
Layers - New Mask Layer - From Image - Mask [maschera stelle]
Merge Group
Effects - Edge Effects - Enhance
Effects - Edge Effects - Enhance More
Step 3
Select the inside of the circle with the Magic Wand - Feather=5
Copy the tube misted landscape [kTs_paysage_neige04]
Paste into selection
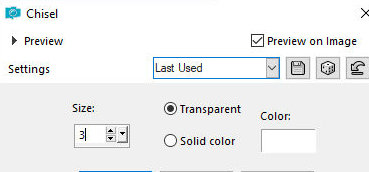
Effects - 3D Effects - Chisel
Select none
Effects - User Defined Filter - Emboss 3
Step 4
Copy the main tube [anna.br_joie.1079]
Paste as new layer
Image - Resize: 60% - all layers unchecked
Position to the left according to the model
Image - Mirror - Mirror Horizontal (if using the tube provided in
the material)
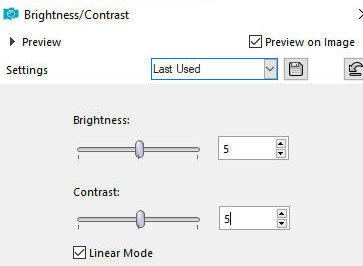
Adjust - Brightness and Contrast - Brightness/Contrast
Drop Shadow: -5 6 56 27 black
Step 5
Add new layer
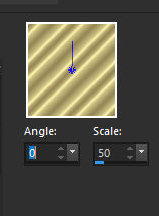
Paint the layer with a golden pattern with this setting:
Selections - Select all
Selections - Modify - contract:10
Press Delete on the keyboard
Selections - Invert
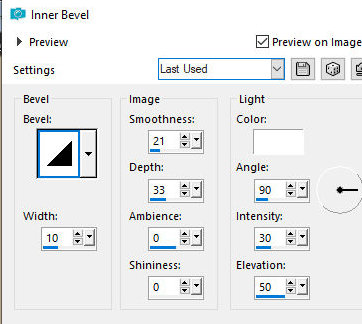
Effects 3D Effects - Inner Bevel
Select none
Activate the Group Raster 2 layer
Copy the tube [stelline]
Paste as new layer
Move a little up and to the right (observe the model)
Step 6
Close the tube and star layers by clicking on the eye
Activate any other layer
Merge visible
Stay on this layer
Place the signatures
Open the tubes and stars layers by clicking on the eye
The Merged layer should be below all the layers
Step 7 - Animation
Activate the stars layer
Selections All
Selections - Float
Selections - Defloat
Layers - Duplicate - 2 times (there will be 3 layers)
Name the layers as Stelle1, Stelle2 and Stelle3
Activate the Stelle1 layer and close the Stelle 2 and 3 layers
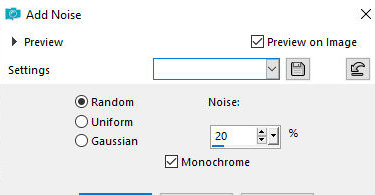
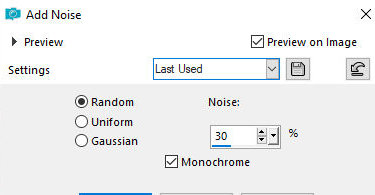
Adjust - Add/Remove Noise - Add Noise
Open and activate the Stelle2 layer
and close Stelle1
Adjust - Add/Remove Noise - Add Noise
Open and activate the Stelle3 layer
and close the Stelle2 layer
Adjust - Add/Remove Noise - Add Noise
Select none
Step 8
Activate the layer Merged
Activate the Selection Tool - Selection Type: Rectangle
Select the inside of the frame (image), drawing a rectangle, leaving
out the golden border
Layers - Duplicate - 2 times (there will be 3 layers)
Name the layers as Snow1, Snow2 and Snow3
Activate the Snow 1 layer and close the Snow2 and 3 layers
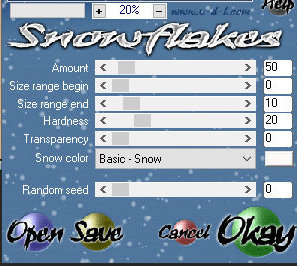
Effects - Plugins - VDL Adrenaline - Snowflakes
Activate the Snow2 layer and close
the Snow1 layer
Effects - Plugins - VDL Adrenaline - Snowflakes
Activate the Snow3 layer and close
the Snow2 layer
Effects - Plugins - VDL Adrenaline - Snowflakes
Select none
Step 9
Leave the tube layers, the Stelle1 layer and Snow 1 layer open
Close all the others
Edit - Copy Special - Copy Merged
Open Animation Shop
Edit - Paste - As new animation
Go back to PSP
Close the layers Stelle1 and Neve1
Open the layers Stelle2 and Neve2
Edit - Copy Special - Copy Merged
Go to Animation Shop
Edit - Paste - After Current Frame
Return to PSP
Close the layers Stelle2 and Neve2
Open the layers Stelle3 and Neve3
Edit - Copy Special - copy Merged
Go to Animation Shop
Edit - Paste - After Current Frame
Now, the next steps will be to paste the other animation (MIA)
In my version I chose not to put it, but you can see it in the
original animation
Open the animation [mia] in Animation Shop
You will have two animations: the work one and [Mia]
Activate the animation [work] - Edit - select all
Activate the animation [mia] - Edit - select all
Click on the first frame of the animation [mia] and without
releasing the mouse button, drag it to the first frame of the
animation [work]
Click where you want the image to be and release the mouse button
See the animation: View - Animation
If it is all right, save:
File - Save as - select the folder - name the work - save - click
Next 3 times - Finish
*

|