|
You will need:
1 tube character
1 floral or landscape JPEG image (make it misted using
the mask [20 20])
The link to the images I used is just above
*
Open a new transparent image measuring 900x600px
Selections / Select all
Copy the floral or landscape image
Paste into the selection
Select none
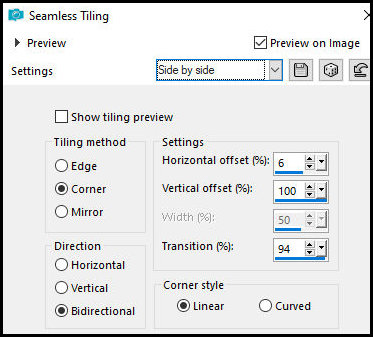
Effects / Image Effects / Seamless Tiling - Side by Side
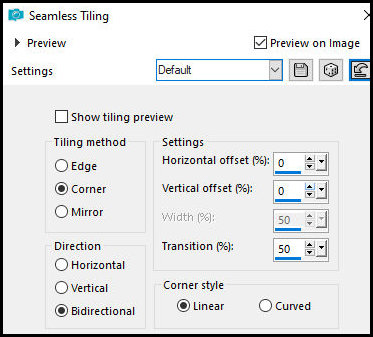
Effects / Image Effects / Seamless Tiling - default
Layers / Duplicate
Activate the original layer
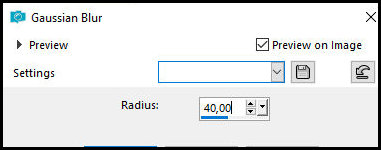
Adjust / Blur / Gaussian Blur: 40
Activate the copied layer
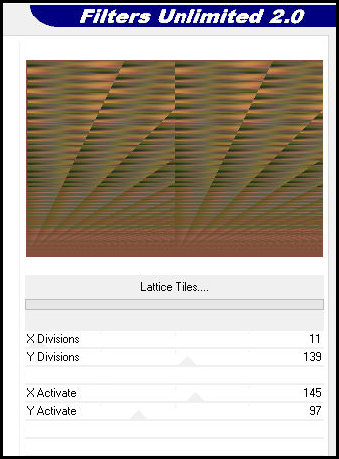
Effects / Plugins / Unlimited 2 / Alf's Power Toys /
Lattice Tiler
Layers / Duplicate
Image / Mirror / Mirror Vertical
Layers / Properties / Opacity: 50%
Merge Down
Layers / Properties / Blend Mode: choose a blend
according to your colors (in mine (I used Luminance (L))
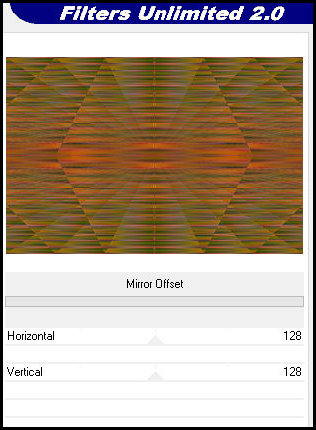
Effects / Edge Effects / Enhance More
Effects / Plugins / Unlimited 2 / Alf's Power Toys /
Mirror Offset - Apply twice
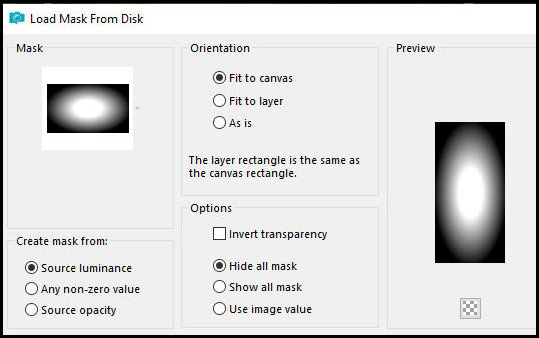
Open your landscape or floral JPG image
Layers / Load mask from disk / Mask [20 20]
Merge Group
Copy this image
Return to your original image
Paste as a new layer
Position on top
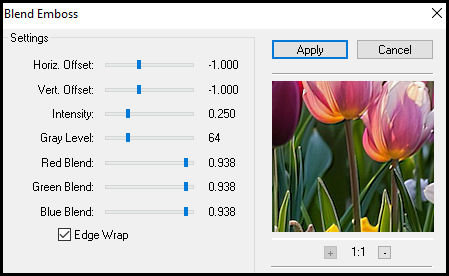
Objects / Align / Center in Canvas
Effects / Plugins / FM Tiles Tools / Blend Emboss -
default
Borders: 10px / color of your choice
30px / white
Select this 30px border with the Magic Wand (tolerance/feather=0)
Effects / Plugins / Unlimited 2 / Alf's Power Toys /
Mirror Offset - default

Select none
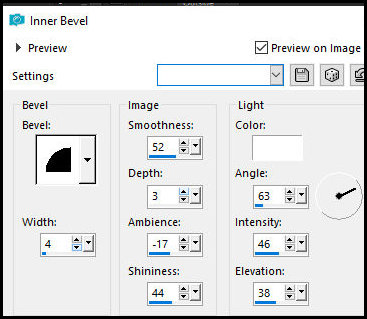
Border: 5px / color of your choice (same as above)
Select this border with the Magic Wand Wand
Effects / 3D Effects / Inner Bevel
Selections / Invert
Drop Shadow: -1 0 50 10
Select none
Select the rectangles with the Magic Wand
Effects / Reflection Effects / Pattern

Effects / Plugins / Eye Candy 5: Impact / Glass - Clear
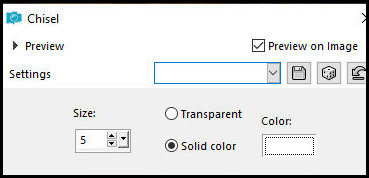
Effects / 3D Effects / Chisel
Keep the selection
Effects / 3D Effects / Inner Bevel - same as before

Select none
Select All
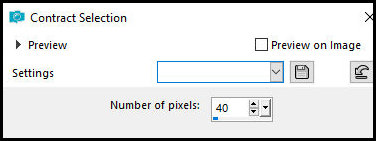
Selections / Modify / Contract: 40
Add a new layer
Paint with white
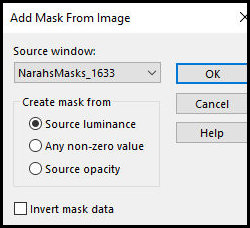
Layers / New Mask Layer / From Image / Mask
[Narah_Mask_1633]
Merge Group
Select none
Activate Freehand Selection (Selection Type:
point-to-point)
Select within the first frame on the left
Activate the background layer
Selections / Promote selection to Layer
Effects / plugins / Eye Candy 5: Impact / Glass - Clear
(same as above)
Drop shadow as above
Repeat these steps in the other two frames:
|
Activate Freehand
Selection (Selection Type: point-to-point)
Select within the first frame on the left
Activate the background layer
Selections / Promote selection to layer
Effects / plugins / Eye Candy 5: Impact /
Glass - Clear (same as above)
Drop shadow as above
|
Copy the tube character
Paste as a new layer
Adjust the size
Position as desired
Drop shadow of your choice
Choose a font and size and type the name "Glicini"
Right-click the text layer and select Convert to Raster
Layer
Drop shadow of your choice
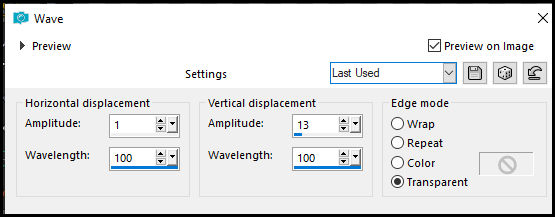
In my version, I applied Distortion Effects / Wave
Include the signatures
Merge all
Save as a jpeg |