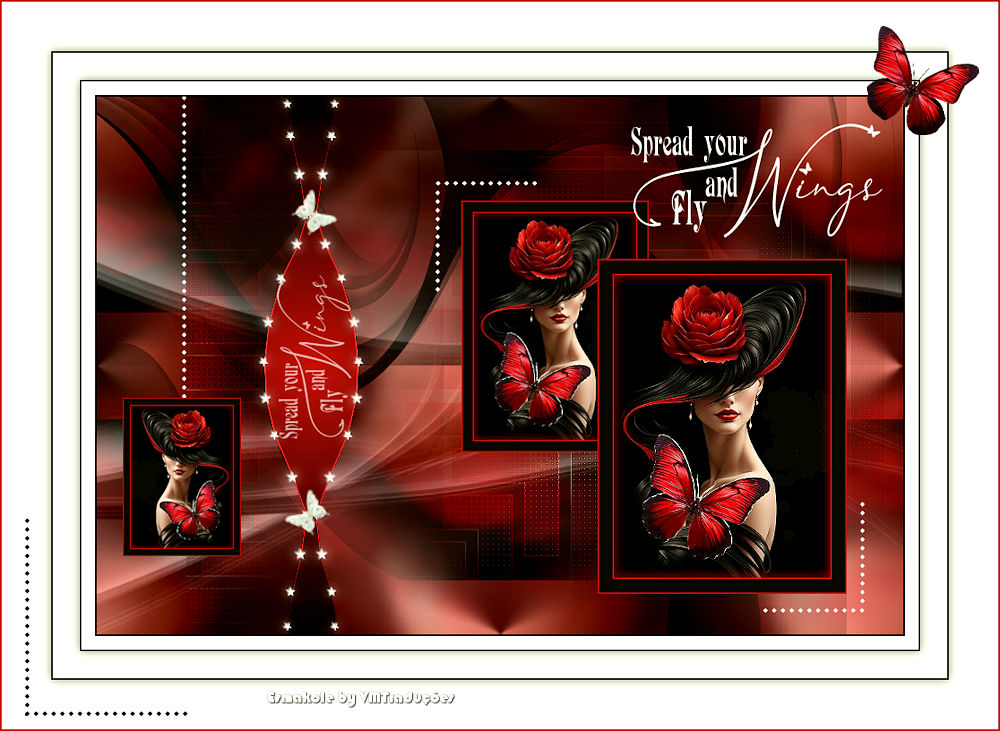
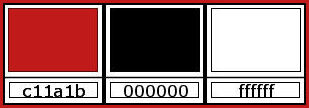
| 1. Set the color #c11a1b to
the foreground and the color #000000 to the background.
2. Open the alpha file [alfablad] /
Duplicate (Shift+D) / Close the original.
3. Paint with the foreground color.
4. Add a new layer.
5. Selections / Select All.
6. Copy the image [34].
7. Paste into the selection.
8. Select none.
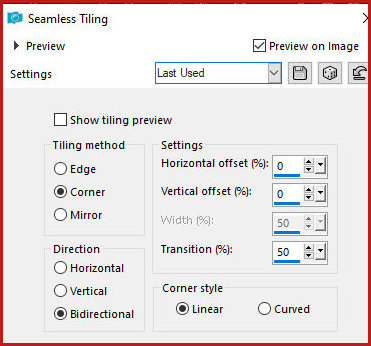
9. Effects / Image Effects / Seamless Tiling.
10. Layers / Properties / Opacity: 62.
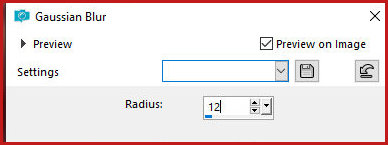
11. Adjust / Blur / Gaussian Blur: 12.
12. Merge visible.
13. Layers / Duplicate.
14. Effects / Plugins / Unlimited 2 / VM Extravaganza /
Shoutin! (this plugin, you don't see the effect when you
apply it, it's normal)

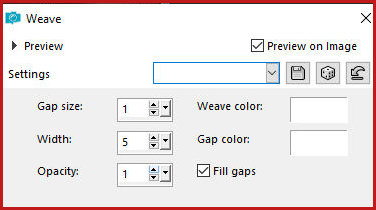
15. Effects / Texture Effects / Weave
16. Effects / Edge Effects / Enhance More
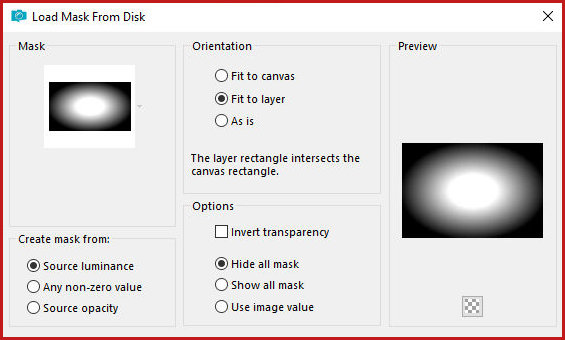
17. Layers / New Mask Layer / From Image / Mask [20-20]
18. Layers/Duplicate
19. Merge Group
20. Layers / Properties / Blend Mod: Hard Light
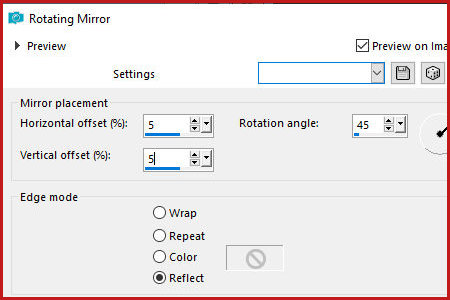
21. Effects / Reflection Effects / Rotating mirror
22. Layers / Properties / Opacity: 42
23. Effects / Image Effects / Offset 100/-20

24. Activate the Background Layer
25. Layers/Duplicate
26. Effects / Plugins / Unlimited 2 / VM Toolbox /
Crystal Ball
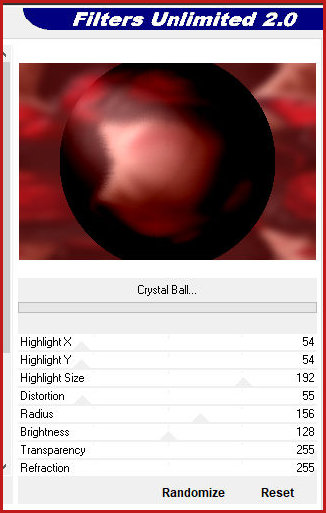
27. Image / Resize: 80% - all layers unchecked
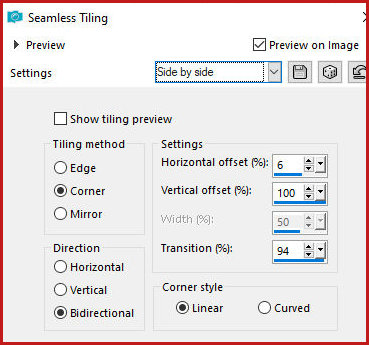
28. Effects / Image Effects / Seamless Tiling - Preset [side
by side]
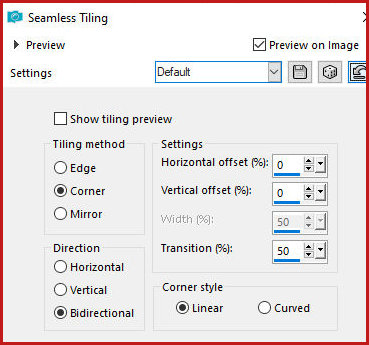
29. Effects / Image Effects / Seamless Tiling - default
30. Activate the middle layer - Copy of Merged
31. Add new layer
32. Paint with white color
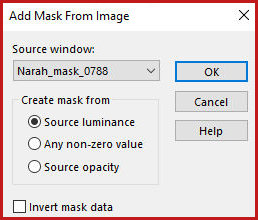
33. Layers / New Mask Layer / From Image / Mask
[Narah_Mask_0788]
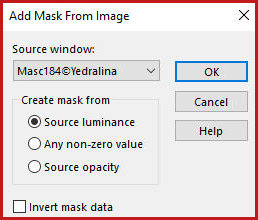
34. Merge Group
35. Layers / Properties / Blend Mode: Luminance (L)
36. Layers / Properties / Opacity=70%
37. Activate the Copy of Merged layer (second from the
bottom)
38. Add new layer
39. Paint it black
40. Layers / New Mask layer / From Image / Mask
[masc184Yedralina]
41. Layers/Duplicate
42. Merge Group
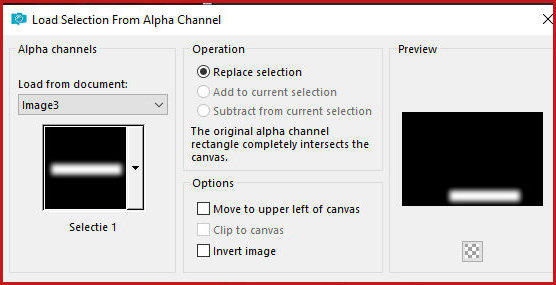
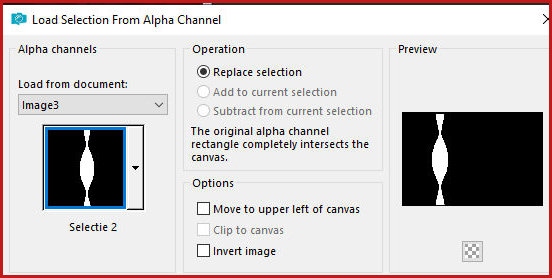
43. Selections / Load selection from alpha channel /
Selection #1
44. Press Delete
45. Select none
46. Activate the top layer
47. Copy the tube [leny-deco]
48. Paste like new Layer
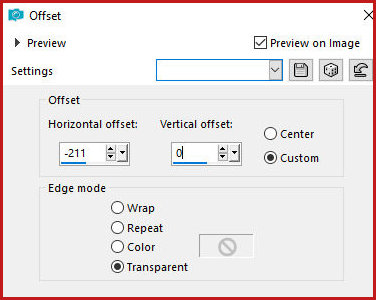
49. Effects / Image Effects / Offset -211/0
50. Add a new layer
51. Prepare this Sunburst gradient
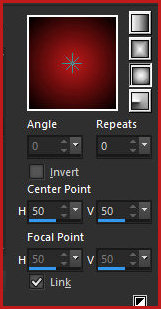
52. Selections / Load selection from alpha channel /
Selection #2
53. Paint the selection with the gradient
54. Select none
55. Layers / Arrange / Move down
56. Effects / Edge Effects / Enhance More
57. Copy the tube [leny-deco-a]
58. Paste as a new layer
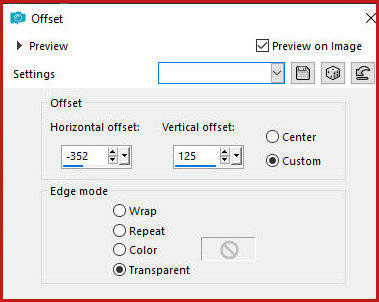
59. Effects / Image Effects / Offset -352/125
60. Copy the image [34a]
61. Paste as a new layer
62. Effects / Image Effects / Offset 248/-68

63. Layers / Duplicate
64. Image / Resize: 75% all layers unchecked
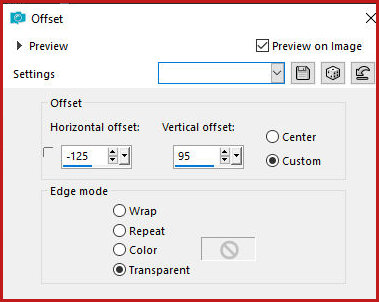
65. Effects / Image Effects / Offset -125/95
66. Layers / Arrange / Move down
67. Layers / Duplicate
68. Image / Resize: 63% - all layers unchecked
69. Image / Mirror / Mirror Horizontal
70. Effects / Image Effects / Offset -316/-152

71. Copy the word art [leny-woardart1123]
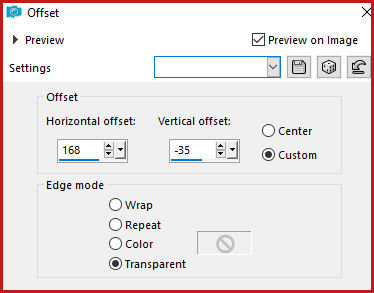
72. Paste as a new layer
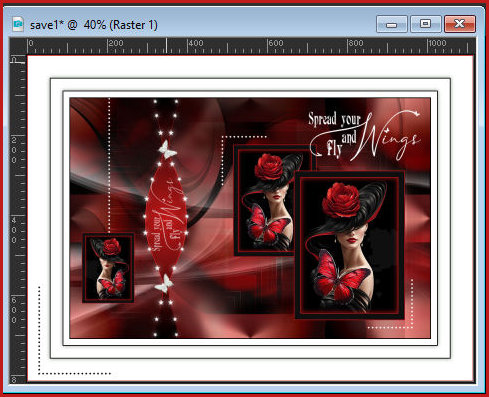
73. Image / Resize: 60% - all layers unchecked
74. Position the text according to the template
75. Layers / Duplicate
76. Image / Resize: 65% - all layers unchecked
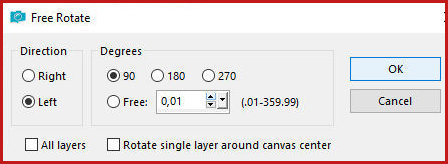
77. Image / Free Rotate - left/90
78. Position in the red oval circle according to the
template
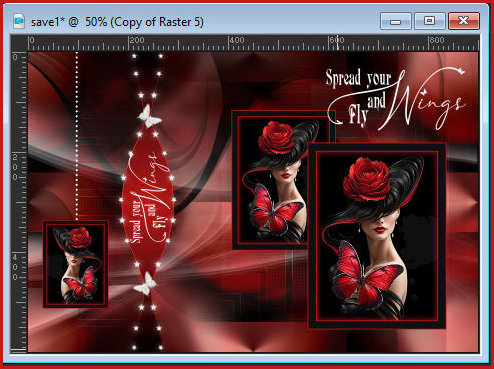
79. Layers / Properties / opacity: 66%
80. Copy the tube [leny-deco-b]
81. Paste as a new layer
82. Effects / Image Effects / Offset 168/-35
83. Merge all
84. Borders:
2px / black
15px / white
2px / black
85. Selections / Select all
86. Border
30px / white
87. Drop Shadow: 0 0 50 15 black
88. Select none
89. Border:
2px / black
90. Selections / Select all
91. Border:
55px / white
92. Repeat Drop Shadow
93. Border
2px / Foreground color
93b. Select none
94. Copy [leny-deco-c]
95. Paste as new layer
96. Position according to the model
97. Copy the tube [leny-deco-vlinder]
98. Paste as new layer
99. Position according to the model
100. Add signatures
101. Merge all
102. Save as jpeg
|