|
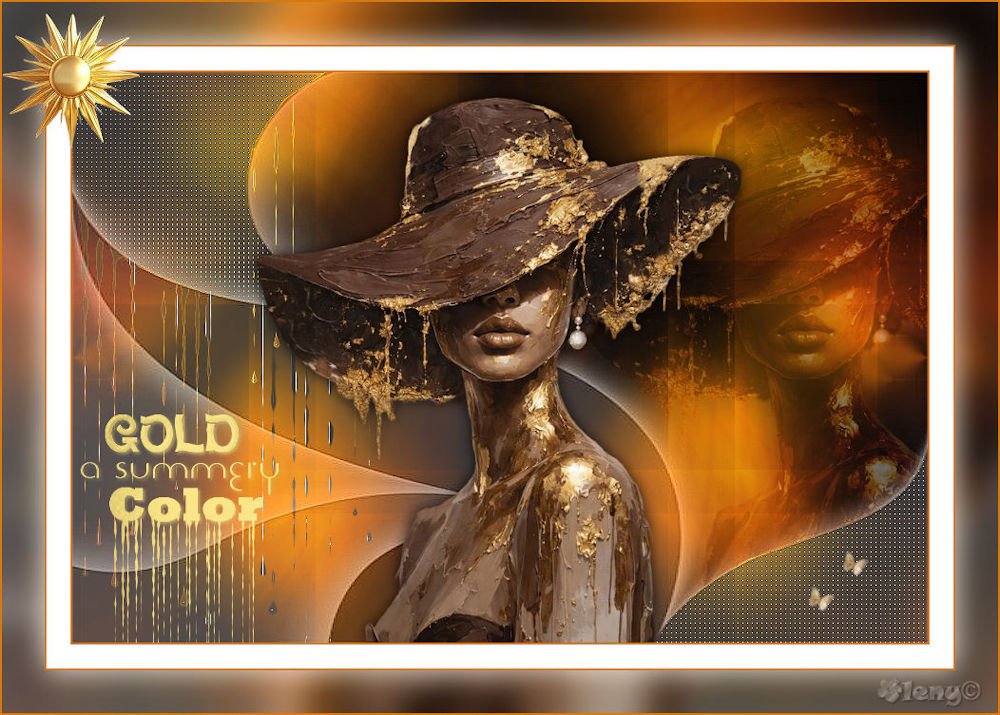
(imagem original de Esmakole)
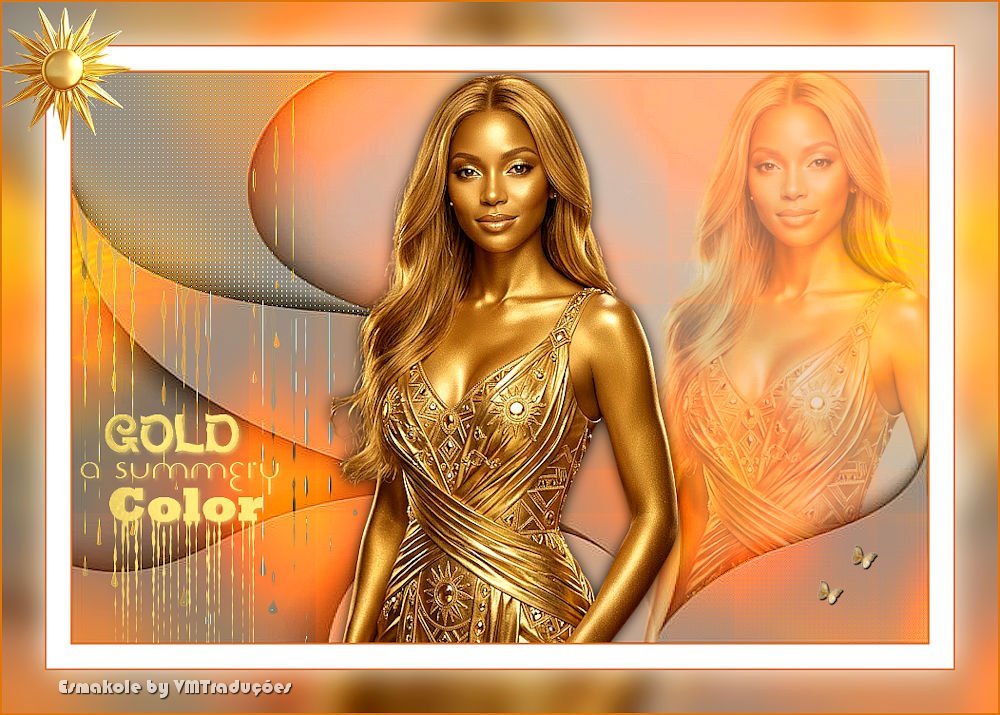
(Minha versão)

This tutorial is from Esmakole who I thank for
letting me translate their tutorials.
Original here
Tubes

Material

Plugins
Unlimited 2 - Tramages - <Bkg
Designer sf10 I> - Graphic Plus - Eye Candy 5: Nature
You can find these plugins on the websites of:
Renée
Cloclo
You can also find this tutorial translated into these languages:
(Click on the flag)


|
Notes:
> Open the material / Duplicate (shift+d) / Close the originals
> Change the blend mode of the layers to match their colors.
> In older versions of PSP, Mirror Horizontal=Mirror / Mirror Vertical=Flip /
Pick tool=deformation
> Open the masks in psp and
minimize
>Adjust the size of the tubes according to your images
|
SCRIPT
Images:
1 female tube
***
My images
***
Colors:
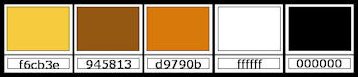
Put the color #f6cb3e in the foreground and the color #945813 in the
background
Open the alpha channel
Duplicate (shift+d) - Close the original
Color the image with the foreground color
Selections - Select all
Copy the tube [Riet 1265 190526]
Paste into selection
Select none
Effects - Image Effects - Seamless Tiling - default
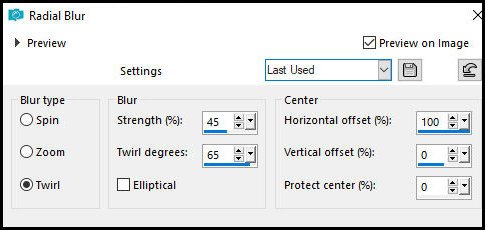
Adjust - Blur - Radial Blur
Layers - Duplicate
Image - Mirror - Mirror Horizontal
Blend mode: hard Light - Opacity: 75%
Merge visible
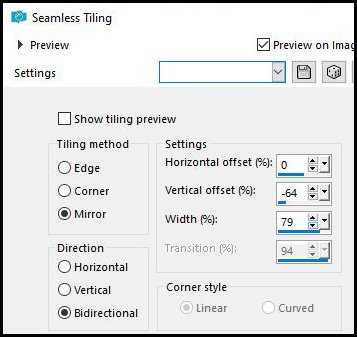
Effects - Image Effects - Seamless Tiling
Layers - Duplicate
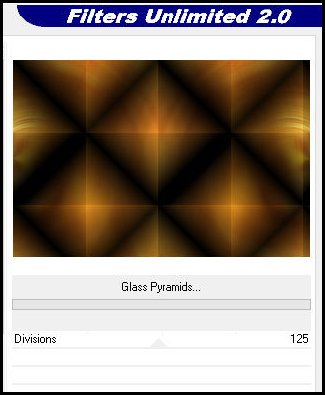
Effects - Plugins - Unlimited 2 - Tramages - Glass Pyramids
Blend mode: hard Light
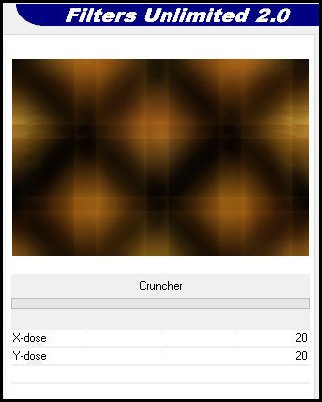
Effects - plugins - Unlimited 2 - <Bkg Designer sf10 I> - Cruncher
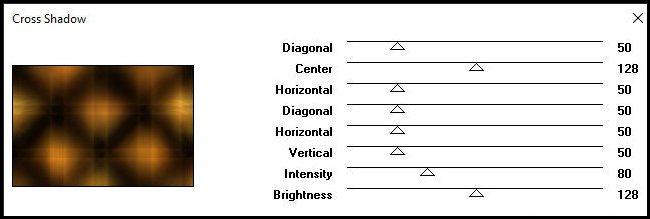
Effects - Plugins - Graphic Plus - Cross Shadow
Selections - load selection from alpha channel - Selection 1
Selections - promote selection to layer
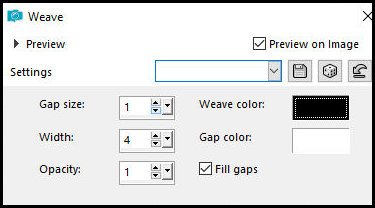
Effects - Texture Effects - Weave
Select none
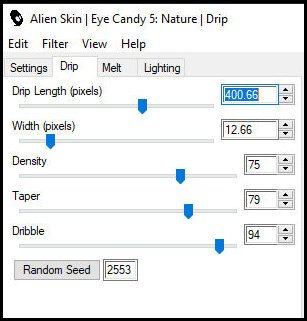
Effects - Plugins - Eye Candy 5: Nature - Drip - Preset [Small
Streaks]
Effects - Edge Effects - Enhance
Effects - Plugins - Graphic Plus - Cross Shadow - same as above
Activate the merged layer and copy (it will remain in memory)
Selections - Load selection from alpha channel - Selection 2
Selections - promote selection to layer
Effects - Texture Effects - Weave - same as above
Select none
Effects - Edge Effects - Enhance
Effects - Plugins - Graphic Plus - Cross Shadow - same as above
Activate the top layer
Copy [Riet 1265 190526]
Paste as new layer
Image - Resize: 85% - all layers unchecked
Effects - Image Effects - Offset
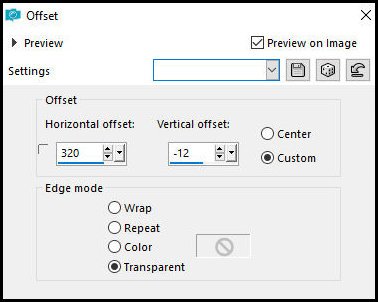
Selections - load selection from alpha channel - Selection 2
Press Delete
Select none
Blend mode: hard light - opacity: 38%
Activate the second layer from above
Add new layer
Paint the layer with the foreground color
Layers - New Mask Layer - From image - Mask [masque 431 faniemargot]
Merge group
Effects - Edge effects - Enhance
Blend mode: Luminance (L)
Activate the top layer
Copy [Riet 1265 190526]
Paste as new layer
Image - Resize: 85% - "all layers" unchecked
Position at the bottom as shown in the example
Drop Shadow: 0 0 80 20.00 black
Copy [Leny-tekst]
Paste as new layer
Effects - Image Effects - Offset
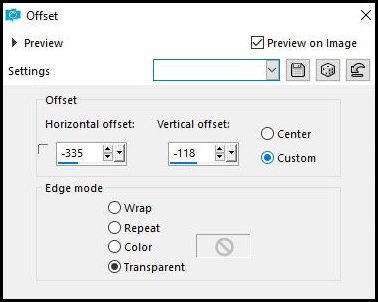
Selections - Load selection from alpha channel - Selection 3
Effects - Plugins - Eye Candy 5:Nature - Drip - preset [small
streaks] click on Drip at the top
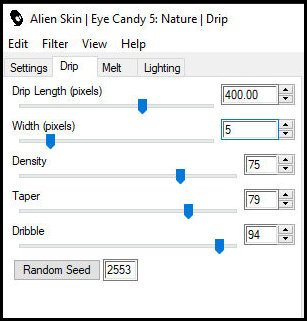
Select none
Copy [Deco]
Paste as new layer
Position at the bottom right as shown in the example
Merge all
Edit - Copy special - Copy merged (it will be stored in memory)
Image - Add borders - 2px - #d9790b
Image - Add borders - 25px - white
Image - Add borders - 2px - #d9790b
Selections - Select all
Image - Add borders - 45px - white
Selections - Invert
Paste the image from memory into the selection
Adjust - Blur - Gaussian Blur: 15
Select none
Image - Add borders - 2px - #d9790b
Copy [Leny-sun]
Paste as new layer
Position at the top left corner
Add credits
Merge all
Save as JPEG

|