|
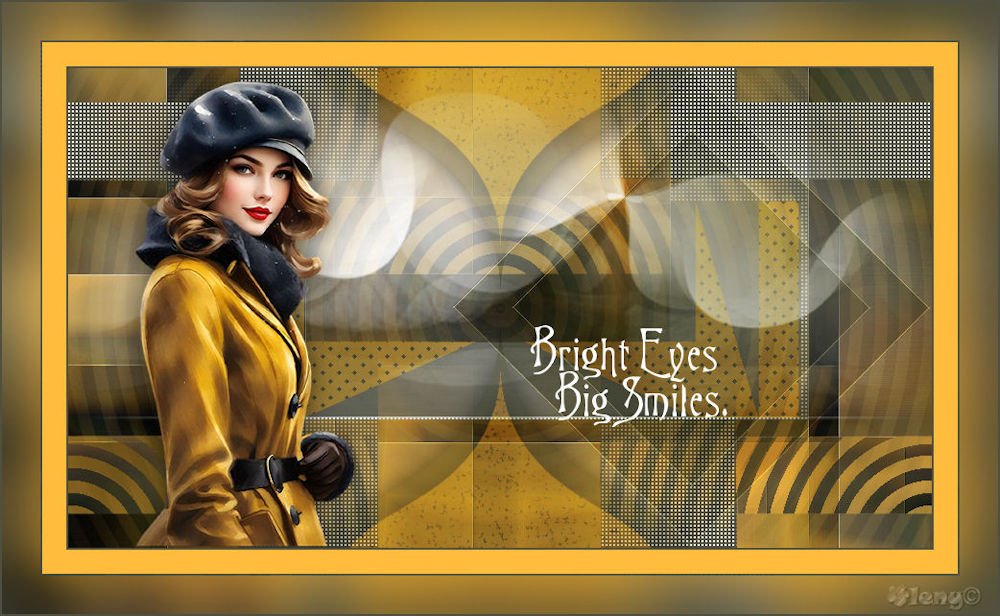
(versão original de Esmakole)
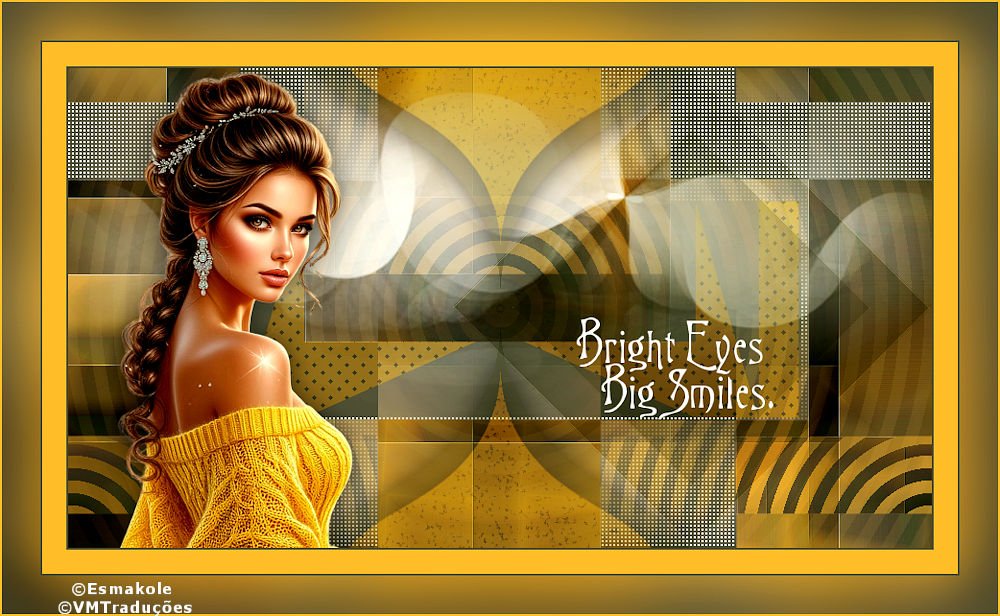

This tutorial is from Esmakole who I thank for
letting me translate their tutorials.

Original here
Tubes

Material

Plugins
AFS Import - Eye Candy 5: Impact -
Eye Candy 4000 - Italian Editors Effects - Mehdi - Mura's Meister -
Neology - Unlimited 2
You can find these plugins on the websites of:
Renée
Cloclo
You can also find this tutorial translated into these languages:
(Click on the flag)


|
Notes:
> Open the material / Duplicate (shift+d) / Close the originals
> Change the blend mode of the layers to match their colors.
> In older versions of PSP, Mirror Horizontal=Mirror / Mirror Vertical=Flip /
Pick tool=deformation
> Open the masks in psp and
minimize
>Adjust the size of the tubes according to your images
|
INSTRUCTIONS
Required:
1 female tube
***
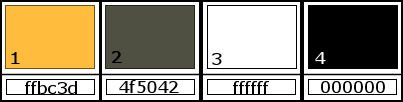
01. Colors: Foreground: #ffbc3d - Background: #4f5042
Open the alpha channel file [alfablad]
Duplicate (Shift+D) - Close the original
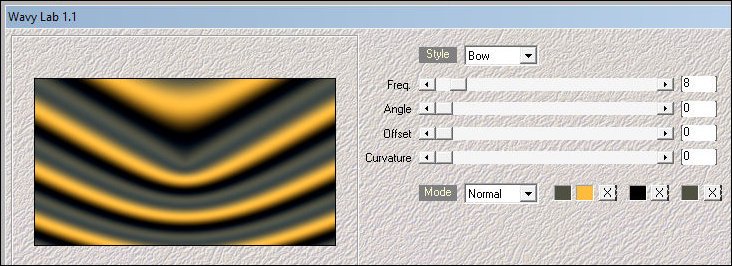
Effects - Plugins - Mehdi - Wavy Lab 1.1
Settings: 2-1-4-2
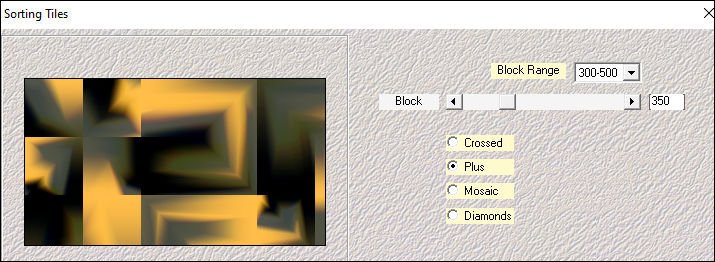
Effects - Plugins - Mehdi - Sorting Tiles
02. Effects - Edge Effects - Enhance More
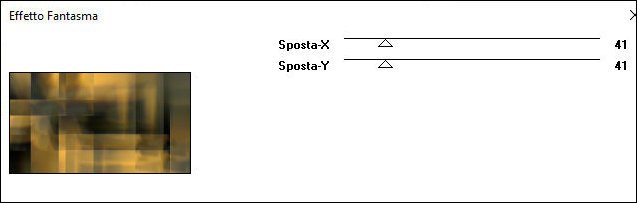
Effects - Plugins - Italian Editors Effects - Effetto Fantasma
Layers - Duplicate
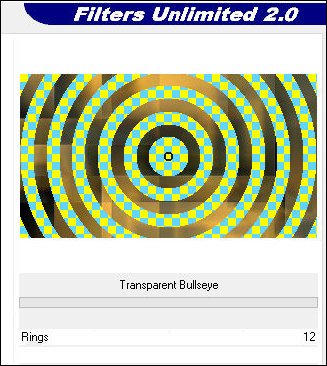
Effects - Plugins - Unlimited 2 - Neology - Transparent Bullseye - Rings at 12
(You won't see a difference; that is normal)
Drop Shadow: 0 0 100 50.00, Color 1
Blend Mode: Soft Light - Opacity: 36
03. Selections - Load Selection from Alpha Channel - Selection 1
Selections - Promote Selection to Layer
Select None
Effects - Image Effects - Seamless Tiling
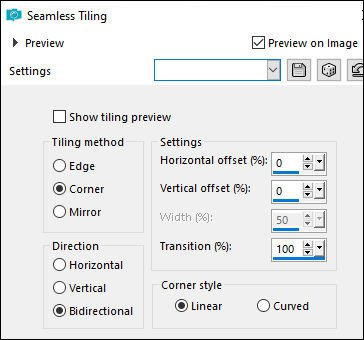
Add a new layer
Selections - Load Selection from Alpha Channel - Selection 1 again
Fill the selection with the background color
Select None
04. Effects - Image Effects - Seamless Tiling - Same as before
Image - Mirror Vertical
Effects - Plugins - AFS Import - sqborder 2
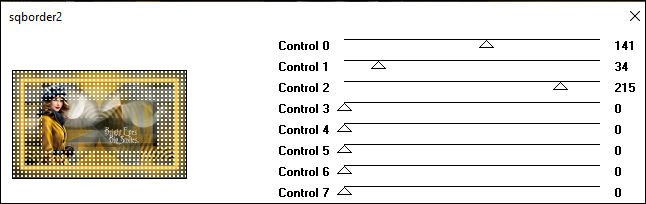
Set the background color to white
Add a new layer
Fill the layer with white
Layers - New Mask Layer - From Image - Mask [masker]
Merge Group
05. Effects - Image Effects - Offset [0/36]
Blend Mode: Screen - Opacity: 85%
Stay on this layer
Layers - New Mask Layer - From Image - Mask [20 20]
Merge Group
Layers - Duplicate
Blend Mode: Normal - Opacity: 85%
Add a new layer
Set the background color to Color 2
06. Selections - Load Selection from Alpha Channel - Selection 2
Fill ...the selection with the background color
Select none
Effects - Plugins - Mura's Meister - Pole Transform
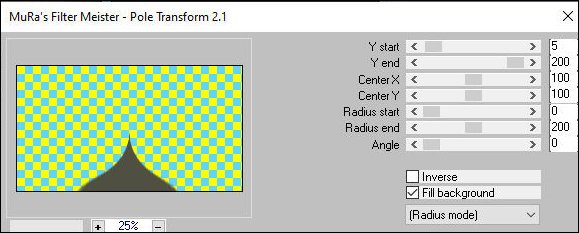
Looks good
Blend Mode: Hard Light - Opacity: 58%
Effects - Plugins - Eye Candy 5: Impact - Perspective Shadow
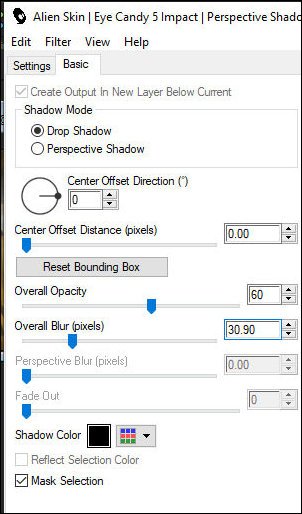
07. Layers - Duplicate
Image - Mirror Vertical
Blend Mode: Hard Light - Opacity: 58%
Add a new layer
Selections - Load selection from alpha channel - Selection 2 (again)
Fill the selection with the foreground color
Select none
08. Effects - Plugins - Mura's Meister - Pole Transform 2.1 - same as before
Image - Resize: 80% - "All layers" unchecked
Effects - Image Effects - Offset [0/(-50)]
Effects - Plugins - Eye Candy 4000 - Marble - colors 1/2
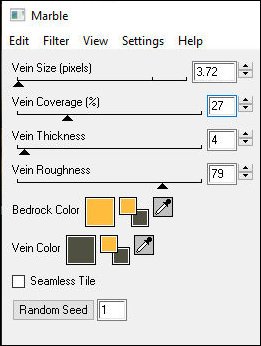
Blend Mode: Hard Light - Opacity: 36%
Effects - Plugins - Eye Candy 5: Impact - Perspective Shadow - same as before
09. Layers - Duplicate
Image - Mirror Vertical
Add a new layer
Selections - Load selection from alpha channel - Selection 3
Fill the selection with the foreground color
Keep the selection active
Effects - Plugins - Mura's Meister - Tone
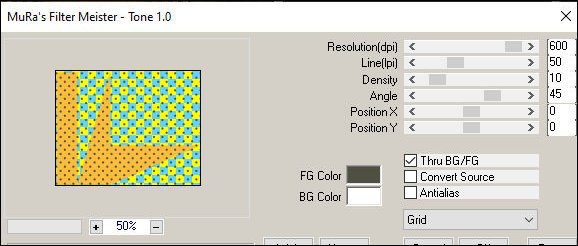
Select none
10. Layers - Duplicate
Image - Mirror Horizontal
Merge Down
Blend Mode: Soft Light
Add a new layer
Selections - Load selection from alpha channel - Selection 4
Fill the selection with the background color
Blend Mode: Overlay - Opacity: 60%
Select none
Effects - Edge Effects - Enhance
11. Layers - Duplicate
Image - Resize: 75% - "All layers" unchecked
Effects - Image Effects - Offset [50/0]
Blend Mode: Hard Light - Opacity: 40%
Copy the tube [Leny-vrouw1527]
Paste as a new layer
Adjust the size
Move to the left, as shown in the example
Effects - Plugins - Eye Candy 5: Impact - Perspective Shadow: same
as before
12. Copy [Leny text]
Paste as a new layer
Image - Resize: 80% - "all layers" unchecked
Position the text wherever you prefer
Merge all
Border - 2px - background color
Copy
Border - 25px - foreground color
Border - 2px - background color
Border - 40px - foreground color
Select this 40px border using the Magic Wand tool
Paste the image currently in your clipboard into the selection
13. Adjust - Blur - Gaussian Blur: 25
Select none
Border - 2px - foreground color
Add credits
Merge all
Save as a JPEG

|